[ad name=”AD_INBETWEEN_POST”] Welcome to the Part 2 of Spring 3.0 MVC Series. In previous article we went through the Introduction of Spring MVC 3.0 framework, its request processing lifecycle and architecture diagram. In this article, let us create a simple Hello World application in Spring MVC 3.0. For creating the hello world demo application, we will use Eclipse IDE. [sc:SpringMVC_Tutorials]


 Create a class called HelloWorldController in net.viralpatel.spring3.controller package and copy following content into it. File: net.viralpatel.spring3.controller.HelloWorldController
Things We Need
Before we starts with our first Hello World Spring MVC Example, we will need few tools.
- JDK 1.5 above (download)
- Tomcat 5.x above or any other container (Glassfish, JBoss, Websphere, Weblogic etc) (download)
- Eclipse 3.2.x above (download)
- Spring 3.0 MVC JAR files:(download). Following are the list of JAR files required for this application.
- commons-logging-1.0.4.jar
- jstl-1.2.jar
- org.springframework.asm-3.0.1.RELEASE-A.jar
- org.springframework.beans-3.0.1.RELEASE-A.jar
- org.springframework.context-3.0.1.RELEASE-A.jar
- org.springframework.core-3.0.1.RELEASE-A.jar
- org.springframework.expression-3.0.1.RELEASE-A.jar
- org.springframework.web.servlet-3.0.1.RELEASE-A.jar
- org.springframework.web-3.0.1.RELEASE-A.jar
Our Goal
Our goal is to create a basic Spring MVC application using latest 3.0 version. There will be an index page which will display a link “Say Hello” to user. On clicking this link, user will be redirected to another page hello which will display a message “Hello World, Spring 3.0!”.
Getting Started
Let us start with our first Spring 3.0 MVC based application. Open Eclipse and goto File -> New -> Project and select Dynamic Web Project in the New Project wizard screen.
After selecting Dynamic Web Project, press Next.  Write the name of the project. For example Spring3MVC. Once this is done, select the target runtime environment (e.g. Apache Tomcat v6.0). This is to run the project inside Eclipse environment. After this press Finish. Once the project is created, you can see its structure in Project Explorer.
  Now copy all the required JAR files in WebContent > WEB-INF > lib folder. Create this folder if it does not exists.
The Spring Controller Class
We will need a spring mvc controller class that will process the request and display a “Hello World” message. For this we will create a packagenet.viralpatel.spring3.controller in the source folder. This package will contain the Controller file.  Create a class called HelloWorldController in net.viralpatel.spring3.controller package and copy following content into it. File: net.viralpatel.spring3.controller.HelloWorldController
package net.viralpatel.spring3.controller;

import org.springframework.stereotype.Controller;
import org.springframework.web.bind.annotation.RequestMapping;
import org.springframework.web.servlet.ModelAndView;

@Controller
public class HelloWorldController {

	@RequestMapping("/hello")
	public ModelAndView helloWorld() {

		String message = "Hello World, Spring 3.0!";
		return new ModelAndView("hello", "message", message);
	}
}
Code language: Java (java)@Controller and @RequestMapping("/hello") on line 7 and 10. When Spring scans our package, it will recognize this bean as being a Controller bean for processing requests. The @RequestMapping annotation tells Spring that this Controller should process all requests beginning with /hello in the URL path. That includes /hello/* and /hello.html. The helloWorld() method returns ModelAndView object. The ModelAndView object tries to resolve to a view named “hello” and the data model is being passed back to the browser so we can access the data within the JSP. The logical view name will resolve to "/WEB-INF/jsp/hello.jsp". We will discuss this shortly how the logical name “hello” which is return in ModelAndView object is mapped to path /WEB-INF/jsp/hello.jsp. The ModelAndView object also contains a message with key “message” and value “Hello World, Spring 3.0!”. This is the data that we are passing to our view. Normally this will be a value object in form of java bean that will contain the data to be displayed on our view. Here we are simply passing a string.The View: Create JSP
To display the hello world message we will create a JSP. Note that this JSP is created in folder /WEB-INF/jsp. Createhello.jsp under WEB-INF/jsp directory and copy following content into it. File: WEB-INF/jsp/hello.jsp<html>
<head>
<title>Spring 3.0 MVC Series: Hello World - ViralPatel.net</title>
</head>
<body>
${message}
</body>
</html>
Code language: HTML, XML (xml)${message}. Note that the name “message” is the one which we have set in ModelAndView object with the message string. Also we will need an index.jsp file which will be the entry point of our application. Create a file index.jsp under WebContent folder in your project and copy following content into it. File: WebContent/index.jsp<html>
<head>
<title>Spring 3.0 MVC Series: Index - ViralPatel.net</title>
</head>
<body>
<a href="hello.html">Say Hello</a>
</body>
</html>
Code language: HTML, XML (xml)Mapping Spring MVC in WEB.xml
As discussed in the previous article (Introduction to Spring 3.0 MVC), the entry point of Spring MVC application will be the Servlet define in deployment descriptor (web.xml). Hence we will define an entry oforg.springframework.web.servlet.DispatcherServlet class in web.xml.
Open web.xml file which is under WEB-INF folder and copy paste following code. File: WEB-INF/web.xml<?xml version="1.0" encoding="UTF-8"?>
<web-app xmlns:xsi="http://www.w3.org/2001/XMLSchema-instance"
xmlns="http://java.sun.com/xml/ns/javaee"
xmlns:web="http://java.sun.com/xml/ns/javaee/web-app_2_5.xsd"
xsi:schemaLocation="http://java.sun.com/xml/ns/javaee http://java.sun.com/xml/ns/javaee/web-app_2_5.xsd"
id="WebApp_ID" version="2.5">
<display-name>Spring3MVC</display-name>
<welcome-file-list>
<welcome-file>index.jsp</welcome-file>
</welcome-file-list>
<servlet>
<servlet-name>spring</servlet-name>
<servlet-class>
org.springframework.web.servlet.DispatcherServlet
</servlet-class>
<load-on-startup>1</load-on-startup>
</servlet>
<servlet-mapping>
<servlet-name>spring</servlet-name>
<url-pattern>*.html</url-pattern>
</servlet-mapping>
</web-app>
Code language: HTML, XML (xml)[servlet-name]-servlet.xml in WEB-INF folder of web application. In this example, the framework will look for file called spring-servlet.xml.Spring configuration file
Create a file spring-servlet.xml in WEB-INF folder and copy following content into it. File: WEB-INF/spring-servlet.xml<?xml version="1.0" encoding="UTF-8"?>
<beans xmlns="http://www.springframework.org/schema/beans"
xmlns:xsi="http://www.w3.org/2001/XMLSchema-instance"
xmlns:p="http://www.springframework.org/schema/p"
xmlns:context="http://www.springframework.org/schema/context"
xsi:schemaLocation="http://www.springframework.org/schema/beans
http://www.springframework.org/schema/beans/spring-beans-3.0.xsd
http://www.springframework.org/schema/context
http://www.springframework.org/schema/context/spring-context-3.0.xsd">
<context:component-scan
		base-package="net.viralpatel.spring3.controller" />

<bean id="viewResolver"
		class="org.springframework.web.servlet.view.UrlBasedViewResolver">
		<property name="viewClass"
			value="org.springframework.web.servlet.view.JstlView" />
		<property name="prefix" value="/WEB-INF/jsp/" />
		<property name="suffix" value=".jsp" />
	</bean>
</beans>
Code language: HTML, XML (xml)net.viralpatel.spring3.controller and all its child packages. This will load our HelloWorldController class. Also we have defined a bean viewResolver. This bean will resolve the view and add prefix string /WEB-INF/jsp/ and suffix .jsp to the view in ModelAndView. Note that in our HelloWorldController class, we have return a ModelAndView object with view name “hello”. This will be resolved to path /WEB-INF/jsp/hello.jsp.That’s All Folks
You may want to run the application now and see the result. I assume you have already configured Tomcat in eclipse. All you need to do: Open Server view from Windows > Show View > Server. Right click in this view and select New > Server and add your server details. To run the project, right click on Project name from Project Explorer and select Run as > Run on Server (Shortcut: Alt+Shift+X, R)Download Source Code
Click here to download source code (9.05kb)Moving On
In this tutorial we created a small Hello World application using Spring 3.0 MVC framework. Also we learned about the spring configuration and different annotations like@Controller and @RequestMapping. In next article we will see how easy it is to handle form data using Spring 3.0 MVC.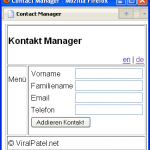


Hi Viral
thanks for the post. I am getting the output as it is in the jsp,
like ${message}
can you tell what mistake i have done.
Spring 3.0 MVC Series — good article to start learning Spring 3.0 MVC. Thanks.
HTTP Status 404 – /Spring3MVC/hello
——————————————————————————–
type Status report
message /Spring3MVC/hello
description The requested resource (/Spring3MVC/hello) is not available.
——————————————————————————–
Apache Tomcat/6.0.26
spring is good but shine is realy better and faster
i prefer to continue working with shine Enterprise Pattern
it contains reflection too
http://sourceforge.net/projects/shine-enterpris/files/
If output is ${message} You need to create a bean in hello.jsp
And access it using
There is probably a more elegant solution but I’m new to this too
Edit: That didn’t really work properly
If output is ${message} You need to create a bean in hello.jsp
jsp:useBean id=”message” type=”java.lang.String” scope=”request” (inside angled brackets)
And access it using
%= message % (inside angled brackets)
There is probably a more elegant solution but I’m new to this too
If you wish that ${message} output, configure the page hello.jsp with:
The JSP ignore Expression Language implicitly and you need configure in JSP or web.xml
Sorry, the correct comment is:
If you wish that ${message} output, configure the page hello.jsp with:
%@ page language=”java” contentType=”text/html; charset=ISO-8859-1″
pageEncoding=”ISO-8859-1″ isELIgnored=”false”%
The JSP ignore Expression Language implicitly and you need configure in JSP or web.xml
Correct comment:
If you wish that ${message} output, configure the page hello.jsp with:
% page language=”java” contentType=”text/html; charset=ISO-8859-1″
pageEncoding=”ISO-8859-1″ isELIgnored=”false” %
The JSP ignore Expression Language implicitly and you need configure in JSP or web.xml
Through tutorial but I have a problem with the result – the link in the index.jsp page is hello.html instead of hello.jsp. I think that’s because it specifies a href=”hello.html” but when I try to change it nothing changes. Cleaned the project, cleaned Tomcat, restarted, etc.
Good article though. So much chatter about Spring on teh internets and so few getting-started guides like this one. Thanks.
Hi,
I have coded the example application exactly how is told above, but when clicking the say hello -link, I receive an error message no mapping for http request URI /projectname/hello.html in dispatcher-servlet with name spring. I have googled and googled, tried changing the url-pattern to /* and almost everything, but nothing seems to help. Can you please assist me with this?
when i click “say hello” ,i get an error
HTTP Status 404 – /SpringExample2/hello.htm
——————————————————————————–
type Status report
message /Spring3MVC/hello.htm
description The requested resource (/Spring3MVC/hello.htm) is not available.
i did everything as instructed here but when i click the “say hello” link i get
HTTP status 404
description The requested resource (/Payroll101/hello.jsp) is not available.
i changed a few things though like the name of the spring configuration file from “sping” to “dispatcher”
and the source package name, but i don’t think it affects the way the program runs.. so.. i need some help I’m getting a little confused on why this happens…
Guys,
Check in your WEB-INF/spring-servlet.xml
See that bean:
Make sure your base package matches the package your controller is in.
HTTP status 500 :|
I have resolved the output from ${message} to “Hello World, Spring 3.0!” by doing the following change in my HelloWorldController.java and hello.jsp.
1-
package net.viralpatel.spring3.controller;
import org.springframework.stereotype.Controller;
import org.springframework.web.bind.annotation.RequestMapping;
import org.springframework.web.servlet.ModelAndView;
@Controller
public class HelloWorldController {
public String message = “Hello World, Spring 3.0!”;
@RequestMapping(“/hello”)
public ModelAndView helloWorld() {
System.out.println(message);
return new ModelAndView(“hello”, “message”, message);
}
}
2-
hello.jsp
its working fine ………
I have resolved the output from ${message} to “Hello World, Spring 3.0!” by doing the following change in my HelloWorldController.java and hello.jsp.
1-
package net.viralpatel.spring3.controller;
import org.springframework.stereotype.Controller;
import org.springframework.web.bind.annotation.RequestMapping;
import org.springframework.web.servlet.ModelAndView;
@Controller
public class HelloWorldController {
public String message = “Hello World, Spring 3.0!”;
@RequestMapping(“/hello”)
public ModelAndView helloWorld() {
return new ModelAndView(“hello”, “message”, message);
}}
2-
hello.jsp
its working fine…
Hi Viral,
Nice Article.But when I am using your existing code of Hello world , it will display index.jsp as expected.But I click on the sayHello link,it will display some error message like page not found.Can you explain why does this happen ?
Thanks
Sandy
HTTP Status 404 – /Spring3MVC/hello
——————————————————————————–
type Status report
message /Spring3MVC/hello
description The requested resource (/Spring3MVC/hello) is not available.
thanks
sandy
nice article, run smoothly..^^
hi virat,
thanks for ur post.
i tired for that couple days,after seeing ur post , i excecuted it correctiy
The error was caused by the link in index.jsp. It should be like this:
<a href=”hello.html”>Say Hello
I mean the link should be like “hello.html” instead of “hello”.
such good article
well done
You get the 404 error because “index.jsp” is in the wrong folder. Instead of being under WebContent, it’s under WebContent/WEB-INF/jsp/. Leave the hello.jsp under WebContent/WEB-INF/jsp/ folder.
I love these tutorials but there is always one or two problems in almost every one of them that I am spending way too much time trying to fix the errors. I wish the author updated these tutorials.
Thanks, Vinnie! This tutorial really ought to be updated with this tidbit. I see a lot developers complaining about the 404, including myself! :)
Not sure about the update. The tutorial already says index.jsp should be under WebContent. Are you getting error due to this?
Oh man, that’s my fault. I misread that step. Once I put the JSP in the WebContent directory, it works. Please excuse my idiocy! :)
Mark, that’s ok :) I am glad your code is working now.
Hats off to you Viral and Team,
You guys are maintaining the content and the Website very good..
one or 2 issues with the instructions/tutorials are ok and this will help the learner to understand and dig through the files.
well i guess basically people are getting problem because in very first step of requirements at point 4, the download is missing 2 jars :
commons-logging-1.0.4.jar
jstl-1.2.jar
so my program worked after downloading these 2 jars.
here are download links i found for these jars :
http://grepcode.com/snapshot/repo1.maven.org/maven2/commons-logging/commons-logging/1.0.4
http://jakarta.apache.org/site/downloads/downloads_taglibs-standard.cgi
in both links download binaries. for second, file name is just jstl.jar not jstl -1.2.jar
All 404 errors
You need to add the project to the server and then run it. Right click on server. choose option add projects. then add your project
Sam
Thanks alot for your time and sharing knowledge. It works awesome.
@MKP – U r a life saver…
Nice article 4 starters.. Thanx..
I rarely if ever say this but this is a very good tutorial on how to setup a basic spring project.
Kudos to the original author for the clarity of this guide.
Thanks for the great tutorial.
hi guys… that tutorial ‘s great but i can’t run it. my error :
HTTP Status 404 – /Spring3MVC/hello1
——————————————————————————–
type Status report
message /Spring3MVC/hello1
description The requested resource (/Spring3MVC/hello1) is not available.
i’m using Tomcat v7.0 and STS 3.0.5 release….
please help me…?
Http status 500
descrioption: Server encountered internal error()
root cause
Provider org.apache.xalan.processor.TransformerFactoryImpl not found
Hi Viral,
Thanks for the wonderful Spring series tutorial. Can you please add the hibernate and Spring Integration tutorial.
Thanks.
Sikinder
I would realy appreciate your help
I resolved my issuei was using Tomcat 5.0.28 and it doen’t support annotations.
Thanks Viral for this greate tutorial.
Did u write any tutorial that focus the Spring 3.0 MVC Security with Hibernate DAO authentication Manage
Please send me the link if you have.
@404 problems
I got the same 404 problems.
At first I got a 404er when I requested http://localhost:8080/Spring3MVC/. That was because I created the index.jsp in WebContent/WEB-INF/jsp but according to this tutorial’s web.xml it was expected in WebContent/. So I changed “index.jsp” in web.xml to “/WEB-INF/jsp/index.jsp”.
Than I got the next 404er when I clicked the “Say Hello” link because for any reason there was no HelloWorldController.class in the deploy directory (workspace/.metadata/.plugins/org.eclipse.wst.server.core/tmp0/wtpwebapps/… in my environment). So I stopped the server, used every clean option I could find, and started the server again and it worked.
So check whether web.xml’s “welcome-file” path and the actual path of index.jsp are consistent and check also that your controller class was deployed and the url handlers where properly registered (check whether lines like “INFO: Mapped URL path [/hello] onto handler ‘helloWorldController’” etc. are present in the servlet container output).
@Falkste, Thanks for your advice.
I solved my 404 problem with the fist step. Now i could able to see the Say Hello Link.
The second problem is still coming for me. on click of the link i am getting the error “404:Servlet spring is not available”. Can you please explain the step 2.
Thanks.
Khadar.
Hi All,
I fixed this issues. The main cause was problem with project setup. The following fixes can help others
1. When Dynamic project was created from Eclipse, The external Jar files are not identified. I manually copied all these files to /WEB-INF/lib directory.
2. Then i got JSTL error, as tomcat 6 wont ships with jstl 1.2 library, I downloaded it and added it to /WEB-INF/lib directory
3. clean up the application and started the server.
The appliation came up well.
thanks @Falkste and other members in understanding the problems and sharing them the solutions as well.
–khadar
Simple, easy, substantive. Thank you!
Nice tutorial, very helpful!
Hi Viral,
This articles are the best document to get start Spring 3.0 MVC, I think.
(In Japan, we can hardly get information about Spring 3.0..)
Thanks a lot.
Hello,
that is a great tutorial. That was the first tutorial after a long search which shows easily how to use spring 3 mvc. But I had the error 500 issue with the missing jstl.jar.
So my question is for what do you need the jstl.jar. It isn’t in the spring package so is it really required for Spring MVC? Because I would understand why you need this file.
Regards
Tobias
@Tobias – Thanks :)
jstl.jar is used as the tag library in JSP to render form/tabular data. The
${}is used to access variables using JSTL. You may want to directly render request attributes using JSP taginstead of using JSTL.Thanks Viral, Very nice tutorial to start with.
If download the source code from this site , change “hello.html” in the index.jsp. every other files are ok.
MKP, thanks! You resolved my problem!
@Eugene – You welcome :)
404 errors. Make sure index.jsp is under /WebContent folder. Make sure hello.jsp is in /WebContent/WEB-INF/jsp folder.
If jstl is causing problems with the ${message} line in hello.jsp then use a jsp bean:
correct ans.
good article.
Nice tutorial.. Anyone who has little bit knowledge of Spring framework can get understand this tutorial and able to run it.. Nice explanation with all necessary details…
@all those facing 404 problem after clicking on say hello link
There is some mistake in web.xml the redirect is written only for *.html while the request is going for a jsp page.
So use this configuration:
Spring3MVC
index.jsp
spring
org.springframework.web.servlet.DispatcherServlet
1
spring
/
the format is not retained after posting the comment.. So plz replace *.html to / in web.xml.
why i still figure out 404 problem :(( it cause by servlet spring is not available :(( anyone help me please…
You Miss Some lib or check the deploye
hi you are using source in lib files. select the other lib files it will work fine
404 Problem :
Check in your WEB-INF/spring-servlet.xml
Make sure your base package matches the package your controller is in.
The “hello()” in line with the content, ” The hello() method returns ModelAndView object ……” should be replaced with “helloWorld()” , shouldn’t that ?
@Nest Chen – well catch :) I have update the typo and changed it to
helloWorld().I got the same problem with 404 error.
I am sure that base-package in spring-servlet.xml is corresponding to my package name where my controller is in …
What URL are you trying to access in Browser? Also are there any errors in the server logs?
I am getting the same problem. I am running the code in Jetty rather than tomcat, but that should’nt make a difference should it?
Here is the error i get when I try to go to the hello.html
WARNING: No mapping found for HTTP request with URI [/webfrontend/hello.html] in
DispatcherServlet with name ‘spring’
I get a normal 404 if i just try going to hello.html, so i dont think having “webfrontend” is the problem
@Chris – The server shouldn’t be a problem. Can you check if your server log shows some exception on starting or loading the app? There must be something wrong the way it loaded the application. It seems that the classes are not getting loaded and thus giving 404 error.
I had the same problem with you, and I fixed it by rebuilding the project. Hope it helps.
In the example you providded , it shows 404 error after clicking “Say hello” superlink…
Another strange thing is that my web.xml and spring-servlet.xml in my project have the same contents as yours…but it shows 404 error when running on Tomcat 7, in the other word, it should show index.jsp but it didn’t … but it did when running with the project you providded…
Certainly , had been set in web.xml…
<welcome-file-list> loses in the last line …..
404 error (Servlet spring is not available)? I have fixed it by adding commons-logging-1.0.4 in the classpath.
Cause: Failing to load org.springframework.web.servlet.DispatcherServlet with classnotfound exception and can’t scan/load the spring servlet at runtime.
Estou comecando agora, mas pela lógica que peguei, falta um bean no spring-servlet
tambem estava tendo o 404
Viral – Works great in Tomcat. Thanks
I am using tomcat 6. I had to copy the JSTL 1.2 jar files to the tomcat lib directory. Please see the following link.
http://www.mularien.com/blog/2008/02/19/tutorial-how-to-set-up-tomcat-6-to-work-with-jstl-12/comment-page-1/#comment-46628
Tip: be careful to use jstl-1.2.jar instead of the JSTL library that comes with the Spring framework distribution. The one that comes with Spring is version 1.1.2 and will lead to errors in your JSPs. Learned that the hard way…
Simple replace *.html with / in web.xml
That is what worked for me with Tomcat 7..thx
(till them got a 404 on clicking the “say hello” link)
Hi
I am deploying the application on Spring Source Tool Suite.
Its showing that the following error
SEVERE: Error loading WebappClassLoader
context: /SpringInAction
delegate: false
repositories:
/WEB-INF/classes/
———-> Parent Classloader:
org.apache.catalina.loader.StandardClassLoader@6e70c7
org.springframework.web.servlet.DispatcherServlet
java.lang.ClassNotFoundException: org.springframework.web.servlet.DispatcherServlet
at org.apache.catalina.loader.WebappClassLoader.loadClass(WebappClassLoader.java:1647)
at org.apache.catalina.loader.WebappClassLoader.loadClass(WebappClassLoader.java:1493)
at org.apache.catalina.core.StandardWrapper.loadServlet(StandardWrapper.java:1095)
at org.apache.catalina.core.StandardWrapper.load(StandardWrapper.java:993)
at org.apache.catalina.core.StandardContext.loadOnStartup(StandardContext.java:4387)
at org.apache.catalina.core.StandardContext.start(StandardContext.java:4700)
at org.apache.catalina.core.ContainerBase.start(ContainerBase.java:1053)
at org.apache.catalina.core.StandardHost.start(StandardHost.java:785)
at org.apache.catalina.core.ContainerBase.start(ContainerBase.java:1053)
at org.apache.catalina.core.StandardEngine.start(StandardEngine.java:463)
at org.apache.catalina.core.StandardService.start(StandardService.java:525)
at org.apache.catalina.core.StandardServer.start(StandardServer.java:701)
at org.apache.catalina.startup.Catalina.start(Catalina.java:585)
at sun.reflect.NativeMethodAccessorImpl.invoke0(Native Method)
at sun.reflect.NativeMethodAccessorImpl.invoke(Unknown Source)
at sun.reflect.DelegatingMethodAccessorImpl.invoke(Unknown Source)
at java.lang.reflect.Method.invoke(Unknown Source)
at org.apache.catalina.startup.Bootstrap.start(Bootstrap.java:289)
at org.apache.catalina.startup.Bootstrap.main(Bootstrap.java:414)
May 4, 2011 4:58:43 PM org.apache.catalina.core.StandardContext loadOnStartup
SEVERE: Servlet /SpringInAction threw load() exception
java.lang.ClassNotFoundException: org.springframework.web.servlet.DispatcherServlet
at org.apache.catalina.loader.WebappClassLoader.loadClass(WebappClassLoader.java:1647)
at org.apache.catalina.loader.WebappClassLoader.loadClass(WebappClassLoader.java:1493)
at org.apache.catalina.core.StandardWrapper.loadServlet(StandardWrapper.java:1095)
at org.apache.catalina.core.StandardWrapper.load(StandardWrapper.java:993)
at org.apache.catalina.core.StandardContext.loadOnStartup(StandardContext.java:4387)
at org.apache.catalina.core.StandardContext.start(StandardContext.java:4700)
at org.apache.catalina.core.ContainerBase.start(ContainerBase.java:1053)
at org.apache.catalina.core.StandardHost.start(StandardHost.java:785)
at org.apache.catalina.core.ContainerBase.start(ContainerBase.java:1053)
at org.apache.catalina.core.StandardEngine.start(StandardEngine.java:463)
at org.apache.catalina.core.StandardService.start(StandardService.java:525)
at org.apache.catalina.core.StandardServer.start(StandardServer.java:701)
at org.apache.catalina.startup.Catalina.start(Catalina.java:585)
at sun.reflect.NativeMethodAccessorImpl.invoke0(Native Method)
at sun.reflect.NativeMethodAccessorImpl.invoke(Unknown Source)
at sun.reflect.DelegatingMethodAccessorImpl.invoke(Unknown Source)
at java.lang.reflect.Method.invoke(Unknown Source)
at org.apache.catalina.startup.Bootstrap.start(Bootstrap.java:289)
at org.apache.catalina.startup.Bootstrap.main(Bootstrap.java:414)
May 4, 2011 4:58:43 PM org.apache.coyote.http11.Http11Protocol start
INFO: Starting Coyote HTTP/1.1 on http-8080
May 4, 2011 4:58:44 PM org.apache.jk.common.ChannelSocket init
INFO: JK: ajp13 listening on /0.0.0.0:8009
May 4, 2011 4:58:44 PM org.apache.jk.server.JkMain start
INFO: Jk running ID=0 time=0/63 config=null
May 4, 2011 4:58:44 PM org.apache.catalina.startup.Catalina start
INFO: Server startup in 804 ms
Please help me in solving this…
I am following this example and using the listed jars, but Eclipse is telling me that all three classes in HelloWorldController.java cannot be resolved. Any idea why?
All is correctly compiled, server starts but got a 404, any hint? I’m running Tomcat 6.
Ok, solved the first 404. Still got a 404 when clicking on the link, maybe is a problem with the servlet-mapping?thanks.
22.05.2011 0:37:06 org.apache.jk.server.JkMain start
INFO: Jk running ID=0 time=0/45 config=null
22.05.2011 0:37:06 org.apache.catalina.startup.Catalina start
INFO: Server startup in 1123 ms
22.05.2011 0:37:13 org.apache.catalina.core.StandardWrapperValve invoke
INFO: Servlet spring is currently unavailable
Have a problem too.
My link wasn’t working. Looks like it was because I was using the jstl.jar from Tomcat 7. I grabbed a copy of jstl-1.2.jar I found from googling to replace tomcat’s jstl.jar, and it works now.
I found the jstl-1.2.jar and attaching into the lib folder… it’s ok now… =D
JSTL-1.2: http://www.java2s.com/Code/Jar/STUVWXYZ/Downloadjstl12jar.htm
have to add antlr-runtime.jar file to make this work.
Thanks for this. its really helpful.
in web.xml servlet-mapping will be defined like this
spring
/
i changed web.xml, .html with /. but now i am geing below error
SEVERE: Servlet.service() for servlet spring threw exception
java.lang.NoSuchMethodError: org.springframework.web.bind.annotation.support.HandlerMethodResolver.(Ljava/lang/Class;)V
at org.springframework.web.servlet.mvc.annotation.AnnotationMethodHandlerAdapter$ServletHandlerMethodResolver.(AnnotationMethodHandlerAdapter.java:399)
at org.springframework.web.servlet.mvc.annotation.AnnotationMethodHandlerAdapter.getMethodResolver(AnnotationMethodHandlerAdapter.java:389)
at org.springframework.web.servlet.mvc.annotation.AnnotationMethodHandlerAdapter.supports(AnnotationMethodHandlerAdapter.java:286)
at org.springframework.web.servlet.DispatcherServlet.getHandlerAdapter(DispatcherServlet.java:1096)
at org.springframework.web.servlet.DispatcherServlet.getLastModified(DispatcherServlet.java:966)
have a 404 problem. What is exactly the url for access ?
OK work fine… Had to reboot my jboss server…
Thx for ur share.
Hello,
I am looking forward to starting this series of tutorials. After following this one, I am reluctant to say that I have also received a 404-Page Not Found error.
I have installed JSTL 1.2 to Tomcat. I have changed the servlet mapping from *.html to ‘/’ and vice versa. I have followed all of the directions in your post explicitly, and have copied/pasted everything directly.
Why isn’t this working? I am *not* getting an error message saying that my spring-servlet cannot be accessed, and I’ve read everyone else’s comments which haven’t helped. I really want to start developing with spring mvc and the learning curve is great – I just can’t get past this hangup. I will literally check this every day until you can reply, Viral.
Thanks for the good work and please let me know asap.
-Sam
@Syevin, can you please see if there are any other exceptions in the error log. Also check if all the required JAR file dependencies are present.
No additional errors in the error log, not that I could see anyways. And they are all present – I am managing dependencies with maven. I have spring3 (all), commons logging, etc. I installed jstl1.2 to tomcat, not to my project. When I tried adding jstl1.2.jar to my application, I kept getting nullpointerexceptions when I clicked the “say hello” link. I don’t get those errors when I have jstl in the tomcat lib folder – but I still get the 404 error when I click “Say Hello” (and everything is configured exactly as you have).
What is your e-mail address? Can I send you my maven project so you can have a look yourself?
Could you decide the problem? i have the same..
I couldn’t get this to work either, so realising that it wasn’t the code (too many people saying it works for that ;-) I tried physically building the WAR file and deploying to Weblogic10.3 rather than using the server started in Eclipse (I tried the tomcat, j2ee basic AND weblogic – none of these worked). Once the war file was deployed, I acccessed the index.jsp, clicked on the link and it worked fine. So the problem appears to be how the eclipse configured container “deploys” the app. Bit annoying that as it will make debugging issues a lot harder.
I am now seeing this (using Maven for dependency management):
Jun 22, 2011 9:19:14 AM org.apache.catalina.core.AprLifecycleListener init
INFO: The APR based Apache Tomcat Native library which allows optimal performance in production environments was not found on the java.library.path: C:\Program Files\Java\jdk1.6.0_26\bin;C:\Windows\Sun\Java\bin;C:\Windows\system32;C:\Windows;C:\Windows\system32;C:\Windows;C:\Windows\system32\wbem;C:\Windows\system32\windowspowershell\v1.0\;c:\program files\thinkpad\bluetooth software\;c:\program files\thinkpad\bluetooth software\syswow64;c:\program files (x86)\intel\services\ipt\;c:\program files\intel\wifi\bin\;c:\program files\common files\intel\wirelesscommon\;c:\program files (x86)\ibm\gsk8\lib;C:\PROGRA~2\IBM\SQLLIB\BIN;C:\PROGRA~2\IBM\SQLLIB\FUNCTION;C:\PROGRA~2\IBM\SQLLIB\SAMPLES\REPL;C:\apache-maven-3.0.3\bin;C:\Program Files\Intel\WiFi\bin\;C:\Program Files\Common Files\Intel\WirelessCommon\;.
Jun 22, 2011 9:19:14 AM org.apache.tomcat.util.digester.SetPropertiesRule begin
WARNING: [SetPropertiesRule]{Server/Service/Engine/Host/Context} Setting property ‘source’ to ‘org.eclipse.jst.j2ee.server:PDFinvoice’ did not find a matching property.
Jun 22, 2011 9:19:14 AM org.apache.tomcat.util.digester.SetPropertiesRule begin
WARNING: [SetPropertiesRule]{Server/Service/Engine/Host/Context} Setting property ‘source’ to ‘org.eclipse.jst.jee.server:Spring3MVC’ did not find a matching property.
Jun 22, 2011 9:19:14 AM org.apache.coyote.http11.Http11Protocol init
INFO: Initializing Coyote HTTP/1.1 on http-9090
Jun 22, 2011 9:19:14 AM org.apache.catalina.startup.Catalina load
INFO: Initialization processed in 1009 ms
Jun 22, 2011 9:19:14 AM org.apache.catalina.core.StandardService start
INFO: Starting service Catalina
Jun 22, 2011 9:19:14 AM org.apache.catalina.core.StandardEngine start
INFO: Starting Servlet Engine: Apache Tomcat/6.0.32
log4j:WARN No appenders could be found for logger (org.springframework.web.servlet.DispatcherServlet).
log4j:WARN Please initialize the log4j system properly.
Jun 22, 2011 9:19:16 AM org.apache.catalina.core.ApplicationContext log
INFO: Initializing Spring FrameworkServlet ‘spring’
Jun 22, 2011 9:19:17 AM org.apache.catalina.core.ApplicationContext log
INFO: Marking servlet spring as unavailable
Jun 22, 2011 9:19:17 AM org.apache.catalina.core.ApplicationContext log
SEVERE: Error loading WebappClassLoader
context: /Spring3MVC
delegate: false
repositories:
/WEB-INF/classes/
———-> Parent Classloader:
org.apache.catalina.loader.StandardClassLoader@95c083
org.springframework.web.servlet.DispatcherServlet
java.lang.ClassNotFoundException: org.springframework.web.servlet.DispatcherServlet
at org.apache.catalina.loader.WebappClassLoader.loadClass(WebappClassLoader.java:1680)
at org.apache.catalina.loader.WebappClassLoader.loadClass(WebappClassLoader.java:1526)
at org.apache.catalina.core.StandardWrapper.loadServlet(StandardWrapper.java:1095)
at org.apache.catalina.core.StandardWrapper.load(StandardWrapper.java:993)
at org.apache.catalina.core.StandardContext.loadOnStartup(StandardContext.java:4420)
at org.apache.catalina.core.StandardContext.start(StandardContext.java:4733)
at org.apache.catalina.core.ContainerBase.start(ContainerBase.java:1053)
at org.apache.catalina.core.StandardHost.start(StandardHost.java:840)
at org.apache.catalina.core.ContainerBase.start(ContainerBase.java:1053)
at org.apache.catalina.core.StandardEngine.start(StandardEngine.java:463)
at org.apache.catalina.core.StandardService.start(StandardService.java:525)
at org.apache.catalina.core.StandardServer.start(StandardServer.java:754)
at org.apache.catalina.startup.Catalina.start(Catalina.java:595)
at sun.reflect.NativeMethodAccessorImpl.invoke0(Native Method)
at sun.reflect.NativeMethodAccessorImpl.invoke(NativeMethodAccessorImpl.java:39)
at sun.reflect.DelegatingMethodAccessorImpl.invoke(DelegatingMethodAccessorImpl.java:25)
at java.lang.reflect.Method.invoke(Method.java:597)
at org.apache.catalina.startup.Bootstrap.start(Bootstrap.java:289)
at org.apache.catalina.startup.Bootstrap.main(Bootstrap.java:414)
Jun 22, 2011 9:19:17 AM org.apache.catalina.core.StandardContext loadOnStartup
SEVERE: Servlet /Spring3MVC threw load() exception
java.lang.ClassNotFoundException: org.springframework.web.servlet.DispatcherServlet
at org.apache.catalina.loader.WebappClassLoader.loadClass(WebappClassLoader.java:1680)
at org.apache.catalina.loader.WebappClassLoader.loadClass(WebappClassLoader.java:1526)
at org.apache.catalina.core.StandardWrapper.loadServlet(StandardWrapper.java:1095)
at org.apache.catalina.core.StandardWrapper.load(StandardWrapper.java:993)
at org.apache.catalina.core.StandardContext.loadOnStartup(StandardContext.java:4420)
at org.apache.catalina.core.StandardContext.start(StandardContext.java:4733)
at org.apache.catalina.core.ContainerBase.start(ContainerBase.java:1053)
at org.apache.catalina.core.StandardHost.start(StandardHost.java:840)
at org.apache.catalina.core.ContainerBase.start(ContainerBase.java:1053)
at org.apache.catalina.core.StandardEngine.start(StandardEngine.java:463)
at org.apache.catalina.core.StandardService.start(StandardService.java:525)
at org.apache.catalina.core.StandardServer.start(StandardServer.java:754)
at org.apache.catalina.startup.Catalina.start(Catalina.java:595)
at sun.reflect.NativeMethodAccessorImpl.invoke0(Native Method)
at sun.reflect.NativeMethodAccessorImpl.invoke(NativeMethodAccessorImpl.java:39)
at sun.reflect.DelegatingMethodAccessorImpl.invoke(DelegatingMethodAccessorImpl.java:25)
at java.lang.reflect.Method.invoke(Method.java:597)
at org.apache.catalina.startup.Bootstrap.start(Bootstrap.java:289)
at org.apache.catalina.startup.Bootstrap.main(Bootstrap.java:414)
Jun 22, 2011 9:19:17 AM org.apache.coyote.http11.Http11Protocol start
INFO: Starting Coyote HTTP/1.1 on http-9090
Jun 22, 2011 9:19:17 AM org.apache.jk.common.ChannelSocket init
INFO: JK: ajp13 listening on /0.0.0.0:9009
Jun 22, 2011 9:19:17 AM org.apache.jk.server.JkMain start
INFO: Jk running ID=0 time=0/18 config=null
Jun 22, 2011 9:19:17 AM org.apache.catalina.startup.Catalina start
INFO: Server startup in 2348 ms
Everything is working except that the message key is not rendered at all. It just shows ${message} instead of the value that belongs to the key. What is going wrong?
Walter,
I get also the same result as you “${message}” in stead of the value. Have you found a solution? If so, could you help my please ?
Syevin, did you find a solution to your problem? I think I’m having the same issue.
if you get 404 error when you click on say hello link then the problem is in WEB-INF/spring-servlet.xml.
the author here did not show all the packages and folders clearly. So, in order to fix this you must have “HelloWorldController” class in net.viralpatel.spring3.controller or you can update you WEB-INF/spring-servlet.xml <context:component-scan
base-package=
path to where you "HelloWorldController" class actually lives.
help me with this please. i have followed your steps correctly but it still doesnt run properly when launched on server. (there are no errors in the HelloWorldController class)
Error
cannot Deploy Spring
Deployment Error for module: Spring: Error occurred during deployment: Exception while loading the app : java.lang.IllegalStateException: ContainerBase.addChild: start: org.apache.catalina.LifecycleException: java.util.ServiceConfigurationError: javax.servlet.ServletContainerInitializer: Provider org.springframework.web.SpringServletContainerInitializer could not be instantiated: java.lang.NoClassDefFoundError: org/apache/commons/logging/LogFactory. Please see server.log for more details
When creating a project from eclipse helios sr2, i already have a predefined .xml file in my WebContent/WEB-INF folder which is named sub-web.xml. Do i still need to create a new web.xml in that directory? Or can i just copy the codes of web.xml to it.
You should create a new file named “web.xml”, or you should rename the file “subweb.xml” to “web.xml” .
very good and easy to follow!thanks
Yeah…thanks i finally run it. first i was got 404 not found error. because of netbean create default dispatcher-servlet.xml. so delete it and recreate xml with spring-servlet.xml. after i was get jstl error. then i have added jstl library. Now its working very well.
Hi,
I have followed this example step-by-step and for some reason I am getting this message:
08-Aug-2011 00:07:59 org.springframework.web.servlet.DispatcherServlet noHandlerFound
WARNING: No mapping found for HTTP request with URI [/ViralPatel/hello] in DispatcherServlet with name ‘spring
…And when I click on “Say Hello”, I get the following error message:
HTTP Status 404 – The requested resource () is not available.
I have even changed the web.xml to include / for all requests instead of *.html.
My setup is: Springsource (Eclipse) IDE, Java 6, Tomcat 7 and Spring 3.0.5 release.
Full IDE console dump is:
08-Aug-2011 00:07:40 org.apache.catalina.core.AprLifecycleListener init
WARNING: [SetPropertiesRule]{Server/Service/Engine/Host/Context} Setting property ‘source’ to ‘org.eclipse.jst.jee.server:ViralPatel’ did not find a matching property.
08-Aug-2011 00:07:41 org.apache.coyote.AbstractProtocol init
INFO: Initializing ProtocolHandler [“http-apr-8080”]
WARNING: No mapping found for HTTP request with URI [/ViralPatel/hello] in DispatcherServlet with name ‘spring’
Many thanks,
Bolat
Opps, I made a similar mistake as Akhtar’s above. Hence, ALL those who are having 404 errors, do NOT use the IDE generated web.xml file, but rather download the web.xml from this tutorial and use this file directly as mistakes can happen while copy & pasting as we are all learing the powerful features of Spring. Another point: all the jars are NOT available in the download here, so make sure you google for the 2 missing jars, that is, commons-logging-1.0-4.jar and jstl-1.2.jar (note: you may have trouble finding jstl-1.2.jar, you can download it from the mvnrepository from the following link http://mvnrepository.com/artifact/javax.servlet/jstl/1.2 ).
I tried it example. It works, but if i click the “Say Hello”-link, i get an message:
TTP Status 404 – /Spring3MVC/hello
type Status report
message /Spring3MVC/hello
description The requested resource (/Spring3MVC/hello) is not available.
Can anybody help me?
i am having a hard time fixing the web.xml. in my project, i use glassfish 3 as a server. so i have a predefined web.xml which is named sun-web.xml. Everytime I copy the codes of your web.xml to my sun-web.xml it has an error. My project will also not run if i rename my sun-web.xml to web.xml.
There is also an error when i copy your WEB-INF/spring-servlet.xml codes to my spring-servlet.xml. help me please. i am currently using STS 2.7.1
In the index.jsp the link should have the href=”hello.html” not “hello”
If you still got a problem about 404 with not found Servlet, please google jstl-1.2.jar and commons-logging-1.0-4.jar, copy that into your lib folder and that definetly solve that problem.
Finally I exported the project in a WAR file and copied it in the webapps folder of my Tomcat installation. I started Tomcat from .bat/.sh file and everything’s OK. Don’t use the embebed Tomcat in Eclipse. In fact it’s not the first time I have problem with Eclipse’s Tomcat. Strange thing is with another server (Jboss, Jetty, etc) I don’t have problems.
Hope That Helps…
thanx a lot………..really really great tutorial for a beginners…….keep up the good work……….
well thank you very much for your effort !
Actually i had the same prob as the others however i noticed that the code sorce to download get a mistake!
have a look at the index.jsp and you ll notice that the href is targetting to hello and not hello.html
and that is why we get the 404 message!
thanks again!!
thank you, Abou.
it works.
I had set up the application as per the steps stated above.But it was throwing error for some class in the jar “org.apache.commons.logging “.Then I add jar “commons-logging-1.1.1.jar” and now it’s working fine.
Download link : http://tomcat.apache.org/download-60.cgi.
Hope this will help!!!
Thanks
Hi Viral,
I tried your application step by step, as you asked in the way to do. But after clicking in the link in the index page, it is giving me blank “hello.jsp” page (Message isnt displaying).
Pls suggest wat should i do now.
Appreciate your quick response.
For me too, similar problem…I am getting “$message” instead of “Hello Eorld Spring 3.0!!” Any guidance would be appreciated.
Thanks.
To make this work, you need all jars specified in this tutorial (for safety, get all spring jar files)
The structure of the website should be
WEB-INF
—— classes
———– java classes
—— jsp
———– all jsp files
—— lib
———- all jar files mentioned above
index.jsp
all you need is to copy and paste the source codes mentioned above. I am using TomCat 7.0 and this works for me without any extra configuration. If you have error (404), check the server log and it will tell you what the problems are.
Hope this helps
its really good tutorial. Viral Patel u rock ..Thanks
-Nitin
It seems none of the above suggestions are completely solving 404 issue, there could be some other unknown issues. For me it worked perfectly fine, when played with plain lib files and failed when I added maven dependencies…. Any issues with dispatcher servlet ? don’t know….
Also noted that spring config file seems looking for …. does it need it…
Its a pretty shame that there is no validation support for a given web.xml and spring-servlet.xml files…
Hope things will improve in future for Spring…
The problem is that the web.xml defines a url-pattern of “*.html” but the controller request mapping (@RequestMapping) defines the mapping as “/hello” and does not include the necessary .html suffix.
To fix this issue, simply either change the @RequestMapping to “/hello.html” or change the web.xml URL pattern to “/”.
Nice tutorial
thanks. i want see,XXX-servlet.xml can be replaced by bean.xml? thank you.
@lucky-liu: You can use DispatcherServlet’s init-param “contextConfigLocation” to override the default context filename and add your own bean.xml. Refer this article for more details – Change spring-servlet.xml filename
Hi,
am getting 404 error:Servlet spring is not available…..getting say hello link but if i click on that link am getting the above error….plz do help ….
@Vamsh – Please check your server error log (console). There must be some exception there.
Hi, After my own build of this project failed I tried the download, but that fails as well.
On clicking ‘Say Hello’ I’m getting:
HTTP Status 404 – /Spring3MVC/hello
The requested resource (/Spring3MVC/hello) is not available.
In the console I have the following warnings:
WARNING: Failed to process JAR [jar:jndi:/localhost/Spring3MVC/WEB-INF/lib/order-supplemental.jar!/null] for TLD files
java.util.zip.ZipException: zip file is empty
at java.util.zip.ZipFile.open(Native Method)
at java.util.zip.ZipFile.(Unknown Source) //plus about another 30 files
WARNING: Failed to process JAR [jar:jndi:/localhost/Spring3MVC/WEB-INF/lib/order.jar!/null] for TLD files
java.util.zip.ZipException: zip file is empty
at java.util.zip.ZipFile.open(Native Method)
at java.util.zip.ZipFile.(Unknown Source) //plus about another 30 files
I’ve checked order-supplemental.jar and order.jar, and both have zero bytes.
Any help greatly appreciated.
I using Glassfish server and i have the same problem. The requested resource () is not available.
Yeah, this tutorial does not work with JBoss 6 and Spring 3. I downloaded the spring deployer from http://www.jboss.org/snowdrop/downloads and selected the JBoss AS 6 with Spring 3. I followed the steps in this article but it is not working as you state above. Very frustrating for an out-of-the-box helloworld perspective. Does anyone have a solution?
As with others, this example does not work. Very frustrating for a Hello World example. I have tried coding it manually as described in the article and downloaded the code including libraries. The project compiles, but when I click “Say Hello” which has a url of “localhost:8080/Spring3MVC/hello”, I get 404 error:
type Status report
message /Spring3MVC/hello
description The requested resource (/Spring3MVC/hello) is not available.
Here is a post I came up with regarding to deploying through eclipse and fix the 404 error
http://stackoverflow.com/questions/7114394/tomcat-6-0-and-eclipse-multiple-instances-of-the-server-behave-differently
However I got the same problem that Ken got when he hit the link
The Program will not work unless u have the required import files. such as (org.springframework.web.servlet.ModelAndView) The modelAndView is itself a class but when the above written program is executed in any IDE an error is prompted that no such class is found but instead let us create our own class “ModelAndView”. Same goes for the controller annotation.
One may find the repositories in the spring framework distribution folder where all the jar files are already there.. (spring-framework-3.1.0.RC1\dist)
It works, thanks
Instead of going through eclipse I packaged everything into a Spring3MVC.jar file and put it in JBoss’s server/default/deploy directory. When I start up the server I see that the controller is being deployed and if I go to http://localhost:8080/spring3mvc/ I see the “Say hello” link but when I click on it I get a message that says “The requested resource (/Spring3MVC/hello) is not available” but there is no meaningful feedback from the console output to help me fix this. Any other suggestions would be helpful. Thanks, Ken p.s. My Jboss 6 is “clean” as I only installed it a week ago, and I am using the latest 3.0.6 Spring jars.
this worked for me well. Thanks
Add the following to your POM
Taken from
http://www.mularien.com/blog/2008/02/19/tutorial-how-to-set-up-tomcat-6-to-work-with-jstl-12/
Hi Viral,
I just came across your blog while searching for some good tutorial on Spring 3. This blog post really helped me to start with Spring 3 basics. Now I’m looking forward to explore and try my hands on next Spring tutorials on your blog. Thanks and keep writing! :)
Regards,
Ron
@Rom – Thanks a lot mate :)
I hope these tutorials helps. Do Tweet them if you like or follow me on twitter http://twitter.com/viralpatelnet
This works greats ! Thx a lot ! You made me gain 8 work-hours. :)
Haft of day stay on your site is equal to a month searching :D
Thanks for the kind words Binhnx :-)
I found the problem with the above code. In the HelloWorldController, the value of “/hello” of RequestMapping annotation should be “/hello.html” since the request is for hello.html
@Rimon: While mapping the request in Spring using @RequestMapping annotation, you just have to mention default mapping string. In our case which is /hello. And while calling the controller from browser, we need to call url /hello.html as *.html is mapped to DispatcherServlet in web.xml.
True!
Hi Viral,
Thanks for your valuables posts. it’s really appreciate able.
I have tried this example.But I am getting some error. Could you please quide me on this.
Issue is:
“org.springframework.web.servlet.DispatcherServlet noHandlerFound No mapping found for HTTP request with URI [/SpringTest/hello.html] in DispatcherServlet with name ‘spring’
Regards
Hardeep
This demo will not work until the following line is added to the spring-servlet.xml file.
Otherwise a 404 error will occur.
<mvc:annotation-driven/>
is not needed in this example.
Have a look at this post: http://stackoverflow.com/questions/3977973/whats-the-difference-between-mvcannotation-driven-and-contextannotation
Hi Viral Patel,
I’m having the same 404 issue:
The requested resource (Servlet spring is not available) is not available.
Could you please help me to fix that issue? I found the tutorial very easy to follow, but I could’t fix this.
I also tried with the code that you provided, however,it didn’t work either
Thanks.
i got this problem in above example
HTTP 404 error Requested resource not found
to work this tutorial u have to add one more jar file . which is spring-webmvc-3.0.3.RELEASE.jar
and index.jsp mentioned as href=forms/helloworld.html and in web.xml the url pattern is /forms/*
now this tutorial works fine.
thanks …
great tutorial .
hi vira,
when i tried running this program. i have some error
java.lang.ClassNotFoundException: org.springframework.web.servlet.DispatcherServlet
i used maven
pom.xml
org.springframework
spring-webmvc
3.0.1.RELEASE
can you help me to solved my errors !
Hi guys, when I run the downloaded code I can see the “say hello” link but when I click the link this is the error I get:
INFO: The APR based Apache Tomcat Native library which allows optimal performance in production environments was not found on the java.library.path: C:\Program Files\Java\jdk1.6.0_20\bin;.;C:\Windows\Sun\Java\bin;C:\Windows\system32;C:\Windows;C:/Program Files/Java/jre6/bin/client;C:/Program Files/Java/jre6/bin;C:\Program Files\Windows Resource Kits\Tools\;C:\Program Files\Common Files\Microsoft Shared\Windows Live;C:\Program Files\PHP\;C:\Windows\system32;C:\Windows;C:\Windows\System32\Wbem;C:\Windows\System32\WindowsPowerShell\v1.0\;c:\maven3\bin\;c:\php;C:\Program Files\QuickTime\QTSystem\;C:\Program Files\Common Files\Microsoft Shared\Windows Live;C:\Sun\SDK\bin;C:\Ruby192\bin;
Jan 19, 2012 5:54:21 PM org.apache.tomcat.util.digester.SetPropertiesRule begin
WARNING: [SetPropertiesRule]{Server/Service/Engine/Host/Context} Setting property ‘source’ to ‘org.eclipse.jst.jee.server:Spring3MVC’ did not find a matching property.
Jan 19, 2012 5:54:21 PM org.apache.coyote.http11.Http11Protocol init
INFO: Initializing Coyote HTTP/1.1 on http-8080
Jan 19, 2012 5:54:21 PM org.apache.catalina.startup.Catalina load
INFO: Initialization processed in 654 ms
Jan 19, 2012 5:54:21 PM org.apache.catalina.core.StandardService start
INFO: Starting service Catalina
Jan 19, 2012 5:54:21 PM org.apache.catalina.core.StandardEngine start
INFO: Starting Servlet Engine: Apache Tomcat/6.0.35
Jan 19, 2012 5:54:21 PM org.apache.catalina.core.ApplicationContext log
INFO: Marking servlet spring as unavailable
Jan 19, 2012 5:54:21 PM org.apache.catalina.core.ApplicationContext log
SEVERE: Error loading WebappClassLoader
context: /Spring3MVC
delegate: false
repositories:
/WEB-INF/classes/
———-> Parent Classloader:
org.apache.catalina.loader.StandardClassLoader@1b90b39
org.springframework.web.servlet.DispatcherServlet
java.lang.ClassNotFoundException: org.springframework.web.servlet.DispatcherServlet
at org.apache.catalina.loader.WebappClassLoader.loadClass(WebappClassLoader.java:1680)
at org.apache.catalina.loader.WebappClassLoader.loadClass(WebappClassLoader.java:1526)
at org.apache.catalina.core.StandardWrapper.loadServlet(StandardWrapper.java:1128)
at org.apache.catalina.core.StandardWrapper.load(StandardWrapper.java:1026)
at org.apache.catalina.core.StandardContext.loadOnStartup(StandardContext.java:4421)
at org.apache.catalina.core.StandardContext.start(StandardContext.java:4734)
at org.apache.catalina.core.ContainerBase.start(ContainerBase.java:1057)
at org.apache.catalina.core.StandardHost.start(StandardHost.java:840)
at org.apache.catalina.core.ContainerBase.start(ContainerBase.java:1057)
at org.apache.catalina.core.StandardEngine.start(StandardEngine.java:463)
at org.apache.catalina.core.StandardService.start(StandardService.java:525)
at org.apache.catalina.core.StandardServer.start(StandardServer.java:754)
at org.apache.catalina.startup.Catalina.start(Catalina.java:595)
at sun.reflect.NativeMethodAccessorImpl.invoke0(Native Method)
at sun.reflect.NativeMethodAccessorImpl.invoke(NativeMethodAccessorImpl.java:39)
at sun.reflect.DelegatingMethodAccessorImpl.invoke(DelegatingMethodAccessorImpl.java:25)
at java.lang.reflect.Method.invoke(Method.java:597)
at org.apache.catalina.startup.Bootstrap.start(Bootstrap.java:289)
at org.apache.catalina.startup.Bootstrap.main(Bootstrap.java:414)
Jan 19, 2012 5:54:21 PM org.apache.catalina.core.StandardContext loadOnStartup
SEVERE: Servlet /Spring3MVC threw load() exception
java.lang.ClassNotFoundException: org.springframework.web.servlet.DispatcherServlet
at org.apache.catalina.loader.WebappClassLoader.loadClass(WebappClassLoader.java:1680)
at org.apache.catalina.loader.WebappClassLoader.loadClass(WebappClassLoader.java:1526)
at org.apache.catalina.core.StandardWrapper.loadServlet(StandardWrapper.java:1128)
at org.apache.catalina.core.StandardWrapper.load(StandardWrapper.java:1026)
at org.apache.catalina.core.StandardContext.loadOnStartup(StandardContext.java:4421)
at org.apache.catalina.core.StandardContext.start(StandardContext.java:4734)
at org.apache.catalina.core.ContainerBase.start(ContainerBase.java:1057)
Please help!
FInally reduced the error to this below by added all the jars needed:
an 19, 2012 6:16:49 PM org.springframework.web.servlet.DispatcherServlet noHandlerFound
WARNING: No mapping found for HTTP request with URI [/Spring3MVC/WEB-INF/jsp/hello.html] in DispatcherServlet with name ‘spring’
my question is hello.jsp is not “.html” where is the .html file as in the viewResolver?
Guys, I got the same errors you guys were getting….u need to add some additional jars file as shown in the error logs and also update the spring-servlet.xml
But unfortunately when I click on the Say hello link it is not able to redirect to hello.jsp but when I enter the url http://localhost:8080/Spring3MVC/hello.html it work fine….
any help guys??
Can you check where “Say hello” link is pointing too. It must be the same URL that you trying to reach manually.
Somehow I have the same problem like Ben. It works perfectly when I add suffix .html on the links
but hello alone does not work
ooookkkkk, now i got it. I have used Click here to download source code (9.05kb) link, and there the index.jsp points to hello instead of hello.html like it is in the tutorial.
when i click on say hello link its is trying to redirec Spring3MVC/WebContent/hello.jsp which is not correct.How to change the location.
It is supposed to redirect to Spring3MVC/WebContent/WEB-INF/jsp/hello.jsp
Jan 19, 2012 5:54:21 PM org.apache.catalina.core.ApplicationContext log
SEVERE: Error loading WebappClassLoader
context: /Spring3MVC
delegate: false
repositories:
/WEB-INF/classes/
———-> Parent Classloader:
org.apache.catalina.loader.StandardClassLoader@1b90b39
org.springframework.web.servlet.DispatcherServlet
java.lang.ClassNotFoundException: org.springframework.web.servlet.DispatcherServlet
at org.apache.catalina.loader.WebappClassLoader.loadClass(WebappClassLoader.java:1680)
To resolve this error pls add spring-webmvc-2.5.6.jar.
Worked well for me. Great explanation as well. Thanks a lot, Viral.
It works!!! thanks for your tutorial. It didn’t work at the begining, but I’ve learned a lot, even more, looking for a solution the problems. I’ m going to the next part. Thanks.
It is fantastic lesson, thanks.
But i have problem with ${message} which is nothing show on the web page.
any idea, please!!!!
I managed to resolve the 404 error by adding 2 more jar files .. viz;
http://www.docjar.com/jar_detail/jstl-1.1.2.jar.html
http://www.docjar.com/jar_detail/commons-logging-api-1.0.4.jar.html
hope it helps
Hi… Thanks a lot for your tips.. I had the same issue 404 when I click the Hello user…link. The issue has been resolved by including the logging and jstl jars into my lib folder. Thanks again for help.
No doubt very simple example and very nice effort. But there are two main problems:
HTTP 404 Error. As sugegsted by SpringNoob
http://stackoverflow.com/questions/7114394/tomcat-6-0-and-eclipse-multiple-instances-of-the-server-behave-differently
If options appears disabled try to delete and add server. Then immediately double click and then set what stated in link.
And when we click on Hello link it shows some problem. As suggested by Anoop download
http://www.docjar.com/jar_detail/jstl-1.1.2.jar.html
http://www.docjar.com/jar_detail/commons-logging-api-1.0.4.jar.html
Now it works :)
I still have 404 even after I add jstl-1.1.2.jar and commons-logging-api-1.0.4.jar files as suggested by Anoop to my Eclipse project’s Properties\Java Build Path\Libraries. I am so frustrated as I spent 3 days and could not make this tutorial work (or one athttp://www.mkyong.com/spring-security/spring-security-hello-world-example/, same problem) Pls. HELP ME OUT here, My error “The requested resource (/Spring3MVC/hello) is not available.”, I had Server “apache-tomcat-7.0.22”, I even put jstl-1.1.2.jar and commons-logging-api-1.0.4.jar to my Tomcat’s lib folder as suggested at http://www.mularien.com/blog/2008/02/19/tutorial-how-to-set-up-tomcat-6-to-work-with-jstl-12/ Thanks, Tracy
Thx, T.
I updated the href in index.jsp to hello.html. Once I clicked “Say Hello”. it prints “Hello World, Spring 3.0!” in standard output but it redirect to http://localhost/hello.html and showed “${message} ” in browser
same result after adding .
For those successfully ran this example, any modification made ? pls help. thx a lot
Finally I ran successfully with this set of source “http://devmanuals.com/tutorials/java/spring/spring3/mvc/Spring3HelloWorld.html” and show the message properly by adding the following in hello.jsp
…
Hi Beauchamp,
What did you just add to hello.jsp? Some how your message got cut off,
Thanks,
Tracy
——————
beauchamp wrote on 6 February, 2012, 11:35
Finally I ran successfully with this set of source “http://devmanuals.com/tutorials/java/spring/spring3/mvc/Spring3HelloWorld.html” and show the message properly by adding the following in hello.jsp
…
Reply
I had a run via Eclipse today, it ran successfully without the above change in hello.jsp. Strange!! The environment difference is jetty 7.4.1 to 7.5.1(in Eclipse). Other lib were same.
taglib uri=”http://java.sun.com/jstl/core” prefix=”c”
thanx for the tutorial but um having the following error everytime i click on the link
HTTP Status 404 – Servlet dis is not available
type Status report
message Servlet Spring3MVC is not available
description The requested resource (Servlet Spring3MVC is not available) is not available.
Apache Tomcat/7.0.23
can you pls explain the reason?
See my notes below, Tracy
Thanks Viral Patel for the tutorial. I finally made it work !!!
To overcome error “HTTP Status 404 – Servlet is not available”:
1) ALL JARS FILES MUST BE in WEB-INF\LIB folder. This is my biggest mistake. I thought I could have them in anyplace, like a subfolder WEB-INF\LIB\Spring3.0.1 .
2) change link in index.jsp to Say Hello (hello)
3) add commons-logging-api-1.0.4.jar, jstl-api-1.2.jar files as Anoop suggested above, Thx. Anoop.
4) Make sure all other jars mentioned at teh begining of this tutorials existed in WEB-INF\LIB
and added to Eclipse’s Java Build Path via
Project’s properties “Java Build Path\Libraries’s “Add External JARS” button
•commons-logging-1.0.4.jar
•jstl-1.2.jar
•org.springframework.asm-3.0.1.RELEASE-A.jar
•org.springframework.beans-3.0.1.RELEASE-A.jar
•org.springframework.context-3.0.1.RELEASE-A.jar
•org.springframework.core-3.0.1.RELEASE-A.jar
•org.springframework.expression-3.0.1.RELEASE-A.jar
•org.springframework.web.servlet-3.0.1.RELEASE-A.jar
•org.springframework.web-3.0.1.RELEASE-A.jar
Good luck,
T.
Typos:
2) Change link in index.jsp to “href=”hello.html” (from href=”hello”) Don’t know why but it works
Thx Bro :) It’s working now.
Thx :) It’s Working now…. :)
Hai friends…i created the projects by following the steps. but after running the project i am getting server error(500 error). plz rectify my error….
java.lang.NoClassDefFoundError: javax/servlet/jsp/jstl/core/Config
at org.springframework.web.servlet.support.JstlUtils.exposeLocalizationContext(JstlUtils.java:97)
at org.springframework.web.servlet.view.JstlView.exposeHelpers(JstlView.java:135)
at org.springframework.web.servlet.view.InternalResourceView.renderMergedOutputModel(InternalResourceView.java:211)
at org.springframework.web.servlet.view.AbstractView.render(AbstractView.java:262)
at org.springframework.web.servlet.DispatcherServlet.render(DispatcherServlet.java:1157)
at org.springframework.web.servlet.DispatcherServlet.doDispatch(DispatcherServlet.java:927)
at org.springframework.web.servlet.DispatcherServlet.doService(DispatcherServlet.java:827)
at org.springframework.web.servlet.FrameworkServlet.processRequest(FrameworkServlet.java:874)
at org.springframework.web.servlet.FrameworkServlet.doGet(FrameworkServlet.java:779)
at javax.servlet.http.HttpServlet.service(HttpServlet.java:617)
at javax.servlet.http.HttpServlet.service(HttpServlet.java:717)
at org.apache.catalina.core.ApplicationFilterChain.internalDoFilter(ApplicationFilterChain.java:290)
at org.apache.catalina.core.ApplicationFilterChain.doFilter(ApplicationFilterChain.java:206)
at org.apache.catalina.core.StandardWrapperValve.invoke(StandardWrapperValve.java:233)
at org.apache.catalina.core.StandardContextValve.invoke(StandardContextValve.java:191)
at org.apache.catalina.core.StandardHostValve.invoke(StandardHostValve.java:127)
at org.apache.catalina.valves.ErrorReportValve.invoke(ErrorReportValve.java:102)
at org.apache.catalina.core.StandardEngineValve.invoke(StandardEngineValve.java:109)
at org.apache.catalina.connector.CoyoteAdapter.service(CoyoteAdapter.java:298)
at org.apache.coyote.http11.Http11Processor.process(Http11Processor.java:852)
at org.apache.coyote.http11.Http11Protocol$Http11ConnectionHandler.process(Http11Protocol.java:588)
at org.apache.tomcat.util.net.JIoEndpoint$Worker.run(JIoEndpoint.java:489)
at java.lang.Thread.run(Unknown Source)
it works ,thank u.
Hi, while going through the above post I saw that the jsp files are placed under the WEB-INF directory. I fail to understand how that is going to work since as per my knowledge the container is not going to look for jsp files within web-inf directory. However a number of persons seems to have run this example without issues.
Am I missing something here or is it dependent on the server/container.
(Some people seem to have this exact problem while using jboss).
Placing the jsp files outside of web-inf can solve the problem.
Your code worked alright for me at the very first time itself. Thank you very much.
mast hai yaar …..
Works, perfectly! thanks!
Guys, i had the same problem like you did and i FINALLY found answer! I read the comments but nothing helped for me so I hope this is useful for some one :)
Watch this and you may find an answer. (around 3.00 was my answer)
http://www.youtube.com/watch?v=tGLeKstwWDU&feature=related
In this video, there is also problems and how programmer actually solves them.
i think change
to
Class HelloWorldController will excute when “/hello.html” is call
in web.xml i have a warning: “file name references to index.jsp that does not exist in web content”.
index.jsp is in WebContent folder. Why?
I followed the example to a T but still get this error
No mapping found for HTTP request with URI [/Spring3MVC/hello.html] in DispatcherServlet with name ‘spring’
I have all the jar files under lib directory.
Please help.
hi i followed the steps as told.
i am getting……jasper exception. unable to compile class for jsp
pl help me get thru this.
thank yu
Hi everyone, hi Viral,
I followed the tutorial too, and I have got the same error as lot of people here.
The fact is that the annotation @RequestMapping is considered only if you add the element in spring-servlet.xml. Or there may be another way to make the annotation considered, and I don’t get it, maybe you do… Anyway, it is not shown in your example and other people here are confronting the same problem.
I agree that we need to call hello.html from the link to pass through the main servlet defined in web.xml, BUT the fact is that in your example your are waiting for the string “/hello” and not what you receive, ie. “/hello.html”. So the error is absolutely normal.
Supposing that the annotation @RequestMapping is considered, you need to wait the string “hello.html” and not “hello” (@RequestMapping(“/hello.html”)). Indeed, the spring servlet is just a kind of filter and the suffix .html is not added as if by magic.
If you only want “hello”, update web.xml and change the url-pattern to ” / “.
And now all works fine for me.
If you have another way to make @RequestMapping considered, I am interested in.
I hope I clarified the point.
Cheers
The tag in spring-servlet.xml didn’t pass through the comment, I am speakin about .
Hey Thanks a ton, finally i created a dummy app on Springs. This is the easiest and best tutorial i found to start with Springs.
Hi,
any clue why I am getting this error after hitting “Say Hello” link. Error is “no declaration can be found for element ‘context:component-scan'”
Thanks
Prachi
paste the above instead of
that is the problem…it will work just fine then…:)
Hey Viral Patel,
Great man. You know how to feed the complex stuffs in easiest way to the young mind.
If you are a developer or architect, better put it on HOLD for some time and start a training institutes and train the young brains.
That is an need of an hour.
Best Regards,
Ilango
I’am getting the same error as Prachi… after hitting “Say Hello” link. Error is “no declaration can be found for element ‘context:component-scan’”
Hi,
See if you have defined schema locations properly in your
spring-servlet.xmlfile.Hi viral…
Thanks for replying…and yes that was the problem:)
Hi mates …..
thanks for your article. if you are getting error of 404.
than change
Say Hello
to
Say Hello
it will work fine.
Thanks for the tutorial.
It is very important that those jars are used for the app.
This is my maven dependency to run the app:
org.springframework
spring-context
3.0.1.RELEASE
org.springframework
spring-beans
3.0.1.RELEASE
org.springframework
spring-core
3.0.1.RELEASE
org.springframework
spring-web
3.0.1.RELEASE
jar
org.springframework
spring-asm
3.0.1.RELEASE
org.springframework
spring-expression
3.0.1.RELEASE
javax.servlet
jstl
1.2
org.springframework
spring-webmvc
3.0.1.RELEASE
thanks..
hello
we appreciate the tutorial and it’s of great assistance though am getting this error on compiling the app.
The matching wildcard is strict, but no declaration can be found for element ‘context:component-scan’
could you please help
Hi everyone. To those only seeing blank jsps, I found the error.
Check out your controller and see the import for ModelAndView.
I looked at mine and it was:
import org.springframework.web.portlet.ModelAndView;
instead of:
import org.springframework.web.servlet.ModelAndView;
Well, now I see Eclipse Autocomplete is not good at all times. :)
hey there, your comment helped resolving the same blank page error, but it worked the other way round for me, i was using “import org.springframework.web.portlet.ModelAndView ” , but then “import org.springframework.web.servlet.ModelAndView” worked for me, Thanks anyways!
May be i understood it the other way, but then IT WORKED, thanks :)
Good Tutorial , could not get better or simpler than this.
-> for those getting 404, restart your server, clean it properly, it will work(provided the coding is correct and also the rest of the things)
:)
this example has an error in index.jsp
this line is wrong
Say Hello
it causes 404 error
it should be:
Say Hello
thanks.
in a href – hello.html
am getting a 404 – /Spring3MVC/ – requested resource (/Spring3MVC/) is not available
http://localhost:8080/Spring3MVC – Is this the correct URL
FYI, I am using jboss
Good one Thanks !!
am getting a 404 – /Spring3MVC/ – requested resource (/Spring3MVC/) is not available
http://localhost:8080/Spring3MVC – Is this the correct URL
FYI, I am Tomcat 7
If error occur 404 in jsp, This because of problem in web.xml try change spring pattern to
/
It will solve the problem
great tutorial for beginners…thanks :)
THANKS A LOT!
i using exaple hello worl but geting proble
erro 404 servlet(spring) nor found
plz help me
I got 404 The requested resource () is not available Error….If anyone known plz help me…Thanq
is internalization concept present in spring 2.5?
nested exception is java.lang.NoClassDefFoundError: javax/servlet/jsp/jstl/core/Config
Abdallah, I believe you’ll need to download jstl1.2.jar. I had the same problem as jstl doesn’t come bundled with Spring anymore, and isn’t part of Tomcat. You can get it from: http://repo1.maven.org/maven2/javax/servlet/jstl/1.2/jstl-1.2.jar
Shaun
There is no ContextLoaderListener entry in the web.xml . i wonder how its instantiating the application context to handle the beans
am getting 404 error what to do
http://localhost:8080/HelloWorld/
message /HelloWorld/
description The requested resource (/HelloWorld/) is not available.
I just downloaded teh source and copy to my eclipse but ity’s not working. Please let me know how I can fix it.
Thanks, it is very good and easy to understood for beginners. I am able to deploy and see the gui screen as expected. Expecting more learning curve in future in this tutorial.
Thanks & Regards,
Sridhar Goranti
hi
great tutorial but i found error in class HelloWorldController as spring tool suite gives
“The import org.springframework.stereotype.Controller cannot be resolved”
“The import org.springframework.web.servlet.ModelAndView cannot be resolved”
“The import org.springframework.web.bind.annotation.RequestMapping cannot be resolved”
Hi,
HTTP Status 500 –
——————————————————————————–
type Exception report
message
description The server encountered an internal error () that prevented it from fulfilling this request.
exception
org.springframework.web.util.NestedServletException: Handler processing failed; nested exception is java.lang.NoClassDefFoundError: javax/servlet/jsp/jstl/core/Config
org.springframework.web.servlet.DispatcherServlet.triggerAfterCompletionWithError(DispatcherServlet.java:1316)
org.springframework.web.servlet.DispatcherServlet.doDispatch(DispatcherServlet.java:971)
org.springframework.web.servlet.DispatcherServlet.doService(DispatcherServlet.java:859)
org.springframework.web.servlet.FrameworkServlet.processRequest(FrameworkServlet.java:883)
org.springframework.web.servlet.FrameworkServlet.doGet(FrameworkServlet.java:781)
javax.servlet.http.HttpServlet.service(HttpServlet.java:617)
javax.servlet.http.HttpServlet.service(HttpServlet.java:717)
root cause
java.lang.NoClassDefFoundError: javax/servlet/jsp/jstl/core/Config
org.springframework.web.servlet.support.JstlUtils.exposeLocalizationContext(JstlUtils.java:97)
org.springframework.web.servlet.view.JstlView.exposeHelpers(JstlView.java:135)
org.springframework.web.servlet.view.InternalResourceView.renderMergedOutputModel(InternalResourceView.java:211)
org.springframework.web.servlet.view.AbstractView.render(AbstractView.java:262)
org.springframework.web.servlet.DispatcherServlet.render(DispatcherServlet.java:1265)
org.springframework.web.servlet.DispatcherServlet.processDispatchResult(DispatcherServlet.java:1016)
org.springframework.web.servlet.DispatcherServlet.doDispatch(DispatcherServlet.java:965)
org.springframework.web.servlet.DispatcherServlet.doService(DispatcherServlet.java:859)
org.springframework.web.servlet.FrameworkServlet.processRequest(FrameworkServlet.java:883)
org.springframework.web.servlet.FrameworkServlet.doGet(FrameworkServlet.java:781)
javax.servlet.http.HttpServlet.service(HttpServlet.java:617)
javax.servlet.http.HttpServlet.service(HttpServlet.java:717)
root cause
java.lang.ClassNotFoundException: javax.servlet.jsp.jstl.core.Config
org.apache.catalina.loader.WebappClassLoader.loadClass(WebappClassLoader.java:1645)
org.apache.catalina.loader.WebappClassLoader.loadClass(WebappClassLoader.java:1491)
org.springframework.web.servlet.support.JstlUtils.exposeLocalizationContext(JstlUtils.java:97)
org.springframework.web.servlet.view.JstlView.exposeHelpers(JstlView.java:135)
org.springframework.web.servlet.view.InternalResourceView.renderMergedOutputModel(InternalResourceView.java:211)
org.springframework.web.servlet.view.AbstractView.render(AbstractView.java:262)
org.springframework.web.servlet.DispatcherServlet.render(DispatcherServlet.java:1265)
org.springframework.web.servlet.DispatcherServlet.processDispatchResult(DispatcherServlet.java:1016)
org.springframework.web.servlet.DispatcherServlet.doDispatch(DispatcherServlet.java:965)
org.springframework.web.servlet.DispatcherServlet.doService(DispatcherServlet.java:859)
org.springframework.web.servlet.FrameworkServlet.processRequest(FrameworkServlet.java:883)
org.springframework.web.servlet.FrameworkServlet.doGet(FrameworkServlet.java:781)
javax.servlet.http.HttpServlet.service(HttpServlet.java:617)
javax.servlet.http.HttpServlet.service(HttpServlet.java:717)
note The full stack trace of the root cause is available in the Apache Tomcat/6.0.29 logs.
——————————————————————————–
Apache Tomcat/6.0.29
How to resolve this problem ?
Thanks in advance
please tell me how u solved the above issue……
iam using jsp,tomcat and also Ant for building…
Hi,
I configured, but while deploying it giving me below error:
16:31:54,783 ERROR [[/Spring3MVC]] StandardWrapper.Throwable
java.lang.NoClassDefFoundError: org/springframework/beans/PropertyAccessorFactory
at org.springframework.web.servlet.HttpServletBean.init(HttpServletBean.java:115)
Please let me know whr am i going wrong or am i missing something.
Regards,
Roshni
404- unable to track the error
any help
href=”hello.html”
urtl-pattern=*.html
servlet-name=spring
Servlet-class=”org.springframework.web.servlet.DispacherServlet”
it’s not mapping
Thank you very much, there are certainly rare basic tutorials of spring 3 MVC
Totaly agree with Racheel I went through more than 10 tutorials without success this my first working one
Thank you very much,
its good tutorial
thanx man……great explanation… :)
The requested resource (/Spring3MVC/hello) is not available.
How i can fix it?
Thanks
Very Nice example
Thanks a lot for the same
thanks a lot buddy i have tried running so many examples of springs but all were showing error this one worked fine
We have not created any “hello.html” file then how does it map “hello.jsp ” to “hello.html” ?
Siddarth
You dont need to create a hello.html.
You have mapped the URL pattern in your web.xml as “.html”.
so once you return the view as “hello” from ModelAndView object, it will be added the “.html” instead of “.jsp” extension by the viewResolver. Check the spring-servlet.xml for suffix and prefix mappings.
hope that helps you !
Nomesh
hi
i am new to spring 3.0
when i run this example(Spring3MVC) i am getting following error
Aug 23, 2012 5:59:07 PM org.springframework.web.servlet.DispatcherServlet noHandlerFound
WARNING: No mapping found for HTTP request with URI [/Spring3MVC/hello.html] in DispatcherServlet with name ‘spring’
can you help me
thanks
Agree with Narenda. This one worked.
soooo good. thanks
http://www.docjar.com/jar_detail/commons-logging-api-1.0.4.jar.html is the KEY!! worked like a charm after adding it.. trhanks anoop…
HTTP Status 404 – Servlet spring is not available
——————————————————————————–
type Status report
message Servlet spring is not available
description The requested resource (Servlet spring is not available) is not available.
——————————————————————————–
Apache Tomcat/7.0.27
i m getting above issue with ur coding…..
please let us know from whr the hello.html file is coming from?????
Waiting for ur reply
Hi all,
The code is working fine for me but in the message ,it is printing ${message} ,whereas it is to print Hello World, Spring 3.0!,
Any suggestions to solve this?? Thanks in advance
I found the answer ,,Actually jsp ignores Expression language for that simply add %@ page isELIgnored =”false” % under angle brackets in your hello.jsp page
thanks a lot Mr Patel. Your article is very useful .
For crying out loud! If you DO make a tutorial, make sure it WORKS!!! Ever heared of testing your work?? How is a Spring nit-wit like me supposed to know your hello-link has an error?? All I hoped for is an easy (admitted, it was easy to follow your steps) and CORRECT tutorial… Nerds like you are sooooo stupid :-(
@All getting 404 error. configure your web.xml as
..
/
I mean jst hav a “/” only in url pattern and issue will be solved
Nice demo:)
Nice example, but I am getting error 404.
I am using this URL-> http://localhost:8080/Spring3MVC. Any suggestion?
Excellent tutorial.
I’ve to add common loggings jar to make this working.
Thank you so much
This is great tutorial mate, very helpful for beginners.
Thank you so much…….
I m getting this error.
The requested resource (/Spring/WEB-INF/jsp/hello.jsp) is not available.
here Spring is my project name
Hi,
Thanks for the tutorial but i still an error when i click on the anchor to hello.html :-s
my index.jsp file is under WEB-INF and hello.jsp are under WEB-INF/jsp
Could you give me a solution pls
Check if you have error while server is starting up. Check the server logs.
here is my log error:
No mapping found for HTTP request with URI [/tutoSpringMavenHibernate/hello.html] in DispatcherServlet with name ‘spring’
This is very good article for beginners.Thanks a lot Mr Patel..
Awesome tutorial. Thanks Mr Patel.
Very nice tutorial. Thanks.
Thank u , its very easy to develop application …..
Thanks for explanation in core , It’s verry good for me
Thanq.
Thanks,, good work…
I am getting the following error:
– The import org.springframework.stereotype.Controller cannot be resolved
in the HelloWorldController class.
Am i missing something??
Please help. Thanks in advance
-SC
Spring JARs are not present in your classpath and that’s why you getting compile time error. Check if your Java Build Path is configured properly.
The jars are there in lib as well as in library too. Please help..
Done Everything but can’t find @Controller
Hi ,I have configured build path and also added in the lib folder but I am getting 404 Error and also on clicking link Url doesnt append with prefix or suffix.
Put the spring (and hibernate jars when you’re working with hibernate) in WEB-INF/lib folder. In another words, for web applications you need jars in that folder COPIED and not REFERENCED. Just copy the jars in there and rerun. (clean Tomcat working directory, clean project and restart server if necessary.)
I am getting ${message} after clicking sayhello…wats gone wrong?
very gud to understand….. easy to implement
thanks
Hi
I am tryin to run the project in tomcate7 and getting an exception. My Welcome file not getting execute .
some code from web.xml
spring
org.springframework.web.servlet.DispatcherServlet
spring
*.jsp
index.jsp
If i remove servlet tags or dispatcherServlet configuration form above file then index.jsp easily working .
what can be the issue..Please suggest.
————————————
———————————-
INFO: Loading XML bean definitions from ServletContext resource [/WEB-INF/spring-servlet.xml]
Dec 19, 2012 7:44:38 PM org.springframework.beans.factory.support.DefaultListableBeanFactory preInstantiateSingletons
INFO: Pre-instantiating singletons in org.springframework.beans.factory.support.DefaultListableBeanFactory@1a99c51: defining beans [org.springframework.context.annotation.internalConfigurationAnnotationProcessor,org.springframework.context.annotation.internalAutowiredAnnotationProcessor,org.springframework.context.annotation.internalRequiredAnnotationProcessor,org.springframework.context.annotation.internalCommonAnnotationProcessor,viewResolver,org.springframework.context.annotation.ConfigurationClassPostProcessor.importAwareProcessor]; root of factory hierarchy
Dec 19, 2012 7:44:38 PM org.springframework.web.servlet.FrameworkServlet initServletBean
INFO: FrameworkServlet ‘spring’: initialization completed in 841 ms
Dec 19, 2012 7:44:38 PM org.springframework.web.servlet.DispatcherServlet noHandlerFound
WARNING: No mapping found for HTTP request with URI [/Spring3HelloWord/] in DispatcherServlet with name ‘spring’
not able to understand this part, what exactly it does.
sorry for previous comment,
Not able to understand this, what actually it does.
thanks ..good one for freshers
am getting blank website with no outputs can u suggest some help…??
am getting the following exception.How can I resolve it??
org.apache.jasper.JasperException: Unable to compile class for JSP:
An error occurred at line: 31 in the generated java file
The method getJspApplicationContext(ServletContext) is undefined for the type JspFactory
Stacktrace:
org.apache.jasper.compiler.DefaultErrorHandler.javacError(DefaultErrorHandler.java:102)
org.apache.jasper.compiler.ErrorDispatcher.javacError(ErrorDispatcher.java:331)
org.apache.jasper.compiler.JDTCompiler.generateClass(JDTCompiler.java:469)
org.apache.jasper.compiler.Compiler.compile(Compiler.java:378)
org.apache.jasper.compiler.Compiler.compile(Compiler.java:353)
org.apache.jasper.compiler.Compiler.compile(Compiler.java:340)
org.apache.jasper.JspCompilationContext.compile(JspCompilationContext.java:646)
org.apache.jasper.servlet.JspServletWrapper.service(JspServletWrapper.java:357)
org.apache.jasper.servlet.JspServlet.serviceJspFile(JspServlet.java:390)
org.apache.jasper.servlet.JspServlet.service(JspServlet.java:334)
javax.servlet.http.HttpServlet.service(HttpServlet.java:722)
i got this error, after clicking on “say hello” link..
please help me.
Thanks in advance
Very nice Explanation
nice tutorial to get started…..
I have i little confuse is that why we have to put a link to hello.html in index.jsp but not hello.jsp or something like that. I’ll try with hello.jsp but it does not work
Hello!
This tutorial is fine, but it has some errors. For example
this
fragment of coude cause an errors.
You should change it to this
I am getting below error after clicking on sayhello hyperlink. Please help me
The requested resource (Servlet spring is not available) is not available.
Vijay, it appears there have been several updates to this document, but the source code available for download is out of date. If you are attempting to run the downloaded code, update the index.jsp: change [Say Hello] to [Say Hello].
Good luck.
Oops, didn’t realize the tags would get messed up.
What it should say is:
Update
to
hi
i am new to spring mvc
i need to open child window from parent window with a list.can provide the suggestions
thanks in advance
Hi, I am getting 404error when i execute the program.
spring-servlet is not available and these error
SEVERE: Servlet /Spring3MVC threw load() exception
java.lang.ClassNotFoundException: org.apache.commons.logging.LogFactory
at org.apache.catalina.loader.WebappClassLoader.loadClass(WebappClassLoader.java:1387)
at org.apache.catalina.loader.WebappClassLoader.loadClass(WebappClassLoader.java:1233)
at org.springframework.web.servlet.DispatcherServlet.(DispatcherServlet.java:207)
at sun.reflect.NativeConstructorAccessorImpl.newInstance0(Native Method)
How should i go about this
Please add following jar in web-inf/lib to avoid this exception
org.springframework.context.support-3.0.5.RELEASE.jar
I am getting a problem ,
my index.jsp page is running, but while clicking the link “Say Hello” , it is showing me “Requested resource is not found”.
I rechecked my program to resource everything, it is as it is , given in tutorial.
I am newbie to spring Help me in this regard
One correction in this sample program, In HelloWorldController, @RequestMapping(“/hello”) is wrong , it should be @RequestMapping(“/hello.html”) since we are mapping from index.jsp as “hello.html”
If this is not corrected , it will result in “servlet spring not found” exception while navidating from index.jsp to hello.jsp.
Solution for resource not found.
We are creating our own package for HelloWorldController.java but we are not changing in spring-servlet.xml
Use the same package name in spring-servlet.xml it will work out…
Good one for beginners.
Hi Viral,
Would like to know the difference between InternalResourceViewResolver and UrlBasedViewResolver.And when should each of them be used?
Hi Viral,
I’m getting this following error after clicking on the link ‘Say ‘Hello’.
org.springframework.web.util.NestedServletException: Handler processing failed; nested exception is java.lang.NoClassDefFoundError: javax/servlet/jsp/jstl/core/Config
Can u plz help.
Hi All,
If you are getting the below issue::-
I am getting 404error when i execute the program.
spring-servlet is not available and these error
SEVERE: Servlet /Spring3MVC threw load() exception
java.lang.ClassNotFoundException: org.apache.commons.logging.LogFactory
at org.apache.catalina.loader.WebappClassLoader.loadClass(WebappClassLoader.java:1387)
at org.apache.catalina.loader.WebappClassLoader.loadClass(WebappClassLoader.java:1233)
at org.springframework.web.servlet.DispatcherServlet.(DispatcherServlet.java:207)
at sun.reflect.NativeConstructorAccessorImpl.newInstance0(Native Method)
The ” hello. jsp” file is not located in the correct location, please place it under index.jsp. Currently it is located in the wrong location(/jsp) folder
I am gettin gbelow error.
Servlet is searching for hello.html which is not there. Please help! Thanks in advance.
type Status report
message Servlet spring is not available
description The requested resource (Servlet spring is not available) is not available.
This tutorial is one of the best solution for beginners who don’t know anything about spring.
Thanks a lot…………… Viral
While running this example on Jboss i am getting folloeing error
Unexpected exception parsing XML document from ServletContext resource [/WEB-INF/spring-servlet.xml]; nested exception is java.lang.NoClassDefFoundError: org/jboss/virtual/VirtualFileVisitor
Will u please suggest me solution.
And give some tutorial about maven and jboss
I am also getting the same error any input on this one
Viral,
Thanks for the sample application.
Do you know if there are differences in the way spring mvc 3.2 works ? especially in the way the classes are re organized in with in the JAR files ?
Worked !! Thanks for tutorial
Excellent page, thanks Mr Patel for helping the world spring.
I was using maven to build the project so needed to add the following jstl dependencies to obtain the jars through maven, but otherwise things went OK.
Very good tutorial
Hi Viral, Could you please provide an example for developing login application using spring-3 …. It would be very helpful ….!!!
Hi Viral ,
Thanks for providing such a good tutorial for beginners.
But i am facing one issue , please guide me into the below issue:
As i am hitting the “http://localhost:8080/SPRING3MVC/hello.html” , i am directly going to hello.jsp instead of index.jsp where link is present.
the first works tutorial for me, after 2 days trial error with other tuts.
thnks sir.
Nice Spring MVC concept and it’s working implementation.
it is really good to understand
I want to learn springs. anybody can suggest in what way i canlearn easily
i have Eclipse IDE ,APACHE TOMCAT.
SUGGEST ME
Thanks
suneetha
I Am Getting OutPut as Say Hello Only , not getting “Hello World Spring 3.0” ….
Plz Anyone Help me
Hi Viral,
Thanks for such a nice example with all the steps.
Arey yerri p……. write hello.jsp instead of hello.html .
nice tutorial especially for beginners…..i tried it and works fine…..
thanks sir
When I run this App I got following errors
java.lang.ClassNotFoundException: javax.servlet.jsp.jstl.core.Config
at org.apache.catalina.loader.WebappClassLoader.loadClass(WebappClassLoader.java:1714)
at org.apache.catalina.loader.WebappClassLoader.loadClass(WebappClassLoader.java:1559)
at org.springframework.web.servlet.support.JstlUtils.exposeLocalizationContext(JstlUtils.java:97)
at org.springframework.web.servlet.view.JstlView.exposeHelpers(JstlView.java:135)
at org.springframework.web.servlet.view.InternalResourceView.renderMergedOutputModel(InternalResourceView.java:211)
at org.springframework.web.servlet.view.AbstractView.render(AbstractView.java:250)
at org.springframework.web.servlet.DispatcherServlet.render(DispatcherServlet.java:1047)
at org.springframework.web.servlet.DispatcherServlet.doDispatch(DispatcherServlet.java:817)
at org.springframework.web.servlet.DispatcherServlet.doService(DispatcherServlet.java:719)
at org.springframework.web.servlet.FrameworkServlet.processRequest(FrameworkServlet.java:644)
at org.springframework.web.servlet.FrameworkServlet.doGet(FrameworkServlet.java:549)
at javax.servlet.http.HttpServlet.service(HttpServlet.java:621)
at javax.servlet.http.HttpServlet.service(HttpServlet.java:722)
at org.apache.catalina.core.ApplicationFilterChain.internalDoFilter(ApplicationFilterChain.java:305)
at org.apache.catalina.core.ApplicationFilterChain.doFilter(ApplicationFilterChain.java:210)
at org.apache.catalina.core.StandardWrapperValve.invoke(StandardWrapperValve.java:222)
at org.apache.catalina.core.StandardContextValve.invoke(StandardContextValve.java:123)
at org.apache.catalina.authenticator.AuthenticatorBase.invoke(AuthenticatorBase.java:472)
at org.apache.catalina.core.StandardHostValve.invoke(StandardHostValve.java:168)
at org.apache.catalina.valves.ErrorReportValve.invoke(ErrorReportValve.java:99)
at org.apache.catalina.valves.AccessLogValve.invoke(AccessLogValve.java:929)
at org.apache.catalina.core.StandardEngineValve.invoke(StandardEngineValve.java:118)
at org.apache.catalina.connector.CoyoteAdapter.service(CoyoteAdapter.java:407)
at org.apache.coyote.http11.AbstractHttp11Processor.process(AbstractHttp11Processor.java:1002)
at org.apache.coyote.AbstractProtocol$AbstractConnectionHandler.process(AbstractProtocol.java:585)
at org.apache.tomcat.util.net.JIoEndpoint$SocketProcessor.run(JIoEndpoint.java:312)
at java.util.concurrent.ThreadPoolExecutor$Worker.runTask(ThreadPoolExecutor.java:886)
at java.util.concurrent.ThreadPoolExecutor$Worker.run(ThreadPoolExecutor.java:908)
at java.lang.Thread.run(Thread.java:619)
this tutorial is great….I got it running without any changes……….good for starters
Thank you
copy commons-logging-1.1.2.jar in tomcat lib folder
and change index.html to
check tomcat log folder for exceptions
localhost.log file(latest date time wise)
i am running this application in tomcat 6 but getting 404 error after clicking on Say hello
It won’t work with tomcat 6. Use tomcat 7 . It will work then.
working with tomcat 6 , it is not tomcat issue, check your configurations.
Have you mentioned the base package correctly in spring-servlet.xml file.
I got error
Error creating bean with name ‘viewResolver’ defined in ServletContext resource
check jars in lib folder.
check wheter you have required jars in lib folder.
Maybe you could explain where to get jstl-1.2.jar and commons-logging.jar, cause they are not in the Spring package…
Here you go-
http://www.java2s.com/Code/Jar/j/Downloadjstl12jar.htm
http://www.java2s.com/Code/Jar/c/Downloadcommonslogging104jar.htm
So, for those getting an empty page after clicking “Say hello”
be sure you import
from
and not from
!
nice one good to understand thank you helped me lot .
If someone still has an issue after clicking ‘say hello’ saying ‘servlet unavailable’
download jstl.jar and make sure it is in WEB-INF/lib
here is the link:
repo1.maven.org/maven2/javax/servlet/jstl/1.2/jstl-1.2.jar
Help::
This is what comming up. Why?
type Status report
message /Spring3MVC/
description The requested resource (/Spring3MVC/) is not available.
I am also getting the same error. Please suggest.
Hi Syed..
you are getting 404 error, because in this example, jsp pages are kept in ‘WEB-INF’ folder, ideally we should keep pages in ‘WebContent ‘ directory.
If anyone face any error while running then
kindly change your view resolver to InternalResourceViewResolver in application-context
thanks
Nice tutorial.. easy to understand for newbie at spring mvc like me.. :D thanks
hi guys, i am new to j2ee and spring. this tutorial has been a great read for newbies like me. however, i have some problems understanding this part of the tutorial. please do guide me should my understanding is not correct. i have understand it like this:
run application > index.jsp (welcome page) > click link (direct to hello.html) >
go to web.xml > read url mapping (*.html) > servlet name being spring > go to dispatcherservlet > dispatcherservlet reads spring-servlet.xml > scan package controller >
dependency injection to view resolver > reads the properties of this view resolver >
assign property names to values > dispatcherservlet reads view resolver > assigns @requestMapping(/hello) in between prefix and suffix > now call /WEB-INF/jsp/hello.jsp > hello.jsp reads $(message) and resolver rendering this jsp to user > finish
Hi viral i am getting error 404 after clicking say HEllo,and there is no error in serverlog,i am trying to run code given on page to download
Sloved 404 error after clicking sayhello by replacing this in web.xml
spring
/
Beautifully done! Highly recommend it to anyone who would like to learn the basics of Spring MVC
Thank you so much!
Sir, Tutorials are very easy to understand but When I run application I found error in my PC
SEVERE: StandardWrapper.Throwable
java.lang.NoSuchMethodError: org.springframework.core.io.ResourceEditor.(Lorg/springframework/core/io/ResourceLoader;Lorg/springframework/core/env/PropertyResolver;)V
at org.springframework.web.servlet.HttpServletBean.init(HttpServletBean.java:123)
at javax.servlet.GenericServlet.init(GenericServlet.java:160)
at org.apache.catalina.core.StandardWrapper.initServlet(StandardWrapper.java:1189)
at org.apache.catalina.core.StandardWrapper.loadServlet(StandardWrapper.java:1103)
at org.apache.catalina.core.StandardWrapper.load(StandardWrapper.java:1010)
at org.apache.catalina.core.StandardContext.loadOnStartup(StandardContext.java:4915)
at org.apache.catalina.core.StandardContext$3.call(StandardContext.java:5242)
at org.apache.catalina.core.StandardContext$3.call(StandardContext.java:5237)
at java.util.concurrent.FutureTask$Sync.innerRun(FutureTask.java:334)
at java.util.concurrent.FutureTask.run(FutureTask.java:166)
at java.util.concurrent.ThreadPoolExecutor.runWorker(ThreadPoolExecutor.java:1110)
at java.util.concurrent.ThreadPoolExecutor$Worker.run(ThreadPoolExecutor.java:603)
at java.lang.Thread.run(Thread.java:722)
SEVERE: Servlet.service() for servlet [jsp] in context with path [/Spring3MVC] threw exception [java 1=”org.eclipse.jdt.internal.compiler.Compiler.<init>(Lorg/eclipse/jdt/internal/compiler/env/INameEnvironment;Lorg/eclipse/jdt/internal/compiler/IErrorHandlingPolicy;Lorg/eclipse/jdt/internal/compiler/impl/CompilerOptions;Lorg/eclipse/jdt/internal/compiler/ICompilerRequestor;Lorg/eclipse/jdt/internal/compiler/IProblemFactory;)V” language=”.lang.NoSuchMethodError:”][/java] with root cause
java.lang.NoSuchMethodError: org.eclipse.jdt.internal.compiler.Compiler.(Lorg/eclipse/jdt/internal/compiler/env/INameEnvironment;Lorg/eclipse/jdt/internal/compiler/IErrorHandlingPolicy;Lorg/eclipse/jdt/internal/compiler/impl/CompilerOptions;Lorg/eclipse/jdt/internal/compiler/ICompilerRequestor;Lorg/eclipse/jdt/internal/compiler/IProblemFactory;)V
at org.apache.jasper.compiler.JDTCompiler.generateClass(JDTCompiler.java:442)
at org.apache.jasper.compiler.Compiler.compile(Compiler.java:374)
at org.apache.jasper.compiler.Compiler.compile(Compiler.java:352)
at org.apache.jasper.compiler.Compiler.compile(Compiler.java:339)
at org.apache.jasper.JspCompilationContext.compile(JspCompilationContext.java:594)
at org.apache.jasper.servlet.JspServletWrapper.service(JspServletWrapper.java:344)
at org.apache.jasper.servlet.JspServlet.serviceJspFile(JspServlet.java:391)
at org.apache.jasper.servlet.JspServlet.service(JspServlet.java:334)
at javax.servlet.http.HttpServlet.service(HttpServlet.java:722)
Please Suggest me Why it Comes…
Thanks
U need to include all the jar file in the Lib folder inside the WEB-INF for Spring 3.0.0 + common logging and jstl correctly
if you all still have 404 errors then :
Solved it, thanks!
Still getting the same error at landing page itself.
The funny part is if I remove any servlet reference from the web.xml then the webapps at least gets me to the landing page.
I am getting following error after clicking on say Hello.
type: Status report
message: Servlet spring is not available
description: The requested resource (Servlet spring is not available) is not available.
hi friends,
i am still getting same error, please give the solution.
Hi Viral,
thanks for the tutorial.
I have a doubt. When i run the project on Websphere Application Server it gives 404 error but on Tomcat 7 it runs fine. What can be the reason for that?
iam running tiles application in tomcat 6, am getting following error
“The requested service (Servlet spring is currently unavailable) is not currently available.”
what i have to do ,if i want to run tiles application in tomcat 6(not in tomcat 7) successfully.
Hoping for ur reply ASAP….
Work fine!
Worked for me …..project was not compiled thats why ClassNotFound Exception occurred ..
No need to install TOMCAT 7…everything is fine…Just add these to jars:-jstl-1.2.jar and commons-logging-1.1.3.jar……ENJOY
Hi viral,
iam running tiles application in tomcat 6, am getting following error
“The requested service (Servlet spring is currently unavailable) is not currently available.”
what i have to do ,if i want to run tiles application in tomcat 6(not in tomcat 7) successfully.
Hoping for perfect ans ASAP from u….
I didn’t have index.jsp in the web content folder instead of the jsp folder, an easy mistake to make. my URL was http://localhost:8080/Spring3MVC/ which is not clear from the browser screen shots.
Hi Viral,
Thanks for explaining the basic concepts in a highly simplified manner.
Regarding 404 error:
Just replace below lines:
—————————————————————-
spring
*.html
—————————————————————-
with
—————————————————————-
spring
/
————————————————————
2) Also add missing JAR’S
a).commons-logging-1.0.4.jar
http://mvnrepository.com/artifact/commons-logging/commons-logging/1.0.4
b) jstl-1.2.jar
repo1.maven.org/maven2/javax/servlet/jstl/1.2/jstl-1.2.jar
Everything else explained on this topic is correct
i am getting this error Document root element “beans”, must match DOCTYPE root “null” when i am trying to run this program. can anyone help me please. i am using the same code but getting error please solve this
i am getting this error Document root element “beans”, must match DOCTYPE root “null” when i am trying to run this program. can anyone help me please. i am using the same code but getting error please solve this
tks, i got it work in my computer
Hi Viral,
Thank you so much for the your time and effort for explaining the Spring MVC in detail, It helped me a lot.
Thanks,
Aparna
i need use dao project in spring with hibernate using mysql server
i run one hibernate program but i got some following error,pls suggest me to rectify the error
at com.java.Util.HibernateUtil.(HibernateUtil.java:6)
at com.java.DAO.UserDao.getAllUsers(UserDao.java:73)
at com.java.controller.Main.main(Main.java:37)
Caused by: java.lang.NoSuchMethodError: org.slf4j.spi.LocationAwareLogger.log(Lorg/slf4j/Marker;Ljava/lang/String;ILjava/lang/String;[Ljava/lang/Object;Ljava/lang/Throwable;)V
at org.apache.commons.logging.impl.SLF4JLocationAwareLog.info(SLF4JLocationAwareLog.java:159)
at org.hibernate.cfg.Environment.(Environment.java:500)
at org.hibernate.cfg.Configuration.reset(Configuration.java:168)
at org.hibernate.cfg.Configuration.(Configuration.java:187)
at org.hibernate.cfg.Configuration.(Configuration.java:191)
It will work with Tomcat 7.
And make sure that the jsp/hello.jsp should be inside WEB-INF (Not in WebContent as usual).
Also the below tag should be correctly mapped to the base-package.
I get the below error while running the app. I am running it on Jboss
13:01:08,802 WARN [PageNotFound] No mapping found for HTTP request with URI [/SpringMVC/] in DispatcherServlet with name ‘spring’
Dear All,
I am getting $(message) when clicking on hyperlink in index page.
Kindly help.
Regards,
Ashish
I was able to run it after a struggle of 2 hrs.
I almost checked all replies and it helped me to correct the code. Below are check points to take care of
1.Check all jar files are in web-inf\lib. In my case I was refering it through eclipse build path
2.This code will work on any tomcat.
3.Check if jstl and commons-logging-api-1.0.4 jar files are also added to web-inf\lib
4.If you have mentioned Say Hello in index.jsp then HelloWorldController.java should have @RequestMapping(“/hello”).
5.If you have mentioned HTML in in index.jsp then HelloWorldController.java should have @RequestMapping(“/hello.html”).
6.CHANGE web.xml *.html to
/
Log4j not configured ,,,,,getting this error
That could be an awesome web page, many thanks just for this.
I did for you to yahoo with regard to various hours to discover that site.
We dislike any time when I personally yahoo
pertaining to written content in order to go through My partner and i constantly come across ineffective content material in addition to lots
of junk.
You definitely attain treatment method for most of the
spammy as well as conserve your website straightforward along
with high-quality. Would you have got methods for my own personal blog site?
Hi I am getting Error 500 on click of Say Hello Link.
I am using Eclipse 3.3, Tomcat 5.0 and JDK 1.6.Any help will be well appreciated.
sir,
I am unable to view the message in the browser ,it only shows ${message}.
Kindly some one help..
Viral,
thank you for the excellent example. It worked immediately with Tomcat 7.
hi Guys when i am trying to run this i am getting this error
can anyone tell me why ??
Sep 07, 2013 5:28:27 PM org.springframework.web.servlet.DispatcherServlet noHandlerFound
WARNING: No mapping found for HTTP request with URI [/SpringMVC/] in DispatcherServlet with name ‘spring’
Kindly let me know how to resolve this error: I am getting $message when clicking on hyperlink.
Please help me out ASAP.
download jstl jar file and Add it to your libraries and lib folder .
Good tutorial to start with. Great explanation. Thanks Viral.
guys, can anybody explain:
Why we have given
in the index file?
i am finding it difficult to understand the url mapping(*.html) in the spring-servlet.
Thank you in advance.
It works for me nice one thanks.
Not working with tomcat 5.5
I am getting $message
Please help
i m getting 404 eroor. i have tried given above solution (*.html replaced with /).
Please help me.
Love your series!
However, there are a few places where you use “which” but you probably wanted to use “that”.
Note that the name “message” is the one which we have set in ModelAndView object with the message string.
Also we will need an index.jsp file which will be the entry point of our application.
How can i import Maven Dynamic web into eclipse.. help me !!
when click say hello geting error 500
HTTP Status 500 –
——————————————————————————–
type Exception report
message
description The server encountered an internal error () that prevented it from fulfilling this request.
exception
javax.servlet.ServletException: Servlet.init() for servlet spring threw exception
org.apache.catalina.valves.ErrorReportValve.invoke(ErrorReportValve.java:102)
org.apache.catalina.connector.CoyoteAdapter.service(CoyoteAdapter.java:286)
org.apache.coyote.http11.Http11Processor.process(Http11Processor.java:845)
org.apache.coyote.http11.Http11Protocol$Http11ConnectionHandler.process(Http11Protocol.java:583)
org.apache.tomcat.util.net.JIoEndpoint$Worker.run(JIoEndpoint.java:447)
java.lang.Thread.run(Unknown Source)
root cause
java.lang.NoSuchMethodError: org.springframework.web.context.ConfigurableWebApplicationContext.setId(Ljava/lang/String;)V
org.springframework.web.servlet.FrameworkServlet.createWebApplicationContext(FrameworkServlet.java:431)
org.springframework.web.servlet.FrameworkServlet.createWebApplicationContext(FrameworkServlet.java:459)
org.springframework.web.servlet.FrameworkServlet.initWebApplicationContext(FrameworkServlet.java:340)
org.springframework.web.servlet.FrameworkServlet.initServletBean(FrameworkServlet.java:307)
org.springframework.web.servlet.HttpServletBean.init(HttpServletBean.java:127)
javax.servlet.GenericServlet.init(GenericServlet.java:212)
org.apache.catalina.valves.ErrorReportValve.invoke(ErrorReportValve.java:102)
org.apache.catalina.connector.CoyoteAdapter.service(CoyoteAdapter.java:286)
org.apache.coyote.http11.Http11Processor.process(Http11Processor.java:845)
org.apache.coyote.http11.Http11Protocol$Http11ConnectionHandler.process(Http11Protocol.java:583)
org.apache.tomcat.util.net.JIoEndpoint$Worker.run(JIoEndpoint.java:447)
java.lang.Thread.run(Unknown Source)
note The full stack trace of the root cause is available in the Apache Tomcat/6.0.18 logs.
plz help me
Worked … Gr8 Example …Kipit up .
Good One.
I have created a Spring project following all the steps in but when i run the application in
browser it shows the following error. Will you please help me ?
HTTP Status 404 – /Spring_5oct/index.jsp
——————————————————————————–
type Status report
message /Spring_5oct/index.jsp
description The requested resource is not available.
——————————————————————————–
Apache Tomcat/6.0.37
5 Oct, 2013 10:54:31 PM org.apache.catalina.core.AprLifecycleListener init
INFO: The APR based Apache Tomcat Native library which allows optimal performance in production environments was not found on the java.library.path: C:\Program Files (x86)\Java\jre1.7.0\bin;.;C:\Windows\Sun\Java\bin;C:\Windows\system32;C:\Windows;C:/Program Files (x86)/Java/jre1.7.0/bin/client;C:/Program Files (x86)/Java/jre1.7.0/bin;C:\oraclexe\app\oracle\product\10.2.0\server\bin;C:\Program Files (x86)\NVIDIA Corporation\PhysX\Common;C:\Program Files (x86)\PC Connectivity Solution\;C:\Program Files\Common Files\Microsoft Shared\Windows Live;C:\Program Files (x86)\Common Files\Microsoft Shared\Windows Live;C:\Windows\system32;C:\Windows;C:\Windows\System32\Wbem;C:\Windows\System32\WindowsPowerShell\v1.0\;C:\Program Files (x86)\Sony\VAIO Startup Setting Tool;;C:\Program Files (x86)\Windows Live\Shared
5 Oct, 2013 10:54:31 PM org.apache.tomcat.util.digester.SetPropertiesRule begin
WARNING: [SetPropertiesRule]{Server/Service/Engine/Host/Context} Setting property ‘source’ to ‘org.eclipse.jst.jee.server:Spring_5oct’ did not find a matching property.
5 Oct, 2013 10:54:32 PM org.apache.coyote.http11.Http11Protocol init
INFO: Initializing Coyote HTTP/1.1 on http-8080
5 Oct, 2013 10:54:32 PM org.apache.catalina.startup.Catalina load
INFO: Initialization processed in 1443 ms
5 Oct, 2013 10:54:32 PM org.apache.catalina.core.StandardService start
INFO: Starting service Catalina
5 Oct, 2013 10:54:32 PM org.apache.catalina.core.StandardEngine start
INFO: Starting Servlet Engine: Apache Tomcat/6.0.37
5 Oct, 2013 10:54:34 PM org.apache.catalina.core.ApplicationContext log
INFO: Initializing Spring FrameworkServlet ‘spring’
5 Oct, 2013 10:54:34 PM org.springframework.web.servlet.FrameworkServlet initServletBean
INFO: FrameworkServlet ‘spring’: initialization started
5 Oct, 2013 10:54:34 PM org.springframework.context.support.AbstractApplicationContext prepareRefresh
INFO: Refreshing WebApplicationContext for namespace ‘spring-servlet’: startup date [Sat Oct 05 22:54:34 IST 2013]; root of context hierarchy
5 Oct, 2013 10:54:34 PM org.springframework.beans.factory.xml.XmlBeanDefinitionReader loadBeanDefinitions
INFO: Loading XML bean definitions from ServletContext resource [/WEB-INF/spring-servlet.xml]
5 Oct, 2013 10:54:35 PM org.springframework.beans.factory.support.DefaultListableBeanFactory preInstantiateSingletons
INFO: Pre-instantiating singletons in org.springframework.beans.factory.support.DefaultListableBeanFactory@2b16b8: defining beans [org.springframework.context.annotation.internalConfigurationAnnotationProcessor,org.springframework.context.annotation.internalAutowiredAnnotationProcessor,org.springframework.context.annotation.internalRequiredAnnotationProcessor,org.springframework.context.annotation.internalCommonAnnotationProcessor,viewResolver]; root of factory hierarchy
5 Oct, 2013 10:54:37 PM org.springframework.web.servlet.FrameworkServlet initServletBean
INFO: FrameworkServlet ‘spring’: initialization completed in 3043 ms
5 Oct, 2013 10:54:37 PM org.apache.coyote.http11.Http11Protocol start
INFO: Starting Coyote HTTP/1.1 on http-8080
5 Oct, 2013 10:54:37 PM org.apache.jk.common.ChannelSocket init
INFO: JK: ajp13 listening on /0.0.0.0:8009
5 Oct, 2013 10:54:37 PM org.apache.jk.server.JkMain start
INFO: Jk running ID=0 time=0/92 config=null
5 Oct, 2013 10:54:37 PM org.apache.catalina.startup.Catalina start
INFO: Server startup in 4955 ms
I have attached the console output here,for your help…………..
I have resolved myself,i have added a classpath of apache in my .classpath file.
Thanks for your tutorial :)
very Good tutorial .
Cleared my lots of doubt but still have a query ..
In the web.xml file ,
spring
*.html
Above code will transform all the *.html requested to dispatcher servlet but further if we click on
any link from *.jsp page then how it will processed by dispatcher servlet .
This example is not working.If you want to run the properly then u have to changed the entry in web.xml file.you just change the url pattern ‘/’ with sign then after your code is working fine.
I am getting below error while running this program.
HTTP Status 404 –
——————————————————————————–
type Status report
message
description The requested resource () is not available.
——————————————————————————–
Apache Tomcat/7.0.5
Please help me
Hi,
i am a begginar to spring out of the many blogs and sites available to learn spring, i found urs very well organised and giving a step by step guidance, specially for this framework.
Now, as i tried out this example in my machine, i am getting error in these import statements,
import org.springframework.stereotype.Controller;
import org.springframework.web.bind.annotation.RequestMapping;
import org.springframework.web.servlet.ModelAndView;and on this annotation,
so i am not able print the welcome msg
i am using Helios. also i have added all necessary jar as mention by you above
@RequestMapping(value=”/hello”,method=RequestMethod.GET)
As per my understanding, i tthough a jar would be missing…i have included all those jars mentioned by you in your example.
Thanks
Please add following jar in web-inf/lib to avoid this exception
SEVERE: Servlet /MavenWeb threw load() exception java.lang.ClassNotFoundException:
jar—>org.springframework.context.support-3.0.5.RELEASE.jar
clean explanaton. thanks
Your this program is not working
Spring 3 MVC: Create Hello World Application In Spring 3.0 MVC
The link is http://viralpatel.net/spring-3-mvc-create-hello-world-application-spring-3-mvc/
When I click on Say Hello link than it is giving 404 Error and program stops and I am not able to found error my using debug also.
Change hello.html to hello.jsp in index.jsp page. Then it’ll work.
But I didn’t get the message in hello.jsp. If you find it explain me.
Thanks.Q
I am trying to run the above program in eclipse but it shows the following error .Please tell me the reason.
java.lang.NoClassDefFoundError: org/springframework/beans/factory/Aware
at java.lang.ClassLoader.defineClass1(Native Method)
at java.lang.ClassLoader.defineClassCond(Unknown Source)
at java.lang.ClassLoader.defineClass(Unknown Source)
at java.security.SecureClassLoader.defineClass(Unknown Source)
at org.apache.catalina.loader.WebappClassLoader.findClassInternal(WebappClassLoader.java:2820)
at org.apache.catalina.loader.WebappClassLoader.findClass(WebappClassLoader.java:1150)
at org.apache.catalina.loader.WebappClassLoader.loadClass(WebappClassLoader.java:1645)
at org.apache.catalina.loader.WebappClassLoader.loadClass(WebappClassLoader.java:1523)
at org.apache.catalina.core.StandardWrapper.servletSecurityAnnotationScan(StandardWrapper.java:1177)
at org.apache.catalina.authenticator.AuthenticatorBase.invoke(AuthenticatorBase.java:461)
at org.apache.catalina.core.StandardHostValve.invoke(StandardHostValve.java:164)
at org.apache.catalina.valves.ErrorReportValve.invoke(ErrorReportValve.java:100)
at org.apache.catalina.valves.AccessLogValve.invoke(AccessLogValve.java:929)
at org.apache.catalina.core.StandardEngineValve.invoke(StandardEngineValve.java:118)
at org.apache.catalina.connector.CoyoteAdapter.service(CoyoteAdapter.java:405)
at org.apache.coyote.http11.Http11Processor.process(Http11Processor.java:279)
at org.apache.coyote.AbstractProtocol$AbstractConnectionHandler.process(AbstractProtocol.java:515)
at org.apache.tomcat.util.net.JIoEndpoint$SocketProcessor.run(JIoEndpoint.java:302)
at java.util.concurrent.ThreadPoolExecutor$Worker.runTask(Unknown Source)
at java.util.concurrent.ThreadPoolExecutor$Worker.run(Unknown Source)
at java.lang.Thread.run(Unknown Source)
Caused by: java.lang.ClassNotFoundException: org.springframework.beans.factory.Aware
at org.apache.catalina.loader.WebappClassLoader.loadClass(WebappClassLoader.java:1678)
at org.apache.catalina.loader.WebappClassLoader.loadClass(WebappClassLoader.java:1523)
… 45 more
Great post!. Thanks very much.
I come cross the same problem. after running the app I can get to the index page, but after clicking on the link I get 404 error.
solution;
remove the app from the server.
double click on the server and click on open configuration
go to the classpath and add click on add Jars
select class path from your projetc
Simple Spring MVC project, Working successfully.
Thanks a lot..
its giving me request resource not find. with this same example
Hi Guys,
I was facing the same problem as many of you, i.e. getting the index page however getting 404 error when I click on the link. I tried checking many forums and finally got the answer and it worked for me.
As mentioned, in the very first step, copy all the required jar files to the lib folder through eclipse. Do not copy them outside of eclipse. Also, there is no need to add them to the buildpath, since when we copy them to the lib folder, they show up the “Libraries” under “Java Resources”. Also, create a new project altogether when following these steps because I have found that eclipse, tomcat together make some associations with the project and hence reworking on the project doesn’t help
Hope this helps!
Thanks a lot!!
Thanks, it worked !
Hi,
Could you please advise on the below error. When i try to execute the downloaded package (while starting the server), iam getting an error alert saying that “Starting Tomcat v6.0 Server at localhost has encountered a problem.” and below is the error log.
Could you please advise what needs to be done to avoid this issue. Thanks in advance
I have the set below in environment Variables
CATALINA_HOME = C:\Shahul\Software\apache-tomcat-6.0.37;
CLASS_PATH = C:\Shahul\Software\apache-tomcat-6.0.37;
JAVA_HOME = C:\Program Files\Java\jdk1.6.0;
Path = %JDK_HOME%\bin
JDK_HOME = C:\Program Files\Java\jdk1.6.0
Error Log from Console
———————————
Dec 1, 2013 12:09:21 PM org.apache.catalina.core.AprLifecycleListener init
INFO: The APR based Apache Tomcat Native library which allows optimal performance in production environments was not found on the java.library.path: C:\Program Files\Java\jdk1.6.0\bin;.;C:\WINDOWS\Sun\Java\bin;C:\WINDOWS\system32;C:\WINDOWS;C:/Program Files/Java/jdk1.6.0/bin/../jre/bin/client;C:/Program Files/Java/jdk1.6.0/bin/../jre/bin;C:/Program Files/Java/jdk1.6.0/bin/../jre/lib/i386;C:\Sun\share\lib;C:\Sun\share\bin;C:\Program Files\Java\jdk1.6.0\bin;C:\Sun\MessageQueue\lib;C:\Sun\MessageQueue\bin;C:\oracle\product\10.2.0\db_1\bin;C:\WINDOWS\system32;C:\WINDOWS;C:\WINDOWS\System32\Wbem;C:\WINDOWS\system32;C:\MaxProjectClient;C:\Shahul\Software\eclipse kepler\eclipse;
Dec 1, 2013 12:09:22 PM org.apache.tomcat.util.digester.SetPropertiesRule begin
WARNING: [SetPropertiesRule]{Server/Service/Engine/Host/Context} Setting property ‘source’ to ‘org.eclipse.jst.jee.server:test1’ did not find a matching property.
Dec 1, 2013 12:09:23 PM org.apache.coyote.http11.Http11Protocol init
INFO: Initializing Coyote HTTP/1.1 on http-8080
Dec 1, 2013 12:09:23 PM org.apache.catalina.startup.Catalina load
INFO: Initialization processed in 3135 ms
Dec 1, 2013 12:09:23 PM org.apache.catalina.core.StandardService start
INFO: Starting service Catalina
Dec 1, 2013 12:09:23 PM org.apache.catalina.core.StandardEngine start
INFO: Starting Servlet Engine: Apache Tomcat/6.0.37
java.lang.reflect.InvocationTargetException
at sun.reflect.NativeMethodAccessorImpl.invoke0(Native Method)
at sun.reflect.NativeMethodAccessorImpl.invoke(NativeMethodAccessorImpl.java:39)
at sun.reflect.DelegatingMethodAccessorImpl.invoke(DelegatingMethodAccessorImpl.java:25)
at java.lang.reflect.Method.invoke(Method.java:597)
at org.apache.catalina.startup.Bootstrap.start(Bootstrap.java:289)
at org.apache.catalina.startup.Bootstrap.main(Bootstrap.java:414)
Caused by: java.lang.NoClassDefFoundError: javax/servlet/http/HttpServlet
at java.lang.ClassLoader.defineClass1(Native Method)
at java.lang.ClassLoader.defineClass(ClassLoader.java:620)
at java.security.SecureClassLoader.defineClass(SecureClassLoader.java:124)
at java.net.URLClassLoader.defineClass(URLClassLoader.java:260)
at java.net.URLClassLoader.access$000(URLClassLoader.java:56)
… 6 more
Hi , i got this error while running the application.
can any one help please.
source code is
yes i got the answer,
application need a additional jar file xalan.
add it to the lib folder . thats it
very clear. Thank you.
Hi
I gone through whole tutorial. When I run it on Tomcat, using link
http://localhost:8080/Spring3MVC/hello.html
I am getting following error;
Dec 12, 2013 10:06:58 AM org.apache.coyote.AbstractProtocol start
INFO: Starting ProtocolHandler [“ajp-bio-8009”]
Dec 12, 2013 10:06:58 AM org.apache.catalina.startup.Catalina start
INFO: Server startup in 1762 ms
Dec 12, 2013 10:07:02 AM org.springframework.web.servlet.PageNotFound noHandlerFound
WARNING: No mapping found for HTTP request with URI [/Spring3MVC/hello.html] in DispatcherServlet with name ‘spring’
Can someone help.
thanks
hi Ismail,
Make the below changes and re-run the app…
1. Rename the servlet name to xyz in web.xml
2. Rename the spring-servlet.xml to xyz-servlet.xml
Can you please illustrate a bit ..i am also facing the same issue
This tutorial is very helpful and clear one on the internet .
Thank you .
Thanks, best spring tutorial :)
Hi guys who got exception like HTTP Status 404 –Requested Resource is not available.
Those peoples should change the “hello.htm” in Index.jsp. Then you will overcome that exception.
This tutorial is quite good and helpfull for the beginers, i would like to contribute a little more.. yes this example is not running, all those who are facing the porblem of error after clicking over the link should do only the following
in the web.xml file replace this:
with this
and every thing is done. cheers :)
Thanks,after doing this it’s working.It’s such a nice tutorial for biggner
Thank you a lot, Fawad!
Finally, it is working.
Thanks i got same error but its working fine now after you show suggestion.
hi its giving me error when i am deploying its saying request resource not found.
This tutorial is very good and helpful for the beginers, i would like to contribute a little more.. all those who are facing the porblem of error after clicking over the link should do the following only.
Replace this
with this
in the web.xml file and every thing is done. cheers.
Hi Fawad,
Thanks for your solution. Its working fine. But could you please explain me how it is working with
‘/ ‘ but not with “*.html.”.
Thanks
Hi Fawad,
Thank you for this fix. This works. Initially I was getting message that requested resource is not available. Now after writing / in tag in web.xml file it gives the text message written in Java file. Thank you once again. I am kind of weak in creating web applications.
Hi Fawad,
I am very new to web applications, I tried this example, written everything as it is. But I am still facing the same error after clicking over the link “The requested resource is not available”. even after replacing / with *.html. My index.jsp is also under WebContent. What else can be the problem with the code?
Can you please help.
I CANT FIND THESE JAR FILES
commons-logging-1.0.4.jar
jstl-1.2.jar
WHERE ARE THEY?
how do i copy all the jars there plus i cant find
commons-logging-1.0.4.jar
jstl-1.2.jar
Awesome Explanation :)
Great Tutorial
I followed same steps but i am getting “”Cannot be resolved to a type” errors for @Controller and @Request Mapping annotations.
Stacktrace from console
Jan 09, 2014 10:30:18 PM org.apache.catalina.core.StandardContext loadOnStartup
SEVERE: Servlet /Spring3MVC threw load() exception
java.lang.ClassNotFoundException: org.springframework.web.servlet.DispatcherServlet
at org.apache.catalina.loader.WebappClassLoader.loadClass(WebappClassLoader.java:1702)
at org.apache.catalina.loader.WebappClassLoader.loadClass(WebappClassLoader.java:1547)
at org.apache.catalina.core.DefaultInstanceManager.loadClass(DefaultInstanceManager.java:532)
at org.apache.catalina.core.DefaultInstanceManager.loadClassMaybePrivileged(DefaultInstanceManager.java:514)
at org.apache.catalina.core.DefaultInstanceManager.newInstance(DefaultInstanceManager.java:142)
at org.apache.catalina.core.StandardWrapper.loadServlet(StandardWrapper.java:1144)
at org.apache.catalina.core.StandardWrapper.load(StandardWrapper.java:1088)
at org.apache.catalina.core.StandardContext.loadOnStartup(StandardContext.java:5176)
at org.apache.catalina.core.StandardContext.startInternal(StandardContext.java:5460)
at org.apache.catalina.util.LifecycleBase.start(LifecycleBase.java:150)
at org.apache.catalina.core.ContainerBase$StartChild.call(ContainerBase.java:1559)
at org.apache.catalina.core.ContainerBase$StartChild.call(ContainerBase.java:1549)
at java.util.concurrent.FutureTask$Sync.innerRun(Unknown Source)
at java.util.concurrent.FutureTask.run(Unknown Source)
at java.util.concurrent.ThreadPoolExecutor.runWorker(Unknown Source)
at java.util.concurrent.ThreadPoolExecutor$Worker.run(Unknown Source)
at java.lang.Thread.run(Unknown Source)
Can anyone please help?
Thanks Sir.
Great Explanation. Could you please guide me on how to retrive data from any table that is cretaed in SQL server or Mysql using spring MVC.
HI
Did not do it for me before I used a taglib to output the message, like this
I am getting the result “Hello Data is ” but I am not able to print the value stored in the variable message
For people experiencing the 404 error, ensure that index.jsp is under WebContent. In the tutorial, it is stated to create index.jsp as “WebContent/index.jsp,” however, it is intuitively easy to create it under “WebContent/WEB-INF/jsp” (just like hello.jsp) as it is a *.jsp file after all.
Thanks to the author for this turoial :-)
Hi , i am getting following error in web.xml( i did in same way you explain)
Error 1
file name references to “index.jsp” that does not exist in web content.(i have put file in correct folder)
Error 2
servlet-class references to
“org.springframework.web.servlet.DispatcherServlet” that does not
implement interface javax.servlet.Servlet
Due to above 2 error i am not able to run.
Hi Viral,
Can you help me in generating rest services using spring with hibernate,
Thanks in Advance
Nice explanation.. Regarding 404 Error.. Please create new Project donot import.. because tomcat will not able to recognize.. and in web.xml copy this
spring
/
.. it will work..
Thank You Viral. The code really works.And the explanation is also very helpful.
I am not able to see the ${message} value in 2 end (hello.jsp) page.Please let me know is there how i ll do it ?
Hi
This is a good starting point for spring beginners.
If you get “he requested resource is not available” then do the following in the web.xml
replace *.html with /
Good luck man!!! it just works. Thanks for publishing the working source code.
I think the library jslt-1.2.jar is also needed.
Thanks, works fine.
hi
i have done with this example but it gives error on browser window as
type Status report
message Servlet spring is not available
description The requested resource is not available.
help me i ve just started learning spring. please
Hi, i load your code in my eclipse and always get this error whent click “Say Hello”:
No mapping found for HTTP request with URI [/Spring3MVC/jsp/hello.html] in DispatcherServlet with name ‘spring’
Whats happend?
HI,
replacing servlet-mapping works fine:
spring
/
thanks.
Help me! I get errors and i don’t know how to fix
SEVERE: A child container failed during start
java.util.concurrent.ExecutionException: org.apache.catalina.LifecycleException: Failed to start component [StandardEngine[Catalina].StandardHost[localhost]]
at java.util.concurrent.FutureTask.report(Unknown Source)
at java.util.concurrent.FutureTask.get(Unknown Source)
at org.apache.catalina.core.ContainerBase.startInternal(ContainerBase.java:1123)
at org.apache.catalina.core.StandardEngine.startInternal(StandardEngine.java:302)
at org.apache.catalina.util.LifecycleBase.start(LifecycleBase.java:150)
at org.apache.catalina.core.StandardService.startInternal(StandardService.java:443)
at org.apache.catalina.util.LifecycleBase.start(LifecycleBase.java:150)
at org.apache.catalina.core.StandardServer.startInternal(StandardServer.java:732)
at org.apache.catalina.util.LifecycleBase.start(LifecycleBase.java:150)
at org.apache.catalina.startup.Catalina.start(Catalina.java:684)
at sun.reflect.NativeMethodAccessorImpl.invoke0(Native Method)
at sun.reflect.NativeMethodAccessorImpl.invoke(Unknown Source)
at sun.reflect.DelegatingMethodAccessorImpl.invoke(Unknown Source)
at java.lang.reflect.Method.invoke(Unknown Source)
at org.apache.catalina.startup.Bootstrap.start(Bootstrap.java:322)
at org.apache.catalina.startup.Bootstrap.main(Bootstrap.java:456)
Caused by: org.apache.catalina.LifecycleException: Failed to start component [StandardEngine[Catalina].StandardHost[localhost]]
at org.apache.catalina.util.LifecycleBase.start(LifecycleBase.java:154)
at org.apache.catalina.core.ContainerBase$StartChild.call(ContainerBase.java:1559)
at org.apache.catalina.core.ContainerBase$StartChild.call(ContainerBase.java:1549)
at java.util.concurrent.FutureTask.run(Unknown Source)
at java.util.concurrent.ThreadPoolExecutor.runWorker(Unknown Source)
at java.util.concurrent.ThreadPoolExecutor$Worker.run(Unknown Source)
at java.lang.Thread.run(Unknown Source)
Caused by: org.apache.catalina.LifecycleException: A child container failed during start
at org.apache.catalina.core.ContainerBase.startInternal(ContainerBase.java:1131)
at org.apache.catalina.core.StandardHost.startInternal(StandardHost.java:800)
at org.apache.catalina.util.LifecycleBase.start(LifecycleBase.java:150)
… 6 more
May 14, 2014 4:30:20 PM org.apache.catalina.startup.Catalina start
SEVERE: Catalina.start:
org.apache.catalina.LifecycleException: Failed to start component [StandardServer[8005]]
at org.apache.catalina.util.LifecycleBase.start(LifecycleBase.java:154)
at org.apache.catalina.startup.Catalina.start(Catalina.java:684)
at sun.reflect.NativeMethodAccessorImpl.invoke0(Native Method)
at sun.reflect.NativeMethodAccessorImpl.invoke(Unknown Source)
at sun.reflect.DelegatingMethodAccessorImpl.invoke(Unknown Source)
at java.lang.reflect.Method.invoke(Unknown Source)
at org.apache.catalina.startup.Bootstrap.start(Bootstrap.java:322)
at org.apache.catalina.startup.Bootstrap.main(Bootstrap.java:456)
Caused by: org.apache.catalina.LifecycleException: Failed to start component [StandardService[Catalina]]
at org.apache.catalina.util.LifecycleBase.start(LifecycleBase.java:154)
at org.apache.catalina.core.StandardServer.startInternal(StandardServer.java:732)
at org.apache.catalina.util.LifecycleBase.start(LifecycleBase.java:150)
… 7 more
Caused by: org.apache.catalina.LifecycleException: Failed to start component [StandardEngine[Catalina]]
at org.apache.catalina.util.LifecycleBase.start(LifecycleBase.java:154)
at org.apache.catalina.core.StandardService.startInternal(StandardService.java:443)
at org.apache.catalina.util.LifecycleBase.start(LifecycleBase.java:150)
… 9 more
Caused by: org.apache.catalina.LifecycleException: A child container failed during start
at org.apache.catalina.core.ContainerBase.startInternal(ContainerBase.java:1131)
at org.apache.catalina.core.StandardEngine.startInternal(StandardEngine.java:302)
at org.apache.catalina.util.LifecycleBase.start(LifecycleBase.java:150)
… 11 more
its not working. error at import…pls helped
package net.viralpatel.spring3.controller;
import org.springframework.stereotype.Controller;
import org.springframework.web.bind.annotation.RequestMapping;
import org.springframework.web.servlet.ModelAndView;
@Controller
public class HelloWorldController {
@RequestMapping(“/hello”)
public ModelAndView helloWorld() {
String message = “Hello World, Spring 3.0!”;
return new ModelAndView(“hello”, “message”, message);
}
}
Hi Viral,
Downloaded the project source code from this blog. It was observed that “hello” written in tag does not redirect to /WEB-INF/jsp/hello.jsp.
Says that “The requested resource is not available”
Below is the index.jsp file content –
Spring 3.0 MVC Series: Index – Nitesh Pawar
Say Hello
Request you to provide a fix on this. Thank you.
it ihas worked now after seeing Fawad Khaliq comment.
Thats how I solved it :
First, make sure the index.jsp is under WebContent/ (as I am using Websphere, it will be webapp/indes.jsp). Second, restart your server and application and make sure the tag in index.jsp is written like this:
this is different from the source code which provided by author, but same as in the article, so i guess the author want us do in this way rather than following the provided source code(Its comes out 404 error too!!)
Jul 11, 2014 5:12:04 PM org.apache.catalina.core.AprLifecycleListener init
INFO: The APR based Apache Tomcat Native library which allows optimal performance in production environments was not found on the java.library.path: C:\Program Files (x86)\Java\jre7\bin;C:\windows\Sun\Java\bin;C:\windows\system32;C:\windows;C:\Program Files (x86)\RSA SecurID Token Common;C:\windows\system32;C:\windows;C:\windows\System32\Wbem;C:\windows\System32\WindowsPowerShell\v1.0\;C:\Program Files\Intel\WiFi\bin\;C:\Program Files\Common Files\Intel\WirelessCommon\;C:\Program Files (x86)\Lenovo\Access Connections\;C:\Program Files (x86)\IBM\Personal Communications\;C:\Program Files (x86)\IBM\Trace Facility\;C:\Program Files (x86)\Common Files\Roxio Shared\DLLShared\;C:\Program Files (x86)\Common Files\Roxio Shared\DLLShared\;C:\Program Files (x86)\Common Files\Roxio Shared\13.0\DLLShared\;C:\Program Files (x86)\IBM\Mobility Client\;C:\Program Files\Intel\WiFi\bin\;C:\Program Files\Common Files\Intel\WirelessCommon\;.
Jul 11, 2014 5:12:04 PM org.apache.tomcat.util.digester.SetPropertiesRule begin
WARNING: [SetPropertiesRule]{Server/Service/Engine/Host/Context} Setting property ‘source’ to ‘org.eclipse.jst.jee.server:Sample’ did not find a matching property.
Jul 11, 2014 5:12:04 PM org.apache.tomcat.util.digester.SetPropertiesRule begin
WARNING: [SetPropertiesRule]{Server/Service/Engine/Host/Context} Setting property ‘source’ to ‘org.eclipse.jst.jee.server:Spring3MVC’ did not find a matching property.
Jul 11, 2014 5:12:04 PM org.apache.tomcat.util.digester.SetPropertiesRule begin
WARNING: [SetPropertiesRule]{Server/Service/Engine/Host/Context} Setting property ‘source’ to ‘org.eclipse.jst.jee.server:SpringDemo’ did not find a matching property.
Jul 11, 2014 5:12:04 PM org.apache.coyote.AbstractProtocolHandler init
INFO: Initializing ProtocolHandler [“http-bio-8080”]
Jul 11, 2014 5:12:04 PM org.apache.coyote.AbstractProtocolHandler init
INFO: Initializing ProtocolHandler [“ajp-bio-8009”]
Jul 11, 2014 5:12:04 PM org.apache.catalina.startup.Catalina load
INFO: Initialization processed in 894 ms
Jul 11, 2014 5:12:04 PM org.apache.catalina.core.StandardService startInternal
INFO: Starting service Catalina
Jul 11, 2014 5:12:04 PM org.apache.catalina.core.StandardEngine startInternal
INFO: Starting Servlet Engine: Apache Tomcat/7.0.12
Jul 11, 2014 5:12:06 PM org.apache.catalina.startup.TaglibUriRule body
INFO: TLD skipped. URI: http://www.springframework.org/tags/form is already defined
Jul 11, 2014 5:12:06 PM org.apache.catalina.startup.TaglibUriRule body
INFO: TLD skipped. URI: http://www.springframework.org/tags is already defined
Jul 11, 2014 5:12:06 PM org.apache.catalina.core.ApplicationContext log
INFO: Marking servlet spring as unavailable
Jul 11, 2014 5:12:06 PM org.apache.catalina.core.StandardContext loadOnStartup
SEVERE: Servlet /Spring3MVC threw load() exception
java.lang.ClassNotFoundException: org.slf4j.LoggerFactory
at org.apache.catalina.loader.WebappClassLoader.loadClass(WebappClassLoader.java:1676)
at org.apache.catalina.loader.WebappClassLoader.loadClass(WebappClassLoader.java:1521)
at org.apache.commons.logging.impl.SLF4JLogFactory.getInstance(SLF4JLogFactory.java:155)
at org.apache.commons.logging.LogFactory.getLog(LogFactory.java:289)
at org.springframework.web.servlet.DispatcherServlet.(DispatcherServlet.java:213)
at sun.reflect.NativeConstructorAccessorImpl.newInstance0(Native Method)
at sun.reflect.NativeConstructorAccessorImpl.newInstance(Unknown Source)
at sun.reflect.DelegatingConstructorAccessorImpl.newInstance(Unknown Source)
at java.lang.reflect.Constructor.newInstance(Unknown Source)
at java.lang.Class.newInstance(Unknown Source)
at org.apache.catalina.core.DefaultInstanceManager.newInstance(DefaultInstanceManager.java:119)
at org.apache.catalina.core.StandardWrapper.loadServlet(StandardWrapper.java:1062)
at org.apache.catalina.core.StandardWrapper.load(StandardWrapper.java:1010)
at org.apache.catalina.core.StandardContext.loadOnStartup(StandardContext.java:4935)
at org.apache.catalina.core.StandardContext$3.call(StandardContext.java:5262)
at org.apache.catalina.core.StandardContext$3.call(StandardContext.java:5257)
at java.util.concurrent.FutureTask$Sync.innerRun(Unknown Source)
at java.util.concurrent.FutureTask.run(Unknown Source)
at java.util.concurrent.ThreadPoolExecutor.runWorker(Unknown Source)
at java.util.concurrent.ThreadPoolExecutor$Worker.run(Unknown Source)
at java.lang.Thread.run(Unknown Source)
Jul 11, 2014 5:12:06 PM org.apache.coyote.AbstractProtocolHandler start
INFO: Starting ProtocolHandler [“http-bio-8080”]
Jul 11, 2014 5:12:06 PM org.apache.coyote.AbstractProtocolHandler start
INFO: Starting ProtocolHandler [“ajp-bio-8009”]
Jul 11, 2014 5:12:06 PM org.apache.catalina.startup.Catalina start
INFO: Server startup in 1829 ms
Getting following error: I have changed *.html to / in web.xml, but it is still not working
Jul 19, 2014 1:13:20 PM org.springframework.web.servlet.PageNotFound noHandlerFound
WARNING: No mapping found for HTTP request with URI [/Spring3MVC/hello] in DispatcherServlet with name ‘spring’
Please someone help me out here
You need create a folder under WEB-INF called “jsp” and put there hello.jsp file
+WEB-INF
+—-jsp
|——–hello.jsp
Also change *.html for / in web.xml
thanks for sample,
in this sample in web.xml url pattern has to be as.
/
Hi Sir thanx for giving awesome tutorial. i just want to ask that how can i compile this web app into .EXE file and install on another pc and run without eclipse on other computer please replay me thanks in advance.
iam having error after copying the content into the class HelloWorldController
Add Spring MVC 3 libraries in configuration
Hi patel
this sample example i have been trying in jboss server it throws me the following exception
can you pls help me on it but it works well in other servers like tomcat,weblogic etc..
thanks !!
Context initialization failed: org.springframework.beans.factory.BeanDefinitionStoreException: Unexpected exception parsing XML document from ServletContext resource [/WEB-INF/spring-servlet.xml]; nested exception is java.lang.NoClassDefFoundError: org/jboss/virtual/VirtualFileVisitor
at org.springframework.beans.factory.xml.XmlBeanDefinitionReader.doLoadBeanDefinitions(XmlBeanDefinitionReader.java:412) [org.springframework.beans-3.0.1.RELEASE-A.jar:3.0.1.RELEASE-A]
at org.springframework.beans.factory.xml.XmlBeanDefinitionReader.loadBeanDefinitions(XmlBeanDefinitionReader.java:334) [org.springframework.beans-3.0.1.RELEASE-A.jar:3.0.1.RELEASE-A]
at org.springframework.beans.factory.xml.XmlBeanDefinitionReader.loadBeanDefinitions(XmlBeanDefinitionReader.java:302) [org.springframework.beans-3.0.1.RELEASE-A.jar:3.0.1.RELEASE-A]
at org.springframework.beans.factory.support.AbstractBeanDefinitionReader.loadBeanDefinitions(AbstractBeanDefinitionReader.java:143) [org.springframework.beans-3.0.1.RELEASE-A.jar:3.0.1.RELEASE-A]
at org.springframework.beans.factory.support.AbstractBeanDefinitionReader.loadBeanDefinitions(AbstractBeanDefinitionReader.java:178) [org.springframework.beans-3.0.1.RELEASE-A.jar:3.0.1.RELEASE-A]
at org.springframework.beans.factory.support.AbstractBeanDefinitionReader.loadBeanDefinitions(AbstractBeanDefinitionReader.java:149) [org.springframework.beans-3.0.1.RELEASE-A.jar:3.0.1.RELEASE-A]
at org.springframework.web.context.support.XmlWebApplicationContext.loadBeanDefinitions(XmlWebApplicationContext.java:124) [org.springframework.web-3.0.1.RELEASE-A.jar:3.0.1.RELEASE-A]
at org.springframework.web.context.support.XmlWebApplicationContext.loadBeanDefinitions(XmlWebApplicationContext.java:93) [org.springframework.web-3.0.1.RELEASE-A.jar:3.0.1.RELEASE-A]
at org.springframework.context.support.AbstractRefreshableApplicationContext.refreshBeanFactory(AbstractRefreshableApplicationContext.java:130) [org.springframework.context-3.0.1.RELEASE-A.jar:3.0.1.RELEASE-A]
at org.springframework.context.support.AbstractApplicationContext.obtainFreshBeanFactory(AbstractApplicationContext.java:465) [org.springframework.context-3.0.1.RELEASE-A.jar:3.0.1.RELEASE-A]
at org.springframework.context.support.AbstractApplicationContext.refresh(AbstractApplicationContext.java:395) [org.springframework.context-3.0.1.RELEASE-A.jar:3.0.1.RELEASE-A]
at org.springframework.web.servlet.FrameworkServlet.createWebApplicationContext(FrameworkServlet.java:443) [org.springframework.web.servlet-3.0.1.RELEASE-A.jar:3.0.1.RELEASE-A]
at org.springframework.web.servlet.FrameworkServlet.createWebApplicationContext(FrameworkServlet.java:459) [org.springframework.web.servlet-3.0.1.RELEASE-A.jar:3.0.1.RELEASE-A]
at org.springframework.web.servlet.FrameworkServlet.initWebApplicationContext(FrameworkServlet.java:340) [org.springframework.web.servlet-3.0.1.RELEASE-A.jar:3.0.1.RELEASE-A]
at org.springframework.web.servlet.FrameworkServlet.initServletBean(FrameworkServlet.java:307) [org.springframework.web.servlet-3.0.1.RELEASE-A.jar:3.0.1.RELEASE-A]
at org.springframework.web.servlet.HttpServletBean.init(HttpServletBean.java:127) [org.springframework.web.servlet-3.0.1.RELEASE-A.jar:3.0.1.RELEASE-A]
at javax.servlet.GenericServlet.init(GenericServlet.java:242) [jboss-servlet-api_3.0_spec-1.0.2.Final-redhat-1.jar:1.0.2.Final-redhat-1]
at org.apache.catalina.core.StandardWrapper.loadServlet(StandardWrapper.java:1194) [jbossweb-7.2.0.Final-redhat-1.jar:7.2.0.Final-redhat-1]
at org.apache.catalina.core.StandardWrapper.load(StandardWrapper.java:1100) [jbossweb-7.2.0.Final-redhat-1.jar:7.2.0.Final-redhat-1]
at org.apache.catalina.core.StandardContext.loadOnStartup(StandardContext.java:3591) [jbossweb-7.2.0.Final-redhat-1.jar:7.2.0.Final-redhat-1]
at org.apache.catalina.core.StandardContext.start(StandardContext.java:3798) [jbossweb-7.2.0.Final-redhat-1.jar:7.2.0.Final-redhat-1]
at org.jboss.as.web.deployment.WebDeploymentService.doStart(WebDeploymentService.java:156) [jboss-as-web-7.2.0.Final-redhat-8.jar:7.2.0.Final-redhat-8]
at org.jboss.as.web.deployment.WebDeploymentService.access$000(WebDeploymentService.java:60) [jboss-as-web-7.2.0.Final-redhat-8.jar:7.2.0.Final-redhat-8]
at org.jboss.as.web.deployment.WebDeploymentService$1.run(WebDeploymentService.java:93) [jboss-as-web-7.2.0.Final-redhat-8.jar:7.2.0.Final-redhat-8]
at java.util.concurrent.Executors$RunnableAdapter.call(Executors.java:441) [rt.jar:1.6.0_20]
at java.util.concurrent.FutureTask$Sync.innerRun(FutureTask.java:303) [rt.jar:1.6.0_20]
at java.util.concurrent.FutureTask.run(FutureTask.java:138) [rt.jar:1.6.0_20]
at java.util.concurrent.ThreadPoolExecutor$Worker.runTask(ThreadPoolExecutor.java:886) [rt.jar:1.6.0_20]
at java.util.concurrent.ThreadPoolExecutor$Worker.run(ThreadPoolExecutor.java:908) [rt.jar:1.6.0_20]
at java.lang.Thread.run(Thread.java:619) [rt.jar:1.6.0_20]
at org.jboss.threads.JBossThread.run(JBossThread.java:122)
Caused by: java.lang.NoClassDefFoundError: org/jboss/virtual/VirtualFileVisitor
i have tried the above program and i got the error while running the application using apache tomcat 6.
Error:org.springframework.beans.factory.BeanDefinitionStoreException: Parser configuration exception parsing XML from ServletContext resource [/WEB-INF/spring-servlet.xml]; nested exception is javax.xml.parsers.ParserConfigurationException: Unable to validate using XSD: Your JAXP provider [org.apache.xerces.jaxp.DocumentBuilderFactoryImpl@112e7f7] does not support XML Schema. Are you running on Java 1.4 with Apache Crimson? Upgrade to Apache Xerces (or Java 1.5) for full XSD support.
Could you pls any body help me to solve this issue.
i have tried the above program many times , i got the error while running the application using apache tomcat 7.0.
type: Status report
message
description :The requested resource is not available.
when i run above code in JBOSS 7.it gives below error. please give me solution for same
and thnks in advance
03:48:37,573 INFO [org.jboss.as.server.deployment.scanner] (DeploymentScanner-threads – 1) JBAS015003: Found SpringMVCFirst.war in deployment directory. To trigger deployment create a file called SpringMVCFirst.war.dodeploy
03:48:37,590 INFO [org.jboss.as.server.deployment] (MSC service thread 1-6) JBAS015876: Starting deployment of “SpringMVCFirst.war”
03:48:37,751 ERROR [org.jboss.msc.service.fail] (MSC service thread 1-3) MSC00001: Failed to start service jboss.deployment.unit.”SpringMVCFirst.war”.POST_MODULE: org.jboss.msc.service.StartException in service jboss.deployment.unit.”SpringMVCFirst.war”.POST_MODULE: Failed to process phase POST_MODULE of deployment “SpringMVCFirst.war”
at org.jboss.as.server.deployment.DeploymentUnitPhaseService.start(DeploymentUnitPhaseService.java:119) [jboss-as-server-7.1.0.Final.jar:7.1.0.Final]
at org.jboss.msc.service.ServiceControllerImpl$StartTask.startService(ServiceControllerImpl.java:1811) [jboss-msc-1.0.2.GA.jar:1.0.2.GA]
at org.jboss.msc.service.ServiceControllerImpl$StartTask.run(ServiceControllerImpl.java:1746) [jboss-msc-1.0.2.GA.jar:1.0.2.GA]
at java.util.concurrent.ThreadPoolExecutor$Worker.runTask(Unknown Source) [rt.jar:1.6.0]
at java.util.concurrent.ThreadPoolExecutor$Worker.run(Unknown Source) [rt.jar:1.6.0]
at java.lang.Thread.run(Unknown Source) [rt.jar:1.6.0]
Caused by: org.jboss.as.server.deployment.DeploymentUnitProcessingException: JBAS011093: Could not load component class org.springframework.web.servlet.DispatcherServlet
at org.jboss.as.ee.component.deployers.InterceptorAnnotationProcessor.processComponentConfig(InterceptorAnnotationProcessor.java:113)
at org.jboss.as.ee.component.deployers.InterceptorAnnotationProcessor.deploy(InterceptorAnnotationProcessor.java:54)
at org.jboss.as.server.deployment.DeploymentUnitPhaseService.start(DeploymentUnitPhaseService.java:113) [jboss-as-server-7.1.0.Final.jar:7.1.0.Final]
… 5 more
Caused by: java.lang.ClassNotFoundException: org.springframework.web.servlet.DispatcherServlet from [Module “deployment.SpringMVCFirst.war:main” from Service Module Loader]
at org.jboss.modules.ModuleClassLoader.findClass(ModuleClassLoader.java:190)
at org.jboss.modules.ConcurrentClassLoader.performLoadClassUnchecked(ConcurrentClassLoader.java:468)
at org.jboss.modules.ConcurrentClassLoader.performLoadClassChecked(ConcurrentClassLoader.java:456)
at org.jboss.modules.ConcurrentClassLoader.performLoadClass(ConcurrentClassLoader.java:398)
at org.jboss.modules.ConcurrentClassLoader.loadClass(ConcurrentClassLoader.java:120)
at org.jboss.as.ee.component.deployers.InterceptorAnnotationProcessor.processComponentConfig(InterceptorAnnotationProcessor.java:111)
… 7 more
03:48:37,777 INFO [org.jboss.as.server] (DeploymentScanner-threads – 2) JBAS015870: Deploy of deployment “SpringMVCFirst.war” was rolled back with failure message {“JBAS014671: Failed services” => {“jboss.deployment.unit.\”SpringMVCFirst.war\”.POST_MODULE” => “org.jboss.msc.service.StartException in service jboss.deployment.unit.\”SpringMVCFirst.war\”.POST_MODULE: Failed to process phase POST_MODULE of deployment \”SpringMVCFirst.war\””}}
03:48:37,782 INFO [org.jboss.as.server.deployment] (MSC service thread 1-6) JBAS015877: Stopped deployment SpringMVCFirst.war in 4ms
03:48:37,785 INFO [org.jboss.as.controller] (DeploymentScanner-threads – 2) JBAS014774: Service status report
JBAS014777: Services which failed to start: service jboss.deployment.unit.”SpringMVCFirst.war”.POST_MODULE: org.jboss.msc.service.StartException in service jboss.deployment.unit.”SpringMVCFirst.war”.POST_MODULE: Failed to process phase POST_MODULE of deployment “SpringMVCFirst.war”
03:48:37,789 ERROR [org.jboss.as.server.deployment.scanner] (DeploymentScanner-threads – 1) {“JBAS014653: Composite operation failed and was rolled back. Steps that failed:” => {“Operation step-2” => {“JBAS014671: Failed services” => {“jboss.deployment.unit.\”SpringMVCFirst.war\”.POST_MODULE” => “org.jboss.msc.service.StartException in service jboss.deployment.unit.\”SpringMVCFirst.war\”.POST_MODULE: Failed to process phase POST_MODULE of deployment \”SpringMVCFirst.war\””}}}}
in spring jars list, required to add spring-core jar also
i tried this example in my system, But i am getting message like ${message}
I have created one Spring MVC project with maven.But in JSP actual model values are not populating – jsp is coming like below
==================================
Maven + Spring MVC Web Project Example
Message : ${.message}
Counter : ${counter}
hi sir,
index file is navigating to hello.jsp…but in the url its showing hello.html
i want to know ,how its getting changed to .jsp to .html
and how to change it to hello.jsp
its giving me request not found error. i am trying lots of time and one thing why we need jstl jar please help regarding this.
When I try to enter in the link “Say hello”.I have this error: Etat HTTP 404 – Servlet spring not disponible.I changed
with
but this is not working.
Please help me
When I try to enter in the link “Say hello”.I have this error: Etat HTTP 404 – Servlet spring not disponible.I changed
with
but it is not working.Help me Please
I also worked out the above example..and I got the warning like this in console
Nov 25, 2014 5:52:56 PM org.springframework.web.servlet.DispatcherServlet noHandlerFound
WARNING: No mapping found for HTTP request with URI [/HelloWorld/hello.html] in DispatcherServlet with name ‘spring’
and also 404 error..requested resource not found..
can anybody give a solution for this
Thanks for the this. very useful
I followed the instructions as it is but it is giving error
( im using Apache 7.0 and eclipse luna)
Plz help ASAP..
type Exception report
message
description The server encountered an internal error () that prevented it from fulfilling this request.
exception
org.springframework.web.util.NestedServletException: Handler processing failed; nested exception is java.lang.NoClassDefFoundError: javax/servlet/jsp/jstl/core/Config
org.springframework.web.servlet.DispatcherServlet.doDispatch(DispatcherServlet.java:820)
org.springframework.web.servlet.DispatcherServlet.doService(DispatcherServlet.java:716)
org.springframework.web.servlet.FrameworkServlet.processRequest(FrameworkServlet.java:647)
org.springframework.web.servlet.FrameworkServlet.doGet(FrameworkServlet.java:552)
javax.servlet.http.HttpServlet.service(HttpServlet.java:621)
javax.servlet.http.HttpServlet.service(HttpServlet.java:722)
root cause
java.lang.NoClassDefFoundError: javax/servlet/jsp/jstl/core/Config
org.springframework.web.servlet.support.JstlUtils.exposeLocalizationContext(JstlUtils.java:97)
org.springframework.web.servlet.view.JstlView.exposeHelpers(JstlView.java:135)
org.springframework.web.servlet.view.InternalResourceView.renderMergedOutputModel(InternalResourceView.java:211)
org.springframework.web.servlet.view.AbstractView.render(AbstractView.java:250)
org.springframework.web.servlet.DispatcherServlet.render(DispatcherServlet.java:1060)
org.springframework.web.servlet.DispatcherServlet.doDispatch(DispatcherServlet.java:798)
org.springframework.web.servlet.DispatcherServlet.doService(DispatcherServlet.java:716)
org.springframework.web.servlet.FrameworkServlet.processRequest(FrameworkServlet.java:647)
org.springframework.web.servlet.FrameworkServlet.doGet(FrameworkServlet.java:552)
javax.servlet.http.HttpServlet.service(HttpServlet.java:621)
javax.servlet.http.HttpServlet.service(HttpServlet.java:722)
note The full stack trace of the root cause is available in the Apache Tomcat/7.0.12 logs.
if you found 404 error,
try replace : *.html
with : /
and change spring-servlet.xml into this
perfect!
Works for me…
Thanks!!!
Hi There,
Unable to download below jars…
org.springframework.expression-3.0.1.RELEASE-A.jar
org.springframework.web.servlet-3.0.1.RELEASE-A.jar
Can anyone please share the Exact URL
Cool tutorial but to make it work you need to use an uppercase “L” in xsi:schemalocation= or else it will give an error saying “cvc-elt.1: Cannot find the declaration of element ‘beans’.”
Pls help me! I got a error
“The requested resource is not available.”
How can i do?
Hi patel
i facing this problem plz helpme
WARNING: [SetPropertiesRule]{Server/Service/Engine/Host/Context} Setting property ‘source’ to ‘org.eclipse.jst.jee.server:Spring3MVC1’ did not find a matching property.
Thanks for the this. very useful
Hi, your tutorial helped me a lot. Thank you! :)
I am new to Spring MVC. I was getting the 404 error when I ran the index.jsp from the above example. I initially placed the index.jsp in the jsp folder along with the hellp.jsp. when I moved the index.jsp to the webcontent folder the 404 error problem was gone.
One more issue when you download the jars using the link in this article it doesnt download commons-logging and jstl jars. Your tomcat will not start without the Commons jar and you will get a 500 error without the jstl jar. Hope this helps atleast one person.
By the way I tried all the fixes like changing from *.html to / etc. None of them solved the problem above.
Perfectly working in myeclipse IDE, thankyou verymuch.
Pls help me! I got a error
“The requested resource is not available.”
How can i do?
got it thanku…
I also worked out the above example..and I got the warning like this in console
Nov 25, 2014 5:52:56 PM org.springframework.web.servlet.DispatcherServlet noHandlerFound
WARNING: No mapping found for HTTP request with URI [/HelloWorld/hello.html] in DispatcherServlet with name ‘spring’
and also 404 error..requested resource not found..
I also worked out the above example..and I got the warning like this in console
Nov 06, 2015 1:29:13 PM org.springframework.web.servlet.DispatcherServlet noHandlerFound
WARNING: No mapping found for HTTP request with URI [/springMvcDemo/hello.html] in DispatcherServlet with name ‘springdemo’
please give solution
not working for me. I tried all the things *.html to / , hello to /hello.But not working.404 error is coming
I am unable to run “HELLO WORLD” example. I followed the exact steps written here in Eclipse LUNA. I have the snapshots also. Temme how can I upload them here. On clicking “Say Hello” link it is giving HTTP STATUS 404.
Please help.
download the source code (Example) and compare the files with yours, most probably there will be a difference in the location of the files present.
am getting this below error.
HTTP Status 404 – /Spring3MVC/hello
The requested resource is not available.
Kindly reply soon.
Great Article. article ! I learned a lot from the insight – Does someone know if my assistant might be able to acquire a fillable IRS 1096 version to complete ?
Jsp file appears blank(white) to me. Tried this one and it worked. Thanks a lot mate, I’ve been struggling with this one for a week now, it has been hell.
Spring MVC Demo – Hodsfdsfdsfsdme Page
I am getting the following error
May 18, 2020 5:33:00 PM org.springframework.context.support.AbstractApplicationContext refresh
WARNING: Exception encountered during context initialization – cancelling refresh attempt: org.springframework.beans.factory.BeanCreationException: Error creating bean with name ‘bookServiceImpl’: Injection of autowired dependencies failed; nested exception is org.springframework.beans.factory.BeanCreationException: Could not autowire field: com.accenture.lkm.dao.BookDaoImpl com.accenture.lkm.service.BookServiceImpl.bookDaoImpl; nested exception is org.springframework.beans.factory.BeanCurrentlyInCreationException: Error creating bean with name ‘bookDaoImpl’: Bean with name ‘bookDaoImpl’ has been injected into other beans [bookDao] in its raw version as part of a circular reference, but has eventually been wrapped. This means that said other beans do not use the final version of the bean. This is often the result of over-eager type matching – consider using ‘getBeanNamesOfType’ with the ‘allowEagerInit’ flag turned off, for example.
May 18, 2020 5:33:00 PM org.springframework.orm.jpa.AbstractEntityManagerFactoryBean destroy
INFO: Closing JPA EntityManagerFactory for persistence unit ‘default’
May 18, 2020 5:33:00 PM org.springframework.web.context.ContextLoader initWebApplicationContext
SEVERE: Context initialization failed
org.springframework.beans.factory.BeanCreationException: Error creating bean with name ‘bookServiceImpl’: Injection of autowired dependencies failed; nested exception is org.springframework.beans.factory.BeanCreationException: Could not autowire field: com.accenture.lkm.dao.BookDaoImpl com.accenture.lkm.service.BookServiceImpl.bookDaoImpl; nested exception is org.springframework.beans.factory.BeanCurrentlyInCreationException: Error creating bean with name ‘bookDaoImpl’: Bean with name ‘bookDaoImpl’ has been injected into other beans [bookDao] in its raw version as part of a circular reference, but has eventually been wrapped. This means that said other beans do not use the final version of the bean. This is often the result of over-eager type matching – consider using ‘getBeanNamesOfType’ with the ‘allowEagerInit’ flag turned off, for example.
at org.springframework.beans.factory.annotation.AutowiredAnnotationBeanPostProcessor.postProcessPropertyValues(AutowiredAnnotationBeanPostProcessor.java:334)
at org.springframework.beans.factory.support.AbstractAutowireCapableBeanFactory.populateBean(AbstractAutowireCapableBeanFactory.java:1214)
at org.springframework.beans.factory.support.AbstractAutowireCapableBeanFactory.doCreateBean(AbstractAutowireCapableBeanFactory.java:543)
at org.springframework.beans.factory.support.AbstractAutowireCapableBeanFactory.createBean(AbstractAutowireCapableBeanFactory.java:482)
at org.springframework.beans.factory.support.AbstractBeanFactory$1.getObject(AbstractBeanFactory.java:306)
at org.springframework.beans.factory.support.DefaultSingletonBeanRegistry.getSingleton(DefaultSingletonBeanRegistry.java:230)
at org.springframework.beans.factory.support.AbstractBeanFactory.doGetBean(AbstractBeanFactory.java:302)
at org.springframework.beans.factory.support.AbstractBeanFactory.getBean(AbstractBeanFactory.java:197)
at org.springframework.beans.factory.support.DefaultListableBeanFactory.preInstantiateSingletons(DefaultListableBeanFactory.java:772)
at org.springframework.context.support.AbstractApplicationContext.finishBeanFactoryInitialization(AbstractApplicationContext.java:839)
at org.springframework.context.support.AbstractApplicationContext.refresh(AbstractApplicationContext.java:538)
at org.springframework.web.context.ContextLoader.configureAndRefreshWebApplicationContext(ContextLoader.java:446)
at org.springframework.web.context.ContextLoader.initWebApplicationContext(ContextLoader.java:328)
at org.springframework.web.context.ContextLoaderListener.contextInitialized(ContextLoaderListener.java:107)
at org.apache.catalina.core.StandardContext.listenerStart(StandardContext.java:4853)
at org.apache.catalina.core.StandardContext.startInternal(StandardContext.java:5314)
at org.apache.catalina.util.LifecycleBase.start(LifecycleBase.java:145)
at org.apache.catalina.core.ContainerBase$StartChild.call(ContainerBase.java:1408)
at org.apache.catalina.core.ContainerBase$StartChild.call(ContainerBase.java:1398)
at java.util.concurrent.FutureTask.run(Unknown Source)
at java.util.concurrent.ThreadPoolExecutor.runWorker(Unknown Source)
at java.util.concurrent.ThreadPoolExecutor$Worker.run(Unknown Source)
at java.lang.Thread.run(Unknown Source)
Caused by: org.springframework.beans.factory.BeanCreationException: Could not autowire field: com.accenture.lkm.dao.BookDaoImpl com.accenture.lkm.service.BookServiceImpl.bookDaoImpl; nested exception is org.springframework.beans.factory.BeanCurrentlyInCreationException: Error creating bean with name ‘bookDaoImpl’: Bean with name ‘bookDaoImpl’ has been injected into other beans [bookDao] in its raw version as part of a circular reference, but has eventually been wrapped. This means that said other beans do not use the final version of the bean. This is often the result of over-eager type matching – consider using ‘getBeanNamesOfType’ with the ‘allowEagerInit’ flag turned off, for example.
at org.springframework.beans.factory.annotation.AutowiredAnnotationBeanPostProcessor$AutowiredFieldElement.inject(AutowiredAnnotationBeanPostProcessor.java:573)
at org.springframework.beans.factory.annotation.InjectionMetadata.inject(InjectionMetadata.java:88)
at org.springframework.beans.factory.annotation.AutowiredAnnotationBeanPostProcessor.postProcessPropertyValues(AutowiredAnnotationBeanPostProcessor.java:331)
… 22 more
Caused by: org.springframework.beans.factory.BeanCurrentlyInCreationException: Error creating bean with name ‘bookDaoImpl’: Bean with name ‘bookDaoImpl’ has been injected into other beans [bookDao] in its raw version as part of a circular reference, but has eventually been wrapped. This means that said other beans do not use the final version of the bean. This is often the result of over-eager type matching – consider using ‘getBeanNamesOfType’ with the ‘allowEagerInit’ flag turned off, for example.
at org.springframework.beans.factory.support.AbstractAutowireCapableBeanFactory.doCreateBean(AbstractAutowireCapableBeanFactory.java:574)
at org.springframework.beans.factory.support.AbstractAutowireCapableBeanFactory.createBean(AbstractAutowireCapableBeanFactory.java:482)
at org.springframework.beans.factory.support.AbstractBeanFactory$1.getObject(AbstractBeanFactory.java:306)
at org.springframework.beans.factory.support.DefaultSingletonBeanRegistry.getSingleton(DefaultSingletonBeanRegistry.java:230)
at org.springframework.beans.factory.support.AbstractBeanFactory.doGetBean(AbstractBeanFactory.java:302)
at org.springframework.beans.factory.support.AbstractBeanFactory.getBean(AbstractBeanFactory.java:197)
at org.springframework.beans.factory.support.DefaultListableBeanFactory.findAutowireCandidates(DefaultListableBeanFactory.java:1192)
at org.springframework.beans.factory.support.DefaultListableBeanFactory.doResolveDependency(DefaultListableBeanFactory.java:1116)
at org.springframework.beans.factory.support.DefaultListableBeanFactory.resolveDependency(DefaultListableBeanFactory.java:1014)
at org.springframework.beans.factory.annotation.AutowiredAnnotationBeanPostProcessor$AutowiredFieldElement.inject(AutowiredAnnotationBeanPostProcessor.java:545)
… 24 more
May 18, 2020 5:33:00 PM org.apache.catalina.core.StandardContext listenerStart
SEVERE: Exception sending context initialized event to listener instance of class org.springframework.web.context.ContextLoaderListener
org.springframework.beans.factory.BeanCreationException: Error creating bean with name ‘bookServiceImpl’: Injection of autowired dependencies failed; nested exception is org.springframework.beans.factory.BeanCreationException: Could not autowire field: com.accenture.lkm.dao.BookDaoImpl com.accenture.lkm.service.BookServiceImpl.bookDaoImpl; nested exception is org.springframework.beans.factory.BeanCurrentlyInCreationException: Error creating bean with name ‘bookDaoImpl’: Bean with name ‘bookDaoImpl’ has been injected into other beans [bookDao] in its raw version as part of a circular reference, but has eventually been wrapped. This means that said other beans do not use the final version of the bean. This is often the result of over-eager type matching – consider using ‘getBeanNamesOfType’ with the ‘allowEagerInit’ flag turned off, for example.
at org.springframework.beans.factory.annotation.AutowiredAnnotationBeanPostProcessor.postProcessPropertyValues(AutowiredAnnotationBeanPostProcessor.java:334)
at org.springframework.beans.factory.support.AbstractAutowireCapableBeanFactory.populateBean(AbstractAutowireCapableBeanFactory.java:1214)
at org.springframework.beans.factory.support.AbstractAutowireCapableBeanFactory.doCreateBean(AbstractAutowireCapableBeanFactory.java:543)
at org.springframework.beans.factory.support.AbstractAutowireCapableBeanFactory.createBean(AbstractAutowireCapableBeanFactory.java:482)
at org.springframework.beans.factory.support.AbstractBeanFactory$1.getObject(AbstractBeanFactory.java:306)
at org.springframework.beans.factory.support.DefaultSingletonBeanRegistry.getSingleton(DefaultSingletonBeanRegistry.java:230)
at org.springframework.beans.factory.support.AbstractBeanFactory.doGetBean(AbstractBeanFactory.java:302)
at org.springframework.beans.factory.support.AbstractBeanFactory.getBean(AbstractBeanFactory.java:197)
at org.springframework.beans.factory.support.DefaultListableBeanFactory.preInstantiateSingletons(DefaultListableBeanFactory.java:772)
at org.springframework.context.support.AbstractApplicationContext.finishBeanFactoryInitialization(AbstractApplicationContext.java:839)
at org.springframework.context.support.AbstractApplicationContext.refresh(AbstractApplicationContext.java:538)
at org.springframework.web.context.ContextLoader.configureAndRefreshWebApplicationContext(ContextLoader.java:446)
at org.springframework.web.context.ContextLoader.initWebApplicationContext(ContextLoader.java:328)
at org.springframework.web.context.ContextLoaderListener.contextInitialized(ContextLoaderListener.java:107)
at org.apache.catalina.core.StandardContext.listenerStart(StandardContext.java:4853)
at org.apache.catalina.core.StandardContext.startInternal(StandardContext.java:5314)
at org.apache.catalina.util.LifecycleBase.start(LifecycleBase.java:145)
at org.apache.catalina.core.ContainerBase$StartChild.call(ContainerBase.java:1408)
at org.apache.catalina.core.ContainerBase$StartChild.call(ContainerBase.java:1398)
at java.util.concurrent.FutureTask.run(Unknown Source)
at java.util.concurrent.ThreadPoolExecutor.runWorker(Unknown Source)
at java.util.concurrent.ThreadPoolExecutor$Worker.run(Unknown Source)
at java.lang.Thread.run(Unknown Source)
Caused by: org.springframework.beans.factory.BeanCreationException: Could not autowire field: com.accenture.lkm.dao.BookDaoImpl com.accenture.lkm.service.BookServiceImpl.bookDaoImpl; nested exception is org.springframework.beans.factory.BeanCurrentlyInCreationException: Error creating bean with name ‘bookDaoImpl’: Bean with name ‘bookDaoImpl’ has been injected into other beans [bookDao] in its raw version as part of a circular reference, but has eventually been wrapped. This means that said other beans do not use the final version of the bean. This is often the result of over-eager type matching – consider using ‘getBeanNamesOfType’ with the ‘allowEagerInit’ flag turned off, for example.
at org.springframework.beans.factory.annotation.AutowiredAnnotationBeanPostProcessor$AutowiredFieldElement.inject(AutowiredAnnotationBeanPostProcessor.java:573)
at org.springframework.beans.factory.annotation.InjectionMetadata.inject(InjectionMetadata.java:88)
at org.springframework.beans.factory.annotation.AutowiredAnnotationBeanPostProcessor.postProcessPropertyValues(AutowiredAnnotationBeanPostProcessor.java:331)
… 22 more
Caused by: org.springframework.beans.factory.BeanCurrentlyInCreationException: Error creating bean with name ‘bookDaoImpl’: Bean with name ‘bookDaoImpl’ has been injected into other beans [bookDao] in its raw version as part of a circular reference, but has eventually been wrapped. This means that said other beans do not use the final version of the bean. This is often the result of over-eager type matching – consider using ‘getBeanNamesOfType’ with the ‘allowEagerInit’ flag turned off, for example.
at org.springframework.beans.factory.support.AbstractAutowireCapableBeanFactory.doCreateBean(AbstractAutowireCapableBeanFactory.java:574)
at org.springframework.beans.factory.support.AbstractAutowireCapableBeanFactory.createBean(AbstractAutowireCapableBeanFactory.java:482)
at org.springframework.beans.factory.support.AbstractBeanFactory$1.getObject(AbstractBeanFactory.java:306)
at org.springframework.beans.factory.support.DefaultSingletonBeanRegistry.getSingleton(DefaultSingletonBeanRegistry.java:230)
at org.springframework.beans.factory.support.AbstractBeanFactory.doGetBean(AbstractBeanFactory.java:302)
at org.springframework.beans.factory.support.AbstractBeanFactory.getBean(AbstractBeanFactory.java:197)
at org.springframework.beans.factory.support.DefaultListableBeanFactory.findAutowireCandidates(DefaultListableBeanFactory.java:1192)
at org.springframework.beans.factory.support.DefaultListableBeanFactory.doResolveDependency(DefaultListableBeanFactory.java:1116)
at org.springframework.beans.factory.support.DefaultListableBeanFactory.resolveDependency(DefaultListableBeanFactory.java:1014)
at org.springframework.beans.factory.annotation.AutowiredAnnotationBeanPostProcessor$AutowiredFieldElement.inject(AutowiredAnnotationBeanPostProcessor.java:545)
… 24 more
May 18, 2020 5:33:00 PM org.apache.catalina.core.StandardContext startInternal
SEVERE: One or more listeners failed to start. Full details will be found in the appropriate container log file
May 18, 2020 5:33:00 PM org.apache.catalina.core.StandardContext startInternal
SEVERE: Context [/Webproject] startup failed due to previous errors
May 18, 2020 5:33:00 PM org.apache.catalina.core.ApplicationContext log
INFO: Closing Spring root WebApplicationContext
May 18, 2020 5:33:00 PM org.apache.catalina.loader.WebappClassLoaderBase clearReferencesJdbc
WARNING: The web application [Webproject] registered the JDBC driver [com.mysql.jdbc.Driver] but failed to unregister it when the web application was stopped. To prevent a memory leak, the JDBC Driver has been forcibly unregistered.
May 18, 2020 5:33:00 PM org.apache.catalina.loader.WebappClassLoaderBase clearReferencesThreads
WARNING: The web application [Webproject] appears to have started a thread named [Abandoned connection cleanup thread] but has failed to stop it. This is very likely to create a memory leak. Stack trace of thread:
java.lang.Object.wait(Native Method)
java.lang.ref.ReferenceQueue.remove(Unknown Source)
com.mysql.jdbc.AbandonedConnectionCleanupThread.run(AbandonedConnectionCleanupThread.java:41)
May 18, 2020 5:33:00 PM org.apache.coyote.AbstractProtocol start
INFO: Starting ProtocolHandler [“http-nio-8080”]
May 18, 2020 5:33:00 PM org.apache.coyote.AbstractProtocol start
INFO: Starting ProtocolHandler [“ajp-nio-8009”]
May 18, 2020 5:33:00 PM org.apache.catalina.startup.Catalina start
INFO: Server startup in 9024 ms