Tomcat is a developers choice container. The most popular and loved Java container that everyone loves because of its simplicity and speed. This can be attributed to the ease of installation and configuration while running a tomcat server. Once the server is installed, it is like piece of cake running it through Eclipse or as a windows service.
Wouldn’t it be great to use tomcat without installing tomcat all together? This is exactly what you can achieve thanks to Maven. Maven has a wonderful plugin tomcat7-maven-plugin that we can use to embed tomcat within our Java web application. The idea is to create standalone web project that can start tomcat server and run on its own. All we need to do is the add following maven plugin in your pom.xml plugins list.
<plugin>
   <groupId>org.apache.tomcat.maven</groupId>
   <artifactId>tomcat7-maven-plugin</artifactId>
   <version>2.2</version>
</plugin>Code language: HTML, XML (xml)
And once this is done all we have to do is to clean build the project using maven.
Code language: Bash (bash)mvn clean install
And then running maven tomcat7:run goal which will download the dependencies and trigger the tomcat7-maven-plugin.
Code language: Bash (bash)mvn tomcat7:run
And that’s it. Once we fire this tomcat7:run goal, maven will start its magic. First all related dependencies will be downloaded, the webapp will be compiled and packaged and then tomcat7 maven plugin will deploy the webapp and start the embedded server.
You will have something similar to following.
[INFO] Scanning for projects...
[INFO]
[INFO] ------------------------------------------------------------------------
[INFO] Building HelloWorld Maven Webapp 0.0.1-SNAPSHOT
[INFO] ------------------------------------------------------------------------
[INFO]
[INFO] >>> tomcat7-maven-plugin:2.2:run (default-cli) > process-classes @ HelloWorld >>>
[INFO]
[INFO] --- maven-resources-plugin:2.6:resources (default-resources) @ HelloWorld ---
[INFO] Copying 0 resource
[INFO]
[INFO] --- maven-compiler-plugin:2.3.2:compile (default-compile) @ HelloWorld ---
[INFO] Nothing to compile - all classes are up to date
[INFO]
[INFO] <<< tomcat7-maven-plugin:2.2:run (default-cli) < process-classes @ HelloWorld <<<
[INFO]
[INFO] --- tomcat7-maven-plugin:2.2:run (default-cli) @ HelloWorld ---
[INFO] Running war on http://localhost:8080/HelloWorld
[INFO] Using existing Tomcat server configuration at C:\workspace\test\HelloWorld\target\tomcat
[INFO] create webapp with contextPath: /HelloWorld
Jun 15, 2016 3:10:40 PM org.apache.coyote.AbstractProtocol init
INFO: Initializing ProtocolHandler ["http-bio-8080"]
Jun 15, 2016 3:10:40 PM org.apache.catalina.core.StandardService startInternal
INFO: Starting service Tomcat
Jun 15, 2016 3:10:40 PM org.apache.catalina.core.StandardEngine startInternal
INFO: Starting Servlet Engine: Apache Tomcat/7.0.47
Jun 15, 2016 3:10:52 PM org.apache.coyote.AbstractProtocol start
INFO: Starting ProtocolHandler ["http-bio-8080"]
Code language: Bash (bash)
And then just open your web applications link http://localhost:8080/ (port 9090 if you have copied pom.xml from end of the tutorial which has different port number) in your favorite browser.
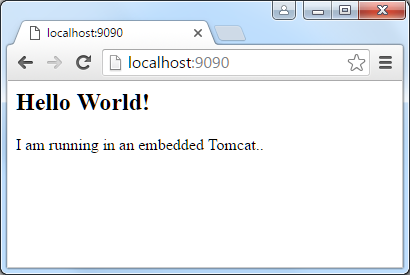
Change the Port number
By default the embedded tomcat will try to initialise at port 8080. We can change this by passing port number in configuration.
Using different context path
Also, by default the web context for the application will be our maven projects artifact id. We can change the path or web context by setting new path in configuration.
<plugin>
   <groupId>org.apache.tomcat.maven</groupId>
   <artifactId>tomcat7-maven-plugin</artifactId>
   <version>2.2</version>
   <configuration>
      <path>/</path>
      <contextReloadable>true</contextReloadable>
      <port>9090</port>
   </configuration>
 </plugin>Code language: HTML, XML (xml)
Following is the sample pom.xml for reference.
pom.xml
<project xmlns="http://maven.apache.org/POM/4.0.0" xmlns:xsi="http://www.w3.org/2001/XMLSchema-instance"
	xsi:schemaLocation="http://maven.apache.org/POM/4.0.0 http://maven.apache.org/maven-v4_0_0.xsd">
	<modelVersion>4.0.0</modelVersion>
	<groupId>net.viralpatel.maven</groupId>
	<artifactId>HelloWorld</artifactId>
	<packaging>war</packaging>
	<version>0.0.1-SNAPSHOT</version>
	<name>HelloWorld Maven Webapp</name>
	<url>http://maven.apache.org</url>
	<properties>
		<java-version>1.7</java-version>
	</properties>
	<dependencies>
		<dependency>
			<groupId>javax.servlet</groupId>
			<artifactId>javax.servlet-api</artifactId>
			<version>3.0.1</version>
			<scope>provided</scope>
		</dependency>
		<dependency>
			<groupId>javax.servlet</groupId>
			<artifactId>jstl</artifactId>
			<version>1.2</version>
		</dependency>
	</dependencies>
	<build>
		<finalName>HelloWorld</finalName>
		<pluginManagement>
			<plugins>
				<plugin>
					<groupId>org.apache.tomcat.maven</groupId>
					<artifactId>tomcat7-maven-plugin</artifactId>
					<version>2.2</version>
					<configuration>
						<port>9090</port>
						<path>/</path>
					</configuration>
				</plugin>
				<plugin>
					<groupId>org.apache.maven.plugins</groupId>
					<artifactId>maven-compiler-plugin</artifactId>
					<version>2.3.2</version>
					<configuration>
						<source>${java-version}</source>
						<target>${java-version}</target>
					</configuration>
				</plugin>
				<plugin>
					<groupId>org.apache.maven.plugins</groupId>
					<artifactId>maven-war-plugin</artifactId>
					<version>2.4</version>
					<configuration>
						<warSourceDirectory>src/main/webapp</warSourceDirectory>
						<warName>helloworld</warName>
						<failOnMissingWebXml>false</failOnMissingWebXml>
					</configuration>
				</plugin>
			</plugins>
		</pluginManagement>
	</build>
</project>Code language: HTML, XML (xml)

Thank you for sharing its very good.
Wow. That is so elegant and logical and clearly explained. Keep it up! I follow up your blog for future post.
I followed the same, after running mvn tomcat7:run i got the screen as shown in the example. But when i try to run in browser i’m getting the following message. “This site can’t be reached
localhost refused to connect.” Please let me know what might be the issue here.
Could not run the project
Description The origin server did not find a current representation for the target resource or is not willing to disclose that one exists.
In pom.xml you configured to 9090 port. After that you write that we should go to 8080
Hi Mikhail, Thanks for the comment. There was some confusion in the port number. Since the step to open in browser is before changing the port, it still referred to 8080. I have added a comment around http://localhost:8008 to remove the ambiguity.
Hi
Good post. How can you use tomcat 8 or 9 with this plugin?