Welcome to Part-4 of the 7-part series where we will go through different aspects for Struts2 Framework with some useful examples. In previous part we went through Struts2 Validation Framework. We saw how easy it is to integrate validation in your struts2 application. In this part we will discuss about Tiles Framework and its Integration with Struts2. We will add Tiles support to our HelloWorld Struts application that we created in previous parts. I strongly recommend you to go through previous articles and download the source code of our sample application. [sc:Struts2_Tutorials]


 We will define the template for our webapplication in a JSP file called BaseLayout.jsp. This template will contain different segments of web page (Header, Footer, Menu etc). Create 4 new JSP files BaseLayout.jsp, Header.jsp, Menu.jsp and Footer.jsp and copy following content in each of them. BaseLayout.jsp
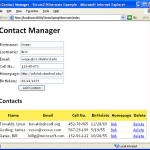
 Customer Page with Tiles
  Customer Success Page with Tiles
Introduction to Tiles 2
Nowadays, website are generally divided into pieces of reusable template that are being rendered among different web pages. For example a site containing header, footer, menu etc. This items remains same through out the website and give it a common look and feel. It is very difficult to hard code this in each and every webpage and if later a change is needed than all the pages needs to be modified. Hence we use templatization mechanism. We create a common Header, Footer, Menu page and include this in each page. Tiles Plugin allow both templating and componentization. In fact, both mechanisms are similar: you define parts of page (a “Tile”) that you assemble to build another part or a full page. A part can take parameters, allowing dynamic content, and can be seen as a method in JAVA language. Tiles is a templating system used to maintain a consistent look and feel across all the web pages of a web application. It increase the reusability of template and reduce code duplication. A common layout of website is defined in a central configuration file and this layout can be extended across all the webpages of the web application.Our Application Layout
Our goal is to add Header, Footer and Menu to our StrutsHelloWorld application. Following will be the layout of the same.
Required JAR files
In order to add Tiles support to our Struts2 application, we will need few jar files. Following is the list of JARs in our example. Add these JARs in WEB-INF/lib folder.
Configuring Tiles in web.xml
To configure Tiles, an entry for listener has to be made in web.xml. Open the web.xml from WEB-INF folder and add following code into it.<listener>
<listener-class>
org.apache.struts2.tiles.StrutsTilesListener
</listener-class>
</listener>
<context-param>
<param-name>tilesDefinitions</param-name>
<param-value>/WEB-INF/tiles.xml</param-value>
</context-param>
Code language: HTML, XML (xml)/WEB-INF/tiles.xml is passed as argument. This file contains the Tiles definition for our web application. Create a file tiles.xml in WEB-INF folder and copy following code into it. 
<?xml version="1.0" encoding="UTF-8" ?>

<!DOCTYPE tiles-definitions PUBLIC
       "-//Apache Software Foundation//DTD Tiles Configuration 2.0//EN"
       "http://tiles.apache.org/dtds/tiles-config_2_0.dtd">
<tiles-definitions>
	<definition name="baseLayout" template="/BaseLayout.jsp">
		<put-attribute name="title" value="" />
		<put-attribute name="header" value="/Header.jsp" />
		<put-attribute name="menu" value="/Menu.jsp" />
		<put-attribute name="body" value="" />
		<put-attribute name="footer" value="/Footer.jsp" />
	</definition>
	<definition name="/welcome.tiles" extends="baseLayout">
		<put-attribute name="title" value="Welcome" />
		<put-attribute name="body" value="/Welcome.jsp" />
	</definition>
	<definition name="/customer.tiles" extends="baseLayout">
		<put-attribute name="title" value="Customer Form" />
		<put-attribute name="body" value="/Customer.jsp" />
	</definition>
	<definition name="/customer.success.tiles" extends="baseLayout">
		<put-attribute name="title" value="Customer Added" />
		<put-attribute name="body" value="/SuccessCustomer.jsp" />
	</definition>
</tiles-definitions>
Code language: HTML, XML (xml)Creating JSPs
 We will define the template for our webapplication in a JSP file called BaseLayout.jsp. This template will contain different segments of web page (Header, Footer, Menu etc). Create 4 new JSP files BaseLayout.jsp, Header.jsp, Menu.jsp and Footer.jsp and copy following content in each of them. BaseLayout.jsp
<%@ taglib uri="http://tiles.apache.org/tags-tiles" prefix="tiles"%>
<!DOCTYPE HTML PUBLIC "-//W3C//DTD HTML 4.01 Transitional//EN"
"http://www.w3.org/TR/html4/loose.dtd">
<html>
<head>
<meta http-equiv="Content-Type" content="text/html; charset=UTF-8">
<title><tiles:insertAttribute name="title" ignore="true" /></title>
</head>
<body>
<table border="1" cellpadding="2" cellspacing="2" align="center">
	<tr>
		<td height="30" colspan="2"><tiles:insertAttribute name="header" />
		</td>
	</tr>
	<tr>
		<td height="250"><tiles:insertAttribute name="menu" /></td>
		<td width="350"><tiles:insertAttribute name="body" /></td>
	</tr>
	<tr>
		<td height="30" colspan="2"><tiles:insertAttribute name="footer" />
		</td>
	</tr>
</table>
</body>
</html>
Code language: HTML, XML (xml)<%@ page contentType="text/html; charset=UTF-8"%>
<%@ taglib prefix="s" uri="/struts-tags"%>
<h2>Struts2 Example - ViralPatel.net</h2>
Code language: HTML, XML (xml)<%@ page contentType="text/html; charset=UTF-8"%>
<%@ taglib prefix="s" uri="/struts-tags"%>
<s:a href="customer-form">Customer</s:a>
Code language: HTML, XML (xml)<%@ page contentType="text/html; charset=UTF-8"%>
<%@ taglib prefix="s" uri="/struts-tags"%>
Copyright © ViralPatel.net
Code language: HTML, XML (xml)Modifications in Struts.xml
In struts.xml we defined result tag which maps a particular action with a JSP page. Now we will modify it and map the result with Tiles. Following will be the content of struts.xml file.<?xml version="1.0" encoding="UTF-8" ?>
<!DOCTYPE struts PUBLIC
"-//Apache Software Foundation//DTD Struts Configuration 2.0//EN"
"http://struts.apache.org/dtds/struts-2.0.dtd">
<struts>
<constant name="struts.enable.DynamicMethodInvocation"
value="false" />
<constant name="struts.devMode" value="false" />
<constant name="struts.custom.i18n.resources"
value="ApplicationResources" />
<package name="default" extends="struts-default" namespace="/">
<result-types>
<result-type name="tiles"
class="org.apache.struts2.views.tiles.TilesResult" />
</result-types>
<action name="login"
class="net.viralpatel.struts2.LoginAction">
<result name="success" type="tiles">/welcome.tiles</result>
<result name="error">Login.jsp</result>
</action>
<action name="customer"
class="net.viralpatel.struts2.CustomerAction">
<result name="success" type="tiles">/customer.success.tiles</result>
<result name="input" type="tiles">/customer.tiles</result>
</action>
<action name="customer-form">
<result name="success" type="tiles">/customer.tiles</result>
</action>
</package>
</struts>
Code language: HTML, XML (xml)<result> tag for different actions. Also note that we have define a new action customer-form. This is just an empty declaration to redirect user to Customer form page when she clicks Customer link from menu.That’s All Folks
Compile and Execute the application in Eclipse and see that the header, menu and footer are properly applied. Welcome Page with Tiles Customer Page with Tiles
  Customer Success Page with Tiles

Congratulations on this tutorial, I would like to make two comments:
1) I downloaded the latest version of Struts2 and comes with the library “struts2-core-2.1.8.1.jar”. With this library do not work the examples. You have to install the versions “struts2-core-2.0.14.jar” you include the link in part 1 of tutorial that really works well. I have not tested with the version “struts2-core-2.1.6.jar”.
2) I have a problem with Part 4 of the tutorial. I do not understand that serving the “customer-form” as well when you click on the link “customer” an error “HTTP Status 404 – / StrutsHelloWorld / Customer-form” ocurs. I have reviewed the signs of the tutorial and I can not see my mistake.
Thanks in advance
@All: To fix error 404, please correct file Menu.jsp. Add href = “customer-form.action”.
Customer
Hi Viral Patel ,
Thanks for the tutorial,
It is very helpful ,
Iam having below queries on Tiles
Is it possible to use struts tiles like Iframe/Div ?
ie. can i call different URLs in header and footer in above example?
Kindly reply,
Hi Viral,
Nice tutorials ..!
But in the Tiles tutorial, I’m facing the same problem, which was mentioned above by Pedro.
error:
———————————————-
HTTP Status 404 – /mystuff/customer-form
type Status report
message /mystuff/customer-form
description The requested resource (/mystuff/customer-form) is not available.
———————————————-
And, I’m are eagerly waiting for your “Struts 2 Ajax Tutorial with Example”
Kindly reply viral
Hey Viral
Thanks for the tutorials. Though I was stuck in running the hello world but I managed to get it through. Also is there any forums or any thing in which I can ask you about some concepts & meanings of the syntax?? You understand what I am saying??
Regards
Sadia
Hi Viral,
great tutorial! Thank you very much for your work! BTW, i had to modyfiy the Customer.jsp and Welcome.jsp Files to get them displayed correctly with Tiles – if BaseLayout.jsp contains the complete XHTML framework, the “content tiles” should only contain the content of the body tags, i suppose? But maybe this is due to my usage of a css/div-based layout? In addition, i had to change the “add customer” link in Welcome.jsp so it points to customer-form instead of Customer.jsp – otherwise i loose my Tiles-Layout.
Regards
florian
I am having problems. when I click on the customer or add customer button then it shows the customer.action without the tiles & not in the way its show in the picture. then when I press add customer then it shows in the body tile???what could be the problem?
I got the error
———————————————-
HTTP Status 404 – /mystuff/customer-form
type Status report
message /mystuff/customer-form
description The requested resource (/mystuff/customer-form) is not available.
———————————————-
Can anyone share how to fix it?
NK
Hi,
This is a nice tutorial, I appreciate your help.
It’s working fine for me, just don’t know why it’s not taking the whole page, I only see it as a small square in the top center of the page.
thanks
For those that are still trying to fix the 404 on customer-form
in Welcome.jsp and Menu.jsp the href should now point to “customer-form.action” not “customer-form”
Hope this helps
I have downloaded the example and added the Jar, but when i run it on server, it is giving error “The requested resource (/StrutsHelloWorld/) is not available.”, I dont know where i am missing, can u please guide me as i understand everything but i want to chek it out in practical . Thanks in advance,
Good article. Very helpful
Hi. Nice job on the tutorial. I’ve been doing well up until this point. I’ve completed this tutorial but when I try to run I get the following error. Please help. Thanks in advance.
May 21, 2010 3:00:45 PM org.apache.catalina.core.StandardWrapperValve invoke
SEVERE: Servlet.service() for servlet jsp threw exception
java.lang.NoSuchMethodError: com.opensymphony.xwork2.util.ValueStack.findValue(Ljava/lang/String;Z)Ljava/lang/Object;
at org.apache.struts2.components.Component.findValue(Component.java:255)
at org.apache.struts2.components.ActionError.evaluateExtraParams(ActionError.java:75)
at org.apache.struts2.components.UIBean.evaluateParams(UIBean.java:856)
at org.apache.struts2.components.UIBean.end(UIBean.java:510)
at org.apache.struts2.views.jsp.ComponentTagSupport.doEndTag(ComponentTagSupport.java:42)
at org.apache.jsp.Login_jsp._jspx_meth_s_005factionerror_005f0(Login_jsp.java:109)
at org.apache.jsp.Login_jsp._jspService(Login_jsp.java:79)
at org.apache.jasper.runtime.HttpJspBase.service(HttpJspBase.java:70)
at javax.servlet.http.HttpServlet.service(HttpServlet.java:717)
at org.apache.jasper.servlet.JspServletWrapper.service(JspServletWrapper.java:377)
at org.apache.jasper.servlet.JspServlet.serviceJspFile(JspServlet.java:313)
at org.apache.jasper.servlet.JspServlet.service(JspServlet.java:260)
at javax.servlet.http.HttpServlet.service(HttpServlet.java:717)
at org.apache.catalina.core.ApplicationFilterChain.internalDoFilter(ApplicationFilterChain.java:290)
at org.apache.catalina.core.ApplicationFilterChain.doFilter(ApplicationFilterChain.java:206)
at org.apache.struts2.dispatcher.FilterDispatcher.doFilter(FilterDispatcher.java:389)
at org.apache.catalina.core.ApplicationFilterChain.internalDoFilter(ApplicationFilterChain.java:235)
at org.apache.catalina.core.ApplicationFilterChain.doFilter(ApplicationFilterChain.java:206)
at org.apache.catalina.core.StandardWrapperValve.invoke(StandardWrapperValve.java:233)
at org.apache.catalina.core.StandardContextValve.invoke(StandardContextValve.java:191)
at org.apache.catalina.core.StandardHostValve.invoke(StandardHostValve.java:127)
at org.apache.catalina.valves.ErrorReportValve.invoke(ErrorReportValve.java:102)
at org.apache.catalina.core.StandardEngineValve.invoke(StandardEngineValve.java:109)
at org.apache.catalina.connector.CoyoteAdapter.service(CoyoteAdapter.java:298)
at org.apache.coyote.http11.Http11Processor.process(Http11Processor.java:852)
at org.apache.coyote.http11.Http11Protocol$Http11ConnectionHandler.process(Http11Protocol.java:588)
at org.apache.tomcat.util.net.JIoEndpoint$Worker.run(JIoEndpoint.java:489)
at java.lang.Thread.run(Thread.java:619)
May 21, 2010 3:01:03 PM org.apache.catalina.core.StandardWrapperValve invoke
SEVERE: Servlet.service() for servlet jsp threw exception
java.lang.NoSuchMethodError: com.opensymphony.xwork2.util.ValueStack.findValue(Ljava/lang/String;Z)Ljava/lang/Object;
at org.apache.struts2.components.Component.findValue(Component.java:255)
at org.apache.struts2.components.ActionError.evaluateExtraParams(ActionError.java:75)
at org.apache.struts2.components.UIBean.evaluateParams(UIBean.java:856)
at org.apache.struts2.components.UIBean.end(UIBean.java:510)
at org.apache.struts2.views.jsp.ComponentTagSupport.doEndTag(ComponentTagSupport.java:42)
at org.apache.jsp.Login_jsp._jspx_meth_s_005factionerror_005f0(Login_jsp.java:109)
at org.apache.jsp.Login_jsp._jspService(Login_jsp.java:79)
at org.apache.jasper.runtime.HttpJspBase.service(HttpJspBase.java:70)
at javax.servlet.http.HttpServlet.service(HttpServlet.java:717)
at org.apache.jasper.servlet.JspServletWrapper.service(JspServletWrapper.java:377)
at org.apache.jasper.servlet.JspServlet.serviceJspFile(JspServlet.java:313)
at org.apache.jasper.servlet.JspServlet.service(JspServlet.java:260)
at javax.servlet.http.HttpServlet.service(HttpServlet.java:717)
at org.apache.catalina.core.ApplicationFilterChain.internalDoFilter(ApplicationFilterChain.java:290)
at org.apache.catalina.core.ApplicationFilterChain.doFilter(ApplicationFilterChain.java:206)
at org.apache.struts2.dispatcher.FilterDispatcher.doFilter(FilterDispatcher.java:389)
at org.apache.catalina.core.ApplicationFilterChain.internalDoFilter(ApplicationFilterChain.java:235)
at org.apache.catalina.core.ApplicationFilterChain.doFilter(ApplicationFilterChain.java:206)
at org.apache.catalina.core.StandardWrapperValve.invoke(StandardWrapperValve.java:233)
at org.apache.catalina.core.StandardContextValve.invoke(StandardContextValve.java:191)
at org.apache.catalina.core.StandardHostValve.invoke(StandardHostValve.java:127)
at org.apache.catalina.valves.ErrorReportValve.invoke(ErrorReportValve.java:102)
at org.apache.catalina.core.StandardEngineValve.invoke(StandardEngineValve.java:109)
at org.apache.catalina.connector.CoyoteAdapter.service(CoyoteAdapter.java:298)
at org.apache.coyote.http11.Http11Processor.process(Http11Processor.java:852)
at org.apache.coyote.http11.Http11Protocol$Http11ConnectionHandler.process(Http11Protocol.java:588)
at org.apache.tomcat.util.net.JIoEndpoint$Worker.run(JIoEndpoint.java:489)
at java.lang.Thread.run(Thread.java:619)
hi struts 2 tiles example is very good . But i want to remove the borders from the tiles and not scroll every time page has to fit for the window . How to do this one usig struts 2 tiles
Kindly suggest me
Thanks in advance
I am having problems. when I click on the customer or add customer button then it shows the customer.action without the tiles & not in the way its show in the picture. then when I press add customer then it shows in the body tile???what could be the problem?
Hi,
I have configured all the steps given in tutorial, Everthing works fine. but in console i seeing warnings i.e,
1. WARNING: Could not find property [org.apache.tiles.AttributeContext.STACK]
2. SEVERE: Could not find action or result
There is no Action mapped for namespace / and action name white. – [unknown location]
at com.opensymphony.xwork2.DefaultActionProxy.prepare(DefaultActionProxy.java:177)
Can any one help in sort out this issue, Thanks in advance
can i put tiles.xml on resources folder, instead of /WEB-INF/ on eclipse?
Why below configuration is required while use of tiles framework.
if I am setting this value to true my application is not working. Thanks in advance.
Viral,
Another great tutorial. Looking ahead, do you have any plans of creating a struts2-MySQL (using a properties file that encrypts the password) tutorial?
Thanks again for putting this series together,
David Jensen
@David – Thanks for the kind words. I am glad this helped you. Sure, I will try to write more on Struts2 / MySQL and encrypted passwords.
Change “customer-form” to customer-form.action for avoiding / StrutsHelloWorld / Customer-form” error.. hope this will help
Good Day!
First. this tutorial is great you have my thanks
Second.
I have the 404 in BaseLayout. jsp:
HTTP 404 – /StrutsExample/BaseLayout.jsp dont found
I change the menu: for
bur I still dont get it.
Can anyone help me?
Hi VIral,
Thanks the for the nice tutorial. In the tiles tutorial, when I click on the customer link on the welcome page, i get the following error. I tried to import the sample code from the site and still see the error. Any idea why?
HTTP Status 404 – /StrutsHelloWorld/customer-form
type Status report
message /StrutsHelloWorld/customer-form
description The requested resource (/StrutsHelloWorld/customer-form) is not available.
Hi Viral,
This is nice tutorial, but when I tried to run this example, it gives following error.
org.apache.jasper.JasperException: Unable to compile class for JSP:
An error occurred at line: 35 in the generated java file
The method getJspApplicationContext(ServletContext) is undefined for the type JspFactory
Stacktrace:
org.apache.jasper.compiler.DefaultErrorHandler.javacError(DefaultErrorHandler.java:92)
org.apache.jasper.compiler.ErrorDispatcher.javacError(ErrorDispatcher.java:330)
org.apache.jasper.compiler.JDTCompiler.generateClass(JDTCompiler.java:423)
org.apache.jasper.compiler.Compiler.compile(Compiler.java:317)
org.apache.jasper.compiler.Compiler.compile(Compiler.java:295)
org.apache.jasper.compiler.Compiler.compile(Compiler.java:282)
org.apache.jasper.JspCompilationContext.compile(JspCompilationContext.java:586)
org.apache.jasper.servlet.JspServletWrapper.service(JspServletWrapper.java:317)
org.apache.jasper.servlet.JspServlet.serviceJspFile(JspServlet.java:342)
org.apache.jasper.servlet.JspServlet.service(JspServlet.java:267)
javax.servlet.http.HttpServlet.service(HttpServlet.java:717)
org.apache.struts2.dispatcher.FilterDispatcher.doFilter(FilterDispatcher.java:413)
org.netbeans.modules.web.monitor.server.MonitorFilter.doFilter(MonitorFilter.java:390)
But, if I remove the jars and configurations for tiles, it runs smoothly.
Any idea… why it is happening…???
Thanks in advance..!!!
I’m getting the following Warning when activating the “Customer” link in the menu:
aug 15, 2011 4:54:18 PM com.opensymphony.xwork2.util.logging.commons.CommonsLogger warn
WARNING: No configuration found for the specified action: ‘customer.action’ in namespace: ‘/’. Form action defaulting to ‘action’ attribute’s literal value.
The same happens when I use the files provided at the end of this part of the tutorial.
I have searched google for an answer, but it didn’t turn up anything useful.
Any idea what might be wrong?
Using:
Eclipse Java EE, Indigo, Build id: 20110615-0604
apache-tomcat-7.0.19
jakarta-taglibs-standard-1.1.2
struts-2.2.3
It turned out the error was a typo on my part in the struts.xml file. *blush*
The config-browser, available with struts2, helped me a lot when viewing and resolving the namespace issues.
http://devtalks.blogspot.com/2009/10/struts2-config-browser-plugin.html
While running this application, got below exception
exception
javax.servlet.ServletException: org.apache.tiles.impl.CannotRenderException: ServletException including path ‘/BaseLayout.jsp’.
org.apache.struts2.dispatcher.Dispatcher.serviceAction(Dispatcher.java:515)
org.apache.struts2.dispatcher.FilterDispatcher.doFilter(FilterDispatcher.java:422)
To resolve this we have to update tiles jar files to version 2.2.0
Heya folks,
First of all, thank you for you excellent tutorial. Thank to you, I have saved tons of time and troubles.
I have just a question, maybe because im a newbie with all this stuff and I am not good at it, yet. Well: why should I put in the adress: http://……/customer in order to see the BaseLayout.jsp page? At the start, i tried to acces to this .jsp directly, and then I see that i needed to put just “customer”. By acceding to the BaseLayout.jsp directly I got some errors (404).
I have also “SEVERE: Error executing tag: Attribute ‘header’ not found.” at the start of Apache Tomcat. Maybe some suggestion with that?
Thank you.
Heya,
Thank you again for your great tutorial. Everything is going fine, but I ve some errors while starting Tomcat Server:
java.lang.NoClassDefFoundError: org/apache/tiles/web/startup/TilesListener
How it comes that. My web.xml and the others .xml config files seems be ok. Like that, Tomcat is unable to start /StrutsHelloWorld context, due to previous errors, and I need to put addresses manually like that.
Can you help me, please?
Thanks.
Hi José,
It seems that tomcat couldn’t find tiles-core-2.0.6.jar jar file in your web projects WEB-INF/lib directory. Download this jar file from here and put it in your project’s classpath.
Hello Viral,
Thank you for your fast reply. Well, i had tiles-core-2.2.2.jar instead tiles-core-2.0.6.jar, because with this last one, i had this other error:
Exception starting filter struts2
java.lang.NoClassDefFoundError: org/objectweb/asm/ClassVisitor
I’m really lost, because even if the application works putting manually the addresses, I am not able to start properly tomcat once and for all. Still taking errors since I started to use tiles on my project, and I cannot fix the problem. sigh
Thank you for your help.
Ok, I struggled a few hours to figure out why I got different errors. It looks like you have to have the exact same version of all those jars even for ongl-2.6.11.jar (ongl-3.0.jar does not work).
Hi,
when i am trying above tiles example, i am getting error like below
SEVERE: Error configuring application listener of class org.apache.struts2.tiles.StrutsTilesListener
java.lang.ClassNotFoundException: org.apache.struts2.tiles.StrutsTilesListener
at org.apache.catalina.loader.WebappClassLoader.loadClass(WebappClassLoader.java:1680)
SEVERE: Context [/HelloWorld] startup failed due to previous errors
Please help me.
advance thanks.
@SatyamReddy: The ClassNotFoundException occurs if required Struts jar files are not present in your project’s classpath. Please see if all required jar files are in your classpath.
I am getting a strange kind of error. If I include this listener class,
org.apache.struts2.tiles.StrutsTilesListener
be whatever it might be, I get a HTTP status 404 error. I wonder how people are able to get the output? I found this very similar type of discussion in other popular website, but I didn’t find any solution.
Please can anyone clarify it.
Then, after I removed that listener class, I get the welcome screen. But the moment, I give admin and admin123, I am getting a NullPointerException. The log is not anywhere useful I feel because it is not pointing to any part of the program. What I feel is that it is not getting mapped from struts.xml to tiles.xml file.
Please reply as soon as possible.
dear patel g,
im new in learning of struts so first Que. is that which version of struts is usefull in corporate ?
hi viral, m trying this tutorial but everytime when m copying the .jar fiels then that time the following error message displayed.
Incrementally deploying http://localhost:8084/demo1
Completed incremental distribution of http://localhost:8084/demo1
Incrementally redeploying http://localhost:8084/demo1
Deploy is in progress…
deploy?config=file%3A%2FC%3A%2FUsers%2FPOWER%2FAppData%2FLocal%2FTemp%2Fcontext48354.xml&path=/demo1
FAIL – Deployed application at context path /demo1 but context failed to start
C:\Users\POWER\Documents\NetBeansProjects\demo1\nbproject\build-impl.xml:580: The module has not been deployed.
BUILD FAILED (total time: 11 seconds)
but when m removing the jar files then it will run without any error. m also changed the jsr files but it will not working…..plz help me dear….m waiting…
hi
iam trying 2 run dis code bt facing prblms such
java.lang.NoClassDefFoundError: org/apache/catalina/startup/Bootstrap
Caused by: java.lang.ClassNotFoundException: org.apache.catalina.startup.Bootstrap
at java.net.URLClassLoader$1.run(Unknown Source)
at java.security.AccessController.doPrivileged(Native Method)
at java.net.URLClassLoader.findClass(Unknown Source)
at java.lang.ClassLoader.loadClass(Unknown Source)
at sun.misc.Launcher$AppClassLoader.loadClass(Unknown Source)
at java.lang.ClassLoader.loadClass(Unknown Source)
Exception in thread “main”
plz ny1 help me out
Hi Tanny, Check if Apache Tomcat Server’s runtime is added in your Project’s classpath. The missing class is part of Tomcat’s library. So you need to include that in your classpath.
I am getting below exception while running this tiles example :
I tried to find the root cause,but after searching google,i clould not find any help.
Am also getting same error. any clue please??
Thanks in advance!
Check weather u had in tiles.xml under tiles-definition and also check the value(Header.jsp here) of it which u have assigned, if it exist or not if value(Header.jsp here) is there than check its location is same as u are allocating in tiles.xml or not………
me too
Great tutorial. This is very helpful. To summarize changes
Change link in Welcome.jsp to:
Add Customer
Change link in Menu.jsp to:
Customer
Hi viral sir Thanks for this Nice tutorial
but i have a problem
error http:404 requested resources is not available….i checked all jar files.
and i tried all possible way but it still present…..could you help me….
any one guys can help me how to overcome this problem……i m waiting
Hi Viral,
thanks for the tutorial.
I am facing issues after logging in the application.When i click on the customer link it displays error .I have appended .action to customer-form. in Menu.jsp
Also dont we need to specify the action class for customer-form in struts.xml.
No result defined for action net.viralpatel.struts2.CustomerAction and result error – action – file:/E:/engr/project/.metadata/.plugins/org.eclipse.wst.server.core/tmp0/wtpwebapps/StrutsHelloWorld/WEB-INF/classes/struts.xml:34:50
com.opensymphony.xwork2.DefaultActionInvocation.executeResult(DefaultActionInvocation.java:350)
com.opensymphony.xwork2.DefaultActionInvocation.invoke(DefaultActionInvocation.java:253)
org.apache.struts2.impl.StrutsActionProxy.execute(StrutsActionProxy.java:50)
org.apache.struts2.dispatcher.Dispatcher.serviceAction(Dispatcher.java:504)
org.apache.struts2.dispatcher.FilterDispatcher.doFilter(FilterDispatcher.java:422)
org.apache.catalina.core.ApplicationFilterChain.internalDoFilter(ApplicationFilterChain.java:235)
org.apache.catalina.core.ApplicationFilterChain.doFilter(ApplicationFilterChain.java:206)
org.apache.catalina.core.StandardWrapperValve.invoke(StandardWrapperValve.java:228)
org.apache.catalina.core.StandardContextValve.invoke(StandardContextValve.java:175)
org.apache.catalina.core.StandardHostValve.invoke(StandardHostValve.java:128)
org.apache.catalina.valves.ErrorReportValve.invoke(ErrorReportValve.java:104)
org.apache.catalina.core.StandardEngineValve.invoke(StandardEngineValve.java:109)
org.apache.catalina.connector.CoyoteAdapter.service(CoyoteAdapter.java:216)
org.apache.coyote.http11.Http11Processor.process(Http11Processor.java:844)
org.apache.coyote.http11.Http11Protocol$Http11ConnectionHandler.process(Http11Protocol.java:634)
org.apache.tomcat.util.net.JIoEndpoint$Worker.run(JIoEndpoint.java:445)
java.lang.Thread.run(Thread.java:619)
Can u please guide me on this.
It’s nice.. but getting error.. plz update the example in 1.3.10 of struts version.
Thanks in Advance
Would there be a problem using higher versions of a jay file like ognl-3.0.4.jar instead of 2.6.11 that you have used?
I meant jar. Sorry
its really a wonderfull tutorial…..tnx folk….
Where can i get those all jar files..if you can make a link in the page,it will be be very helpful i feel..
Thank u.
but overall it is an excellent tutorial made handy with the screen shots..
Thank you very much. It is so great
Awesome tutorial thanx a lot Viral
Got the example to run but it displays the “Struts 2 – Login Application” page when it opens up, instead of the tiles as displayed in the demo. Any ideas what might be causing this?
when download the example in eclipse – am getting 404 error
hve uploaded all the required jar files.
Hi,
I have configured all the steps given in tutorial, Everthing works fine. but in console i seeing warnings i.e,
1. WARNING: Could not find property [org.apache.tiles.AttributeContext.STACK]
2. SEVERE: Could not find action or result
There is no Action mapped for namespace / and action name white. – [unknown location]
at com.opensymphony.xwork2.DefaultActionProxy.prepare(DefaultActionProxy.java:177)
Hello Viral,
Please help me for this message:
org.apache.tiles.impl.BasicTilesContainer render
ATTENTION: Unable to find the definition ‘/Welcome.tiles’
Kind regards
Hi Viral,
Thanks a lot for you..
Actually the tutorial is very helpful .
what ‘m facing is ,whenever i download the code and setup in the eclipse ,it s working fine.but if do setup by myself throwing an error like The requested resource () is not available.
please help me to resolve this issue.
Thanks in advance.
heyy frnd just check ur class name is correct according to ur package………..
i like your`document which you give me. thank you.
hi guys,this is zain i am devlp project, getting frustrated because of this ERROR can somebody help me…plz
Hi zain,
I am also facing the same issue.
if u got any solution please help me.
Thanks,
venkat
can i use tiles in MVC2 architecture????
pls rpl me…
This is great. u have made me more confident in this profession. Thanks.
HI,
Getting the following errors.
Please Help to resolve the issue.
Thanks
Venkat
Mar 21, 2013 12:41:52 PM org.apache.catalina.core.AprLifecycleListener init
INFO: The Apache Tomcat Native library which allows optimal performance in production environments was not found on the java.library.path: C:\Documents and Settings\Administrator\MyEclipse Professional\binary\com.sun.java.jdk.win32.x86_1.6.0.u43\bin;C:\Documents and Settings\Administrator\MyEclipse Professional\plugins\com.genuitec.eclipse.easie.tomcat.myeclipse_11.0.0.me201211151802\tomcat\bin
Mar 21, 2013 12:41:52 PM org.apache.coyote.http11.Http11Protocol init
INFO: Initializing Coyote HTTP/1.1 on http-8080
Mar 21, 2013 12:41:52 PM org.apache.catalina.startup.Catalina load
INFO: Initialization processed in 305 ms
Mar 21, 2013 12:41:52 PM org.apache.catalina.core.StandardService start
INFO: Starting service Catalina
Mar 21, 2013 12:41:52 PM org.apache.catalina.core.StandardEngine start
INFO: Starting Servlet Engine: Apache Tomcat/6.0.13
log4j:WARN No appenders could be found for logger (org.apache.tiles.impl.BasicTilesContainer).
log4j:WARN Please initialize the log4j system properly.
Mar 21, 2013 12:41:54 PM org.apache.catalina.core.StandardContext listenerStart
SEVERE: Exception sending context initialized event to listener instance of class org.apache.struts2.tiles.StrutsTilesListener
java.lang.NullPointerException
at org.apache.commons.digester.Digester.getXMLReader(Digester.java:1058)
at org.apache.commons.digester.Digester.parse(Digester.java:1887)
at org.apache.tiles.definition.digester.DigesterDefinitionsReader.read(DigesterDefinitionsReader.java:267)
at org.apache.tiles.definition.UrlDefinitionsFactory.readDefinitions(UrlDefinitionsFactory.java:286)
at org.apache.tiles.definition.UrlDefinitionsFactory.init(UrlDefinitionsFactory.java:130)
at org.apache.tiles.impl.BasicTilesContainer.initializeDefinitionsFactory(BasicTilesContainer.java:406)
at org.apache.tiles.impl.BasicTilesContainer.init(BasicTilesContainer.java:130)
at org.apache.tiles.factory.TilesContainerFactory.initializeContainer(TilesContainerFactory.java:232)
at org.apache.tiles.factory.TilesContainerFactory.createTilesContainer(TilesContainerFactory.java:198)
at org.apache.tiles.factory.TilesContainerFactory.createContainer(TilesContainerFactory.java:163)
at org.apache.tiles.web.startup.TilesListener.createContainer(TilesListener.java:90)
at org.apache.struts2.tiles.StrutsTilesListener.createContainer(StrutsTilesListener.java:68)
at org.apache.tiles.web.startup.TilesListener.contextInitialized(TilesListener.java:57)
at org.apache.catalina.core.StandardContext.listenerStart(StandardContext.java:3827)
at org.apache.catalina.core.StandardContext.start(StandardContext.java:4334)
at org.apache.catalina.core.ContainerBase.addChildInternal(ContainerBase.java:791)
at org.apache.catalina.core.ContainerBase.addChild(ContainerBase.java:771)
at org.apache.catalina.core.StandardHost.addChild(StandardHost.java:525)
at org.apache.catalina.startup.HostConfig.deployDirectory(HostConfig.java:920)
at org.apache.catalina.startup.HostConfig.deployDirectories(HostConfig.java:883)
at org.apache.catalina.startup.HostConfig.deployApps(HostConfig.java:492)
at org.apache.catalina.startup.HostConfig.start(HostConfig.java:1138)
at org.apache.catalina.startup.HostConfig.lifecycleEvent(HostConfig.java:311)
at org.apache.catalina.util.LifecycleSupport.fireLifecycleEvent(LifecycleSupport.java:117)
at org.apache.catalina.core.ContainerBase.start(ContainerBase.java:1053)
at org.apache.catalina.core.StandardHost.start(StandardHost.java:719)
at org.apache.catalina.core.ContainerBase.start(ContainerBase.java:1045)
at org.apache.catalina.core.StandardEngine.start(StandardEngine.java:443)
at org.apache.catalina.core.StandardService.start(StandardService.java:516)
at org.apache.catalina.core.StandardServer.start(StandardServer.java:710)
at org.apache.catalina.startup.Catalina.start(Catalina.java:566)
at sun.reflect.NativeMethodAccessorImpl.invoke0(Native Method)
at sun.reflect.NativeMethodAccessorImpl.invoke(NativeMethodAccessorImpl.java:39)
at sun.reflect.DelegatingMethodAccessorImpl.invoke(DelegatingMethodAccessorImpl.java:25)
at java.lang.reflect.Method.invoke(Method.java:597)
at org.apache.catalina.startup.Bootstrap.start(Bootstrap.java:288)
at org.apache.catalina.startup.Bootstrap.main(Bootstrap.java:413)
Mar 21, 2013 12:41:54 PM org.apache.catalina.core.StandardContext start
SEVERE: Error listenerStart
Mar 21, 2013 12:41:54 PM org.apache.catalina.core.StandardContext start
SEVERE: Context [/StrutsHelloWorld] startup failed due to previous errors
Mar 21, 2013 12:41:54 PM org.apache.coyote.http11.Http11Protocol start
INFO: Starting Coyote HTTP/1.1 on http-8080
Mar 21, 2013 12:41:54 PM org.apache.jk.common.ChannelSocket init
INFO: JK: ajp13 listening on /0.0.0.0:8009
Mar 21, 2013 12:41:55 PM org.apache.jk.server.JkMain start
INFO: Jk running ID=0 time=0/16 config=null
Mar 21, 2013 12:41:55 PM org.apache.catalina.startup.Catalina start
INFO: Server startup in 2316 ms
Hi Venkat,
Make sure all your tiles related jars are of same version and is matching with that of the version mentioned in tiles.xml ( i.e. “http://tiles.apache.org/dtds/tiles-config_.dtd”).
For Instance: tiles.xml containing “http://tiles.apache.org/dtds/tiles-config_2_0.dtd” should have following jars in the project library:
struts2-tiles-plugin-2.0.11.jar,
tiles-api.2.0.6.jar,
tiles-jsp-2.0.6.jar,
tiles-core-2.0.6.jar
Cheers :)
org.apache.tiles.TilesException: Attribute ‘header’ not found.
at org.apache.tiles.jsp.taglib.InsertAttributeTag.render(InsertAttributeTag.java:112)
at org.apache.tiles.jsp.taglib.RenderTagSupport.execute(RenderTagSupport.java:154)
at org.apache.tiles.jsp.taglib.RoleSecurityTagSupport.doEndTag(RoleSecurityTagSupport.java:75)
at org.apache.tiles.jsp.taglib.ContainerTagSupport.doEndTag(ContainerTagSupport.java:80)
at org.apache.jsp.BaseLayout_jsp._jspx_meth_tiles_005finsertAttribute_005f1(BaseLayout_jsp.java:145)
at org.apache.jsp.BaseLayout_jsp._jspService(BaseLayout_jsp.java:75)
at org.apache.jasper.runtime.HttpJspBase.service(HttpJspBase.java:70)
at javax.servlet.http.HttpServlet.service(HttpServlet.java:717)
at org.apache.jasper.servlet.JspServletWrapper.service(JspServletWrapper.java:388)
at org.apache.jasper.servlet.JspServlet.serviceJspFile(JspServlet.java:313)
at org.apache.jasper.servlet.JspServlet.service(JspServlet.java:260)
at javax.servlet.http.HttpServlet.service(HttpServlet.java:717)
at org.apache.catalina.core.ApplicationFilterChain.internalDoFilter(ApplicationFilterChain.java:290)
at org.apache.catalina.core.ApplicationFilterChain.doFilter(ApplicationFilterChain.java:206)
at org.apache.struts2.dispatcher.ng.filter.StrutsPrepareAndExecuteFilter.doFilter(StrutsPrepareAndExecuteFilter.java:88)
at org.apache.catalina.core.ApplicationFilterChain.internalDoFilter(ApplicationFilterChain.java:235)
at org.apache.catalina.core.ApplicationFilterChain.doFilter(ApplicationFilterChain.java:206)
at org.apache.catalina.core.StandardWrapperValve.invoke(StandardWrapperValve.java:233)
at org.apache.catalina.core.StandardContextValve.invoke(StandardContextValve.java:191)
at org.apache.catalina.core.StandardHostValve.invoke(StandardHostValve.java:127)
at org.apache.catalina.valves.ErrorReportValve.invoke(ErrorReportValve.java:103)
at org.apache.catalina.core.StandardEngineValve.invoke(StandardEngineValve.java:109)
at org.apache.catalina.connector.CoyoteAdapter.service(CoyoteAdapter.java:293)
at org.apache.coyote.http11.Http11AprProcessor.process(Http11AprProcessor.java:879)
at org.apache.coyote.http11.Http11AprProtocol$Http11ConnectionHandler.process(Http11AprProtocol.java:600)
at org.apache.tomcat.util.net.AprEndpoint$Worker.run(AprEndpoint.java:1703)
at java.lang.Thread.run(Thread.java:619)
The tutorial is superb and your way of explaining is excellent.Thanks a lot.
hey viral, could please explain how to integrate struts 2.1 + hibernate 3.5 and tiles 2.06 together it shows error!
1) “tiles-definitions”, must match DOCTYPE root “struts”
2)XML error reading definitions.
3)Exception sending context initialized event to listener instance of class org.apache.struts2.tiles.StrutsTilesListener
Unable to instantiate container.
[ code java ]
web.xml
org.apache.tiles.impl.BasicTilesContainer.DEFINITIONS_CONFIG
/WEB-INF/tiles.xml
org.apache.struts2.tiles.StrutsTilesListener
struts2
org.apache.struts2.dispatcher.FilterDispatcher
struts2
/*
index.jsp
tiles.xml
struts.xml
welcome
page1
page2
// rest is jsp code
[ / code ]
Hai Viral,
This tutorial is very much helpful for me ..Thanks a lot.
how to install struts2.3 final version in eclipse juno please any body is there to help me regarding in this please
Hi Viral,
Great tutorial.
The tiles are being loaded only if if the page is loaded a part of result from an action class.is it possible to load the page with tiles when a link is clicked i.e without going through an action.
Thanks in advance.
When i run this application i got an erron in my console :
[
SEVERE: Dispatcher initialization failed
Unable to load configuration. – bean – jar:file:/D:/jagnya%20eclips/.metadata/.plugins/org.eclipse.wst.server.core/tmp0/wtpwebapps/TilesFrameWork/WEB-INF/lib/struts2-gxp-plugin-2.3.15.2.jar!/struts-plugin.xml:8:162
at com.opensymphony.xwork2.config.ConfigurationManager.getConfiguration(ConfigurationManager.java:70)
at org.apache.struts2.dispatcher.Dispatcher.init_PreloadConfiguration(Dispatcher.java:446)
at org.apache.struts2.dispatcher.Dispatcher.init(Dispatcher.java:490)
at org.apache.struts2.dispatcher.ng.InitOperations.initDispatcher(InitOperations.java:74)
at org.apache.struts2.dispatcher.ng.filter.StrutsPrepareAndExecuteFilter.init(StrutsPrepareAndExecuteFilter.java:57)
at org.apache.catalina.core.ApplicationFilterConfig.initFilter(ApplicationFilterConfig.java:281)
at org.apache.catalina.core.ApplicationFilterConfig.getFilter(ApplicationFilterConfig.java:262)
at org.apache.catalina.core.ApplicationFilterConfig.(ApplicationFilterConfig.java:107)
at org.apache.catalina.core.StandardContext.filterStart(StandardContext.java:4775)
at org.apache.catalina.core.StandardContext.startInternal(StandardContext.java:5452)
at org.apache.catalina.util.LifecycleBase.start(LifecycleBase.java:150)
at org.apache.catalina.core.ContainerBase$StartChild.call(ContainerBase.java:1559)
at org.apache.catalina.core.ContainerBase$StartChild.call(ContainerBase.java:1549)
at java.util.concurrent.FutureTask$Sync.innerRun(Unknown Source)
at java.util.concurrent.FutureTask.run(Unknown Source)
at java.util.concurrent.ThreadPoolExecutor$Worker.runTask(Unknown Source)
at java.util.concurrent.ThreadPoolExecutor$Worker.run(Unknown Source)
at java.lang.Thread.run(Unknown Source)
Caused by: Unable to load bean: type:org.apache.struts2.views.gxp.inject.InjectedObjectContainer class:org.apache.struts2.views.gxp.inject.InjectedObjectContainer – bean – jar:file:/D:/jagnya%20eclips/.metadata/.plugins/org.eclipse.wst.server.core/tmp0/wtpwebapps/TilesFrameWork/WEB-INF/lib/struts2-gxp-plugin-2.3.15.2.jar!/struts-plugin.xml:8:162
at com.opensymphony.xwork2.config.providers.XmlConfigurationProvider.register(XmlConfigurationProvider.java:245)
at org.apache.struts2.config.StrutsXmlConfigurationProvider.register(StrutsXmlConfigurationProvider.java:102)
at com.opensymphony.xwork2.config.impl.DefaultConfiguration.reloadContainer(DefaultConfiguration.java:226)
at com.opensymphony.xwork2.config.ConfigurationManager.getConfiguration(ConfigurationManager.java:67)
… 17 more
Caused by: java.lang.ClassNotFoundException: org.apache.struts2.views.gxp.inject.InjectedObjectContainer
at org.apache.catalina.loader.WebappClassLoader.loadClass(WebappClassLoader.java:1714)
at org.apache.catalina.loader.WebappClassLoader.loadClass(WebappClassLoader.java:1559)
at com.opensymphony.xwork2.util.ClassLoaderUtil.loadClass(ClassLoaderUtil.java:152)
at com.opensymphony.xwork2.config.providers.XmlConfigurationProvider.register(XmlConfigurationProvider.java:216)
… 20 more
Oct 25, 2013 10:57:47 AM org.apache.catalina.core.StandardContext filterStart
SEVERE: Exception starting filter struts2
Unable to load configuration. – bean – jar:file:/D:/jagnya%20eclips/.metadata/.plugins/org.eclipse.wst.server.core/tmp0/wtpwebapps/TilesFrameWork/WEB-INF/lib/struts2-gxp-plugin-2.3.15.2.jar!/struts-plugin.xml:8:162
at org.apache.struts2.dispatcher.Dispatcher.init(Dispatcher.java:502)
at org.apache.struts2.dispatcher.ng.InitOperations.initDispatcher(InitOperations.java:74)
at org.apache.struts2.dispatcher.ng.filter.StrutsPrepareAndExecuteFilter.init(StrutsPrepareAndExecuteFilter.java:57)
at org.apache.catalina.core.ApplicationFilterConfig.initFilter(ApplicationFilterConfig.java:281)
at org.apache.catalina.core.ApplicationFilterConfig.getFilter(ApplicationFilterConfig.java:262)
at org.apache.catalina.core.ApplicationFilterConfig.(ApplicationFilterConfig.java:107)
at org.apache.catalina.core.StandardContext.filterStart(StandardContext.java:4775)
at org.apache.catalina.core.StandardContext.startInternal(StandardContext.java:5452)
at org.apache.catalina.util.LifecycleBase.start(LifecycleBase.java:150)
at org.apache.catalina.core.ContainerBase$StartChild.call(ContainerBase.java:1559)
at org.apache.catalina.core.ContainerBase$StartChild.call(ContainerBase.java:1549)
at java.util.concurrent.FutureTask$Sync.innerRun(Unknown Source)
at java.util.concurrent.FutureTask.run(Unknown Source)
at java.util.concurrent.ThreadPoolExecutor$Worker.runTask(Unknown Source)
at java.util.concurrent.ThreadPoolExecutor$Worker.run(Unknown Source)
at java.lang.Thread.run(Unknown Source)
Caused by: Unable to load configuration. – bean – jar:file:/D:/jagnya%20eclips/.metadata/.plugins/org.eclipse.wst.server.core/tmp0/wtpwebapps/TilesFrameWork/WEB-INF/lib/struts2-gxp-plugin-2.3.15.2.jar!/struts-plugin.xml:8:162
at com.opensymphony.xwork2.config.ConfigurationManager.getConfiguration(ConfigurationManager.java:70)
at org.apache.struts2.dispatcher.Dispatcher.init_PreloadConfiguration(Dispatcher.java:446)
at org.apache.struts2.dispatcher.Dispatcher.init(Dispatcher.java:490)
… 15 more
Caused by: Unable to load bean: type:org.apache.struts2.views.gxp.inject.InjectedObjectContainer class:org.apache.struts2.views.gxp.inject.InjectedObjectContainer – bean – jar:file:/D:/jagnya%20eclips/.metadata/.plugins/org.eclipse.wst.server.core/tmp0/wtpwebapps/TilesFrameWork/WEB-INF/lib/struts2-gxp-plugin-2.3.15.2.jar!/struts-plugin.xml:8:162
at com.opensymphony.xwork2.config.providers.XmlConfigurationProvider.register(XmlConfigurationProvider.java:245)
at org.apache.struts2.config.StrutsXmlConfigurationProvider.register(StrutsXmlConfigurationProvider.java:102)
at com.opensymphony.xwork2.config.impl.DefaultConfiguration.reloadContainer(DefaultConfiguration.java:226)
at com.opensymphony.xwork2.config.ConfigurationManager.getConfiguration(ConfigurationManager.java:67)
… 17 more
Caused by: java.lang.ClassNotFoundException: org.apache.struts2.views.gxp.inject.InjectedObjectContainer
at org.apache.catalina.loader.WebappClassLoader.loadClass(WebappClassLoader.java:1714)
at org.apache.catalina.loader.WebappClassLoader.loadClass(WebappClassLoader.java:1559)
at com.opensymphony.xwork2.util.ClassLoaderUtil.loadClass(ClassLoaderUtil.java:152)
at com.opensymphony.xwork2.config.providers.XmlConfigurationProvider.register(XmlConfigurationProvider.java:216)
… 20 more
>]
Please me to solve This above problem……………
Hi Viral,
Thanks for the tutorial. Its really teaching a lot. Can we have any other part in struts2 which was not mentioned in ur tutorial?
Dear Friend,
You explained good. Thanks!!! but I will appreciate you is you can provide the source code with jars. Hope I am not expecting spoon feeding.
Regards
-Dhirajkumar
Good Job Dude. Quite Simplified way . Thanks :)
Please suggest from which website i will be able to take struts 2 jar file for example Tile support
great tutorial , thanks for sharing sir!
i am creating web page by using tiles.but i have not some tiles jar file. pls suggestion me.what way i can download jar file.
Is it possibile to nest definition by that old release?
hi … i am followed the same, its fine.i got doubt in tiles when ever we are loading next page, in page title its showing that localhost/ ip address. how can i disable that ip address/localhost .
its happening after next button and before page loading… can u tell how to resolve this, i checked with gmail.. in that its giving some thing like”Please wait while page loading….”
Hi Viral,
Very thanks for the tutorial, but I am having this kind of error
org.apache.tiles.definition.NoSuchDefinitionException: /welcome.tiles
Please help me resolve this
Thanks in advance
Hi rishi, I had the same problem and I fixed it checking the name in struts.xml file. I wrote “Welcome.tiles” rather “welcome.tiles”. I hope it’s working well for you.
HTTP Status 404 – /StrutsTiles/
——————————————————————————–
type Status report
message /StrutsTiles/
description The requested resource is not available.
——————————————————————————–
Apache Tomcat/6.0.41
When I run this code I got this error code ::
SEVERE: Error configuring application listener of class org.apache.struts2.tiles.StrutsTilesListener
java.lang.NoClassDefFoundError: org/slf4j/LoggerFactory
at org.apache.commons.logging.impl.SLF4JLogFactory.getInstance(SLF4JLogFactory.java:155)
at org.apache.commons.logging.impl.SLF4JLogFactory.getInstance(SLF4JLogFactory.java:131)
at org.apache.commons.logging.LogFactory.getLog(LogFactory.java:351)
at com.opensymphony.xwork2.util.logging.commons.CommonsLoggerFactory.getLoggerImpl(CommonsLoggerFactory.java:18)
at com.opensymphony.xwork2.util.logging.LoggerFactory.getLogger(LoggerFactory.java:31)
at org.apache.struts2.tiles.StrutsTilesListener.(StrutsTilesListener.java:50)
at sun.reflect.NativeConstructorAccessorImpl.newInstance0(Native Method)
at sun.reflect.NativeConstructorAccessorImpl.newInstance(Unknown Source)
at sun.reflect.DelegatingConstructorAccessorImpl.newInstance(Unknown Source)
at java.lang.reflect.Constructor.newInstance(Unknown Source)
at java.lang.Class.newInstance0(Unknown Source)
at java.lang.Class.newInstance(Unknown Source)
at org.apache.catalina.core.DefaultInstanceManager.newInstance(DefaultInstanceManager.java:119)
at org.apache.catalina.core.StandardContext.listenerStart(StandardContext.java:4660)
at org.apache.catalina.core.StandardContext$1.call(StandardContext.java:5226)
at org.apache.catalina.core.StandardContext$1.call(StandardContext.java:5221)
at java.util.concurrent.FutureTask$Sync.innerRun(Unknown Source)
at java.util.concurrent.FutureTask.run(Unknown Source)
at java.util.concurrent.ThreadPoolExecutor.runWorker(Unknown Source)
at java.util.concurrent.ThreadPoolExecutor$Worker.run(Unknown Source)
at java.lang.Thread.run(Unknown Source)
Caused by: java.lang.ClassNotFoundException: org.slf4j.LoggerFactory
at org.apache.catalina.loader.WebappClassLoader.loadClass(WebappClassLoader.java:1676)
at org.apache.catalina.loader.WebappClassLoader.loadClass(WebappClassLoader.java:1521)
… 21 more
HTTP Status 404 – /StrutsHelloWorld/
——————————————————————————–
type Status report
message /StrutsHelloWorld/
description The requested resource is not available.
——————————————————————————–
Apache Tomcat/7.0.54
hi. i am geeting this error when i am running the project…what to do???
Hello Viral Sir,
If i want add dynamic menu in menu.jsp as per action , how i can do it
PLEASE HELP ME
lib problem